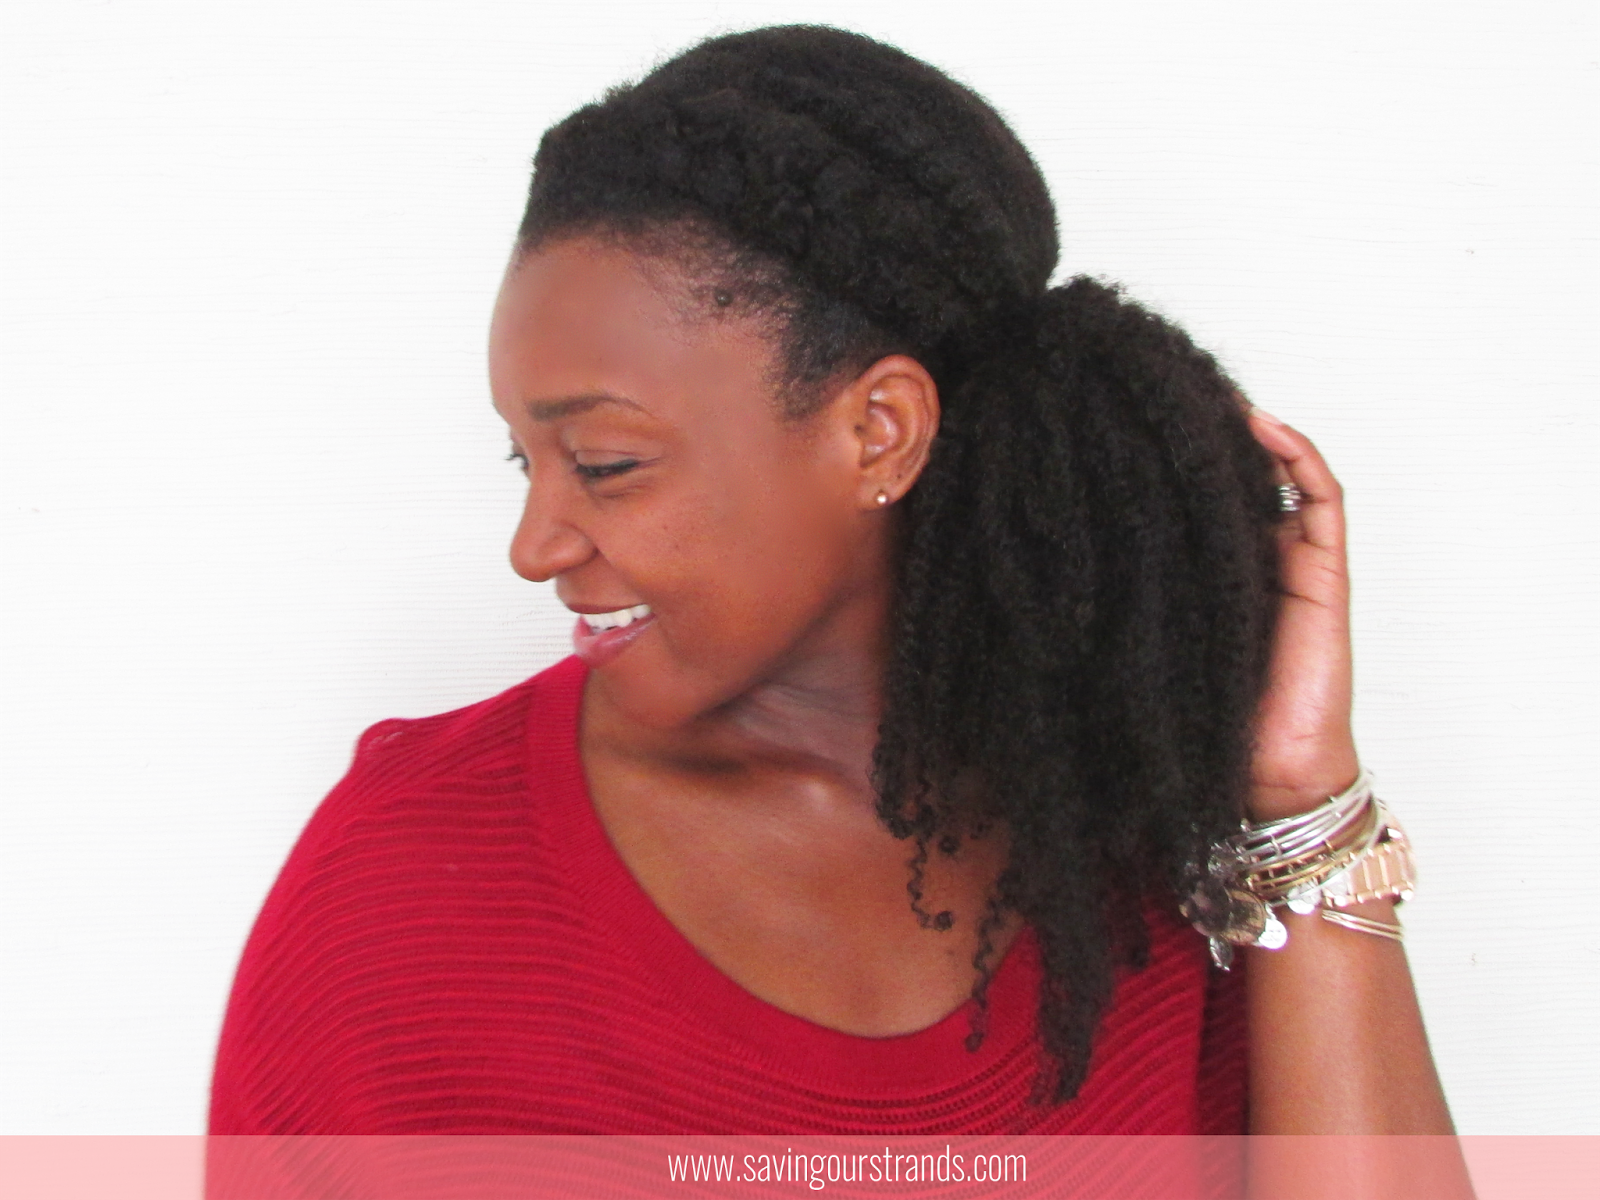
These Kurly Klips are EVERTHING.
E V E R Y T H I N G !!!!!
They're perfect for bad hair days, I don't feel like doing my hair days, and omgosh what's wrong with my hair days.
Just the kinda days that I've been having.
I've been washing my hair. But not really styling it. Which basically means that it's been the puff life for the last 2-3 weeks.
RELATED: How I get the perfect high puff
To get myself out of the rut + a quick protective style---I brought my Kurly Klips back into rotation.
I know that it won't be long until I'm bored with them again (Just like last time). But that's cool. I trimmed my hair about a week ago and I picked up some Lush Caca Rouge Henna last weekend.
Yep yep...I'm ready to get my curls on fleek for the summer!
How did you style your hair this week? Anyone else trying to get their hair summer ready?
Besitos!
KLP
Showing posts with label Natural Hair Clip In Extensions. Show all posts
Wednesday, April 27, 2016
Thursday, January 14, 2016
The Best Natural Hair Products of 2015
I can officially say that I'm a reformed product junkie.
*applause please*
I spent all of 2015 purging my stash and only keeping products that I knew I couldn't live without. Now I'm praying that they're never discontinued! (You do it too...don't get bougie on me now. Keep it 100!)
Here are my favorite natural hair products from 2015!
![]() |
| How I Used Kurly Klips To Protect My Natural Hair |
1. Kurly Klips
I talk so much about Kurly Klips that it's even starting to annoy me! I just need y'all to understand how deep my love for these thangs go! When I said that they are the most versatile protective style for your hair---I meant E V E R Y word of it and they are worth every penny.2. Aubrey Organics GPB Glycogen Protein Balancing Conditioner
I had Aubrey GPB on my list of conditioners to try for ages! In late 2015, I finally went ahead and took the plunge. My hair thanks me for it. While I haven't posted a full review, last just say this: I'm on my 3rd bottle of this stuff. It makes my curls smooth, strong, but still pliable and soft. My hair is perfectly balanced---oh and it smells really great too. I know that my hair really likes protein so I wasn't surprised that my curls loved it. If you're looking for a gentle mild protein conditioner---Aubrey GPB is your guy!3. Bentonite Clay Hair Mask Treatment
Whenever my hair feels BLAH...I know that it's time for a clay mask. Bentonite Clay is amazingness in a jar. It's moisturizing, detoxifying, a shine enhancer, frizz eliminator----just curl defining goodness. I mix it up with a little apple cider vinegar, glycerin, and aloe vera juice to form a conditioning mask, cover with a plastic cap for a little while, then rinse it out. BOOM. And just like that it feels like I have a head of new "act right" curls.4. Jessicurl Deep Treatment
So Jessicurl Deep Treatment isn't new for 2015. But, I've reaffirmed my love for all of it's creamy moisturizing goodness. I just adore this stuff. So if you are dealing with dry, brittle curls---give your hair a dose of Jessicurl Deep Treatment and I guarantee that you'll be joining me on the mountain top singing Jessicurl's praises. Oh and remember when I told you guess that Jessicurl was coming to a brick and mortar near you? Well you can grab the line in Sallys now! #winning5. Camille Rose Naturals Curl Maker
This is the product that I didn't see coming. I'm minding my own business in the curl girl aisle in Target, when an older lady passes by. She has the most beautiful curls---we strike up an conversation that ended up lasting an hour! Anywhos, she recommended Camille Rose Curl Maker and of course I went ahead and bought it! Everything that she said about it was true. While it's technically a gel, it doesn't flake or make your hair too hard. It's has a light/medium hold. And it's actually moisturizing. Oh and it smells AMAZING! A little goes a long way too. My first bottle lasted for about 3 months. I'm on my second bottle now.![]() |
| My favorite Twist out of 2015 using Camille Rose Naturals Curl Maker |
I'm totally keeping these gems in my stash for 2016. What products did you discover in 2015 that made the cut? Share them (and your review) below! Fingers crossed that I don't have a relapse in my product junkie ways!
Besitos!
KLP
Wednesday, December 02, 2015
Bored Bored Bored | The #WashDayExperience
I love my Kurly Klips.
Love. LOVE. LOVE them thangs!
It's definitely not a secret.
I mean, these clip ins are the ONLY thing that I've talked about in the last just about 6 months.
But...
There's one teeny tiny problem....
I'm soooo over them.
It's not the clips.
It's totally me.
I just miss my hair.
I can't put it off another day.
So, let's all say goodbye to the Kurly Klips (for now)...
I'm sitting with deep conditioner in my hair now. I have no idea how I'm going to style it, but I'm kinda siced. *bounces in her seat*
Anyone else bored with their hair? How are you changing it up?
Wednesday, November 18, 2015
[Hairstyle] Hot Pink Chalk Curls Using Kurly Klips
Follow my blog with Bloglovin
I'm usually pretty classy.
I try keep it sophisticated.
Chic is my middle name.
But today...
I just wanted to have some fun!
Say hello to my HOT PINK CHALK CURLS!
*giggles uncontrollably*
I washed and styled my hair per my usual Kurly Klip regimen. (You can find all the details here) I put my bangs into two braids, left a little hair out to cover the wefts, then installed my clip-ins. Using hair pins, I put the hair into a half up half down situation.
Then, I had an A-HA moment!
HAIR CHALK!
Remember when I chalked my relaxed hair? Here...
and here...
and here....
Hmm...looks like I tap into my ratchet side a little more than I realized...lol!
So what do you think? Love it or leave it?
I'm usually pretty classy.
I try keep it sophisticated.
Chic is my middle name.
But today...
I just wanted to have some fun!
Say hello to my HOT PINK CHALK CURLS!
*giggles uncontrollably*
I washed and styled my hair per my usual Kurly Klip regimen. (You can find all the details here) I put my bangs into two braids, left a little hair out to cover the wefts, then installed my clip-ins. Using hair pins, I put the hair into a half up half down situation.
Then, I had an A-HA moment!
HAIR CHALK!
Remember when I chalked my relaxed hair? Here...
![]() |
| Hair Chalk Highlights |
![]() |
| How To Use Hair Chalk on Relaxed Hair |
Hmm...looks like I tap into my ratchet side a little more than I realized...lol!
So what do you think? Love it or leave it?
How was your #washdayexperience? Share the dets with the rest of our healthy hair squad!
Tuesday, November 03, 2015
[Hairstyle] High Ponytail | The #WashDayExperience
I'm treating you guys to a regular old #washdayexperience this week!
AND I tried a new product.
Yep Yep. Your girl is doing BIG THANGS right hurrr
*giggles hysterically*
Feel free to judge me. I'm an absolute mess!
Anywhos, here's what products I used in my #washdayexperience:
Pre-shampoo- Herbal Essence Hello Hydration Conditioner
Shampoo- Matrix Biolage Hydrasource Shampoo
Strenthening Treatment- Aubrey's GPB Conditioner (NEW!)
Leave-ins- Almond Oil + Jessicurl Too Shea Conditioner + EVCO
And here's how I did it:
I unraveled my twists and slathered my hair in Herbal Essence Hello Hydration Conditioner. My love for this stuff goes deep. So deep that I buy it in bulk, several gallons at a time. Again, you may feel free to judge me. LOL. But what I do know is that it's amazing slip was great for detangling and removing my week's worth of shed hair.
Right after pre-shampooing, I went ahead and jumped into the shower, rinsed the conditioner, and shampooed twice using Matrix Biolage Hydrasource Shampoo. I haven't bothered diluting my shampoos anymore because (1) I only shampoo about once a month so I want to really clean my hair and (2) shampoo (especially) just doesn't strip my natural hair. I'm not sure if its because my hair has been ultra moisturized or if it's because my natural curls isn't as dry as my texlaxed hair was.
I used Aubrey's GPB conditioner as my protein treatment. I've been moisturizing my hair like crazy and I know from experience that my hair thrives with regular strengthening treatments.I applied the coditioner to my damp clean hair, covered with a plastic cap, and sat under my heat cap for about 1.5 hours. I'll definitely give you guys a thorough review once I finish the bottle, but let me tell you: I was VERY impressed with how amazing my hair felt after rinsing this conditioner. Strong. Resilient. "Plumper." My curls were crazy defined and tightly coiled. But UBER soft. #winning #winning #WINNING
I applied my leave ins: Almond Oil + Jessicurl Too Shea Conditioner + EVCO then two strand twisted my hair in random sections. I pulled all of the twists back into a low pony tail then let it dry overnight.
The next morning, I decided that I'm really OVER my big hair look, so I went with this crazy cute high ponytail. This is one of my FAVORITE ways to wear my natural hair and these Kurly Klips didn't disappoint in recreating the look! (I pretty much followed this tutorial to the letter)
I'll probably wear this look for the rest of the week, but y'all, I think that I need a break from my clip-ins. I love them. Don't get it twisted. But I realllly miss my hair. Any style recommendations?
How was your #washdayexperience?
Wednesday, October 28, 2015
[Hairstyle] Braided Side Ponytail Using Kurly Klips
I really miss my real hair, but I'm not quite ready to give up my clip-in extensions yet. So, I'm going for the double protective style this week with another braided do.
Meet my Braided Side Ponytail (using Kurly Klips of course)!
*cue Price is Right you won a car theme music*
I love love love this style. It's fun and flirty but classy. Exactly what I look for in a protective style.
Anywhos, here's how I got this quick cute do:
- Create a deep side part. (or whatever kind of part you want)
- Dutch braid your bangs.
- Install your Kurly Klips, leaving a little hair out to blend and camouflage the wefts
- Pull all of the hair and the braid to one side, securing with a hair tie.
- Smooth your edges and fluff that ponytail honey!
So what do you think? Easier than it looks right?
Tuesday, October 27, 2015
[Hairstyle] Double Strand Braid Using Kurly Klips | The #WashDayExperience
Once upon a time I was actually able to do this style with my flat-ironed relaxed hair. Now that my natural hair is a whole lot shorter, I'm siced to have Kurly Klips to give me the length that I need to get'er done!
The simplicity of this style is disgusting. Honestly, I don't even think that it's completely worthy of a #washdayexperience post. But---I'm started to get bored of rocking big hair.
I know, I know. I didn't think that that was even POSSIBLE! I just miss my simple updos, braids, and twists. *sad face*
So meet my Double Strand Braid---using Kurly Klips of course!
I started by following my usual boring regimen. (You can find it here.) After I deep conditioned my hair and applied my leave ins, I put my hair in about 20 twists then pulled then all back into a low pony tail to dry. In the morning, I haphazard unraveled the twists, split my hair into two with a heavy side part, then installed 5 two-clip wefts on each side.
Once the clip-ins were installed, I two strand braided each side. Viola! All done!
I told you that it was disgustingly simple.
But I liked it so much that I'll be testing out a few more braided styles this week. Double protective style for the win! #woot
What do you think? Sophisticated or childish?
Wednesday, October 14, 2015
[Hairstyle] Headband Braid | The #WashDayExperience
I didn't think that I would have this much fun playing around and styling my Kurly Klips! But today I'm back to share another, kinda sorta #washdayexperience with you guys starring this uber cute Headband Braid.
I started by following my usual boring regimen. (You can find it here.) I've noticed that my hair has been crazy moisturized lately. Note to self to work in a legit protein strengthening treatment soon. After I deep conditioned my hair and applied my leave ins, I put my hair in about 20 twists then pulled then all back into a low pony tail to dry. In the morning, I arranged my Kurly Klip wefts into this crazy easy style.
Here's how I did it:
- Separate your hair into two parts leaving about 2 inches of your hair out in the front.
- Install your clips as usual in the back half of your hair using the "Reverse Clip" Technique shown here to maximize volume.
- Start your dutch braid at your ear. Continue braiding incorporating only hair on the right side until you get to your other ear. Finish the braid and secure with a small hair pin.
- Pin your hair back for a mini pompadour then fluff the back half of your hair.
This style keeps my hair out of my face while still allowing me to rock BIG BIG HAIR! As you can see, I left a very small bit of my hair out so that I could blend it back. It's crazy windy today here at the beach and I just couldn't get the clips in the front to act right. Ha-ha!
What do you think? Would you test drive this style?
Thursday, October 08, 2015
[Hairstyle] 3 Ways to Style Kurly Klips | The #WashDayExperience
Steps on soap box
*clears throat*
screams:
KURLY KLIPS ARE THE WORLD'S MOST VERSATILE PROTECTIVE STYLE EVER!!!!
(Kanye mic drop)
*giggles hysterically*
I'm not dramatic tho! Ha-ha! I guess that I'm just two steps past obsessed with my Kurly Klips. Please please please tell me that you're not bored to pieces reading about them!
My actual #washdayexperience's have been pretty boring. I follow my usual regimen. (You can find it here.) Then I put my hair in a bunch of random twists. At the least, I have 6 or 7 twists; At the most, I have 20 or so. It really depends on how much time I want to devote to the twisting process. I pull the twists back into a low pony tail then arrange the Kurly Klip wefts into whatever style I'm going for that day.
Which is why I say that Kurly Klips are the most versatile protective style ever. The styling possibilities are literally endless. Any style that I can do on my real hair, I'm pretty sure that I can do with my Kurly Klips.
Here are a few ways that I've been styling these bad boys over the last few weeks:
Side Swept Curls
Two bundles of Kurly Klips give this look it's fullness. Using clip-ins of varying lengths gives it a cascading layered affect. I used one set of the shoulder chic and one set of the mermaid length clip-ins from the My Fro collection. Here's how I did it:
- Create a deep side part.
- Install several two clip wefts using the "Reverse Clip" Technique shown here.
- Unravel a very small section of your hair to blend and disguise the wefts.
- Using hair pins, secure the opposite side of your hair back across your hair. Fluff and go!
Warning: Wait until you are comfortable with blending your hair with the clip-ins before attempting this style, otherwise you might not get the desired look. In other words, you'll look like a hot mess. I'm just keeping it real with y'all.
Pompadour
Again two bundles of Kurly Klips give this look it's BIG BIG hair look. This style is completely protective as no hair is left out. Here's how I did it:
- Install your clips as usual.
- In the bang area, install several two clip wefts horizontally to your hair line using the "Reverse Clip" Technique shown here.
- Shape and smooth the hair in the bang area back, forming a pompadour then secure with hair pins.
- Smooth back the sides and secure with pins for a tighter look.
Warning: This style is extremely editorial. It's big. It's bad. It's fabulousness is off the charts. So, it's not really a "go to the store or run errands" type style. I mean, unless that's your level of daily fabulousness. If so, WERK IT GIRL!
Angled Fringe
I adore this angled fringe because again, you don't need to blend any of your real hair with the clip-ins. Plus it's beyond adorable. Here's how I did it:- Create a side part.
- Install your clips as usual.
- Pull the bang area towards your face, gently form the hair into a roll.
- Secure the very end of your rolled fringe to the side. Fluff your hair and go.
Warning: This style is sure to become a favorite. You probably won't want to wear your KurlyKlips any other way!
Which style do you like the best? How was your #washdayexperience?
Wednesday, September 23, 2015
2 Ways To Install Clip-In Extensions Without Leave Out | The #WashDayExperience
![]() |
| Headband Technique |
I think that the most important part of a long term protective style whether it be braided extensions, weave, or wigs, is that it actually protects your real hair AND doesn't cause damage. I mean---the last thing that you really want is to have nasty breakage to deal with when you're trying to grow out your hair.
The cool thing about Kurly Klips is that the chances of breakage are pretty slim. You don't have to blend your real hair with the clip-ins to get a natural look plus there's also no stress on your edges. I know I know---it sounds a little too good to be true---but I promise---it's legit.
![]() |
| Headband Technique |
Thanks to Lana's (the genius owner of Kurly Klips) amazing YouTube videos, I figured out two ways to install my Kurly Klips without leave out.
![]() |
| Headband Technique |
What you'll need:
- Two sets of Kurly Klips. I used one set each of the Shoulder Chic and Mermaid length from the My Fro collection. I like using two different lengths to create a blunt full hemline and increase the volume. Volume is your friend when you're not leaving out any of your real hair. It helps hide the wefts plus---its cute!
- 2-3" head band ( I use Goodie Ouchless Hair Wraps)
- Hair ties
- Hair pins
![]() |
| Reverse Clip Technique |
- First, I moisturize and seal my real hair. (Click here to see what I use and how I do it) I pull it back into a low pony tail and secure any shorter sections with hair pins.
- Starting with the Shoulder Chic clips, place 3 clip weft from ear to ear about an inch above your nape.
- Place the 4 clip Shoulder Chic weft next.
- Next place three of the 2 clip shoulder chic wefts side by side.
- Then, place the 4 clip Mermaid length weft.
- You'll have a small area remaining at your crown. You can fill this area my adding your remaining 2 clip wefts horizontally using the headband technique. Just hide the wefts with a simple headband and fluff the hair. OR...
- You can use the "reverse clip" technique to create an invisible part. First, snap a Mermaid 2 clip wefts backwards at the edge of your part. The volume makes the clips appear to be growing out of your scalp. (Hello AWESOMENESS!) Repeat until you fill in your crown area.
![]() |
| Reverse Clip Technique |
Here's a video for my visual learners!
So what do you guys think? Which no leave out method do you like the best?
How was your #washdayexperience?
Wednesday, September 16, 2015
How I Protect My Hair Under Kurly Klips | The #WashDayExperience
One of my biggest fears in getting a long term protective style was that I was gonna neglect my real hair underneath.
I'm lazy.
I'm forgetful.
Totally absent minded cloud chasing----ohhh what's that over there...
*wanders aimlessly for several minutes*
Wait...what was I talking about?
{Regroups for a sec}
I felt like if my hair was out of sight. Then it would be out of mind.
So I'm trying to force myself to still care for my hair---even tho I don't have to touch it every day--if I don't wanna.
Here's my plan to protect my hair while I'm rocking my Kurly Klips:
#1: Remove the clip-ins EVERY night.
It's disgustingly easy to set these bad boys and forget it. I'd be lying if I said that I never slept in them before. (Sorry Lana! I know that you're not supposed to sleep in them; I was beyond exhausted!) But I can't make that a habit.
#2: Massage my scalp.
I'm not sure if its because my scalp is tender. Or if I'm just not used to having anything attached to my hair but I will admit that there are areas of my head where the clips caused a little soreness. So at night, I gently massage my scalp with a little Jamaican Black Castor oil and try to remember to place the clip a little further away from my scalp
#3: Moisturize and seal my real hair.
Under my clips, my hair is in a set in about ≈ 20 two strand twists. So, I mist my hair with a Aloe Vera, glycerine spritz from root to tip, then apply a small amount of Jessicurl Too Shea Conditioner focusing on my ends. I usually seal with my DIY Hair Butter, but---because I want to really keep my ends protected from the exposure to the friction from the clip-in---instead I'm sealing with Jamaican Black Castor Oil. Then I pull all the twist back into a low pony tail and cover with my scarf.
#4: Co-Wash (as needed).
I workout just about daily, so I rinse my twists with warm water every 3-4 days. After my water rinse, I follow my same nightly routine by misting with my aloe vera concotion, applying a small amount of conditioner then sealing with JBCO. Thanks to my trim a few weeks ago, my ends actually stay twists throughout this process.
#5: Deep Condition once a week with heat.
Not washing my hair weekly simply is not an option for me. I plan to follow my usual regimen, shampooing once a month and deep conditioning with heat every week.
#6: Nourish my leave out.
If I plan to use a little of my real hair to blend the tracks, I still mist with the aloe vera concoction and apply a little conditioner, but instead of using JBCO to seal my ends I use a dab of hair butter and Camille Rose Natural Curl Maker. I really need to review Curl Maker so that I can properly gush about how great that stuff is, but just know that if you want a fantastically defined twist out---this stuff is your winner winner chicken dinner!
I'm hoping to stick to my clip-ins for maybe 2 months (unless I get bored), then access my ends. In the meantime, I'll be sharing all about how I style them, blend my hair for a natural look, and my 3 favorite ways to install them.
How was your #washdayexperience?
Share all the dets with our hair obsessed tribe below!
Subscribe to:
Posts (Atom)