Showing posts with label SOS Protective Styles. Show all posts

Thursday, July 07, 2016

10 Cute Vacation Hairstyles For Natural Hair

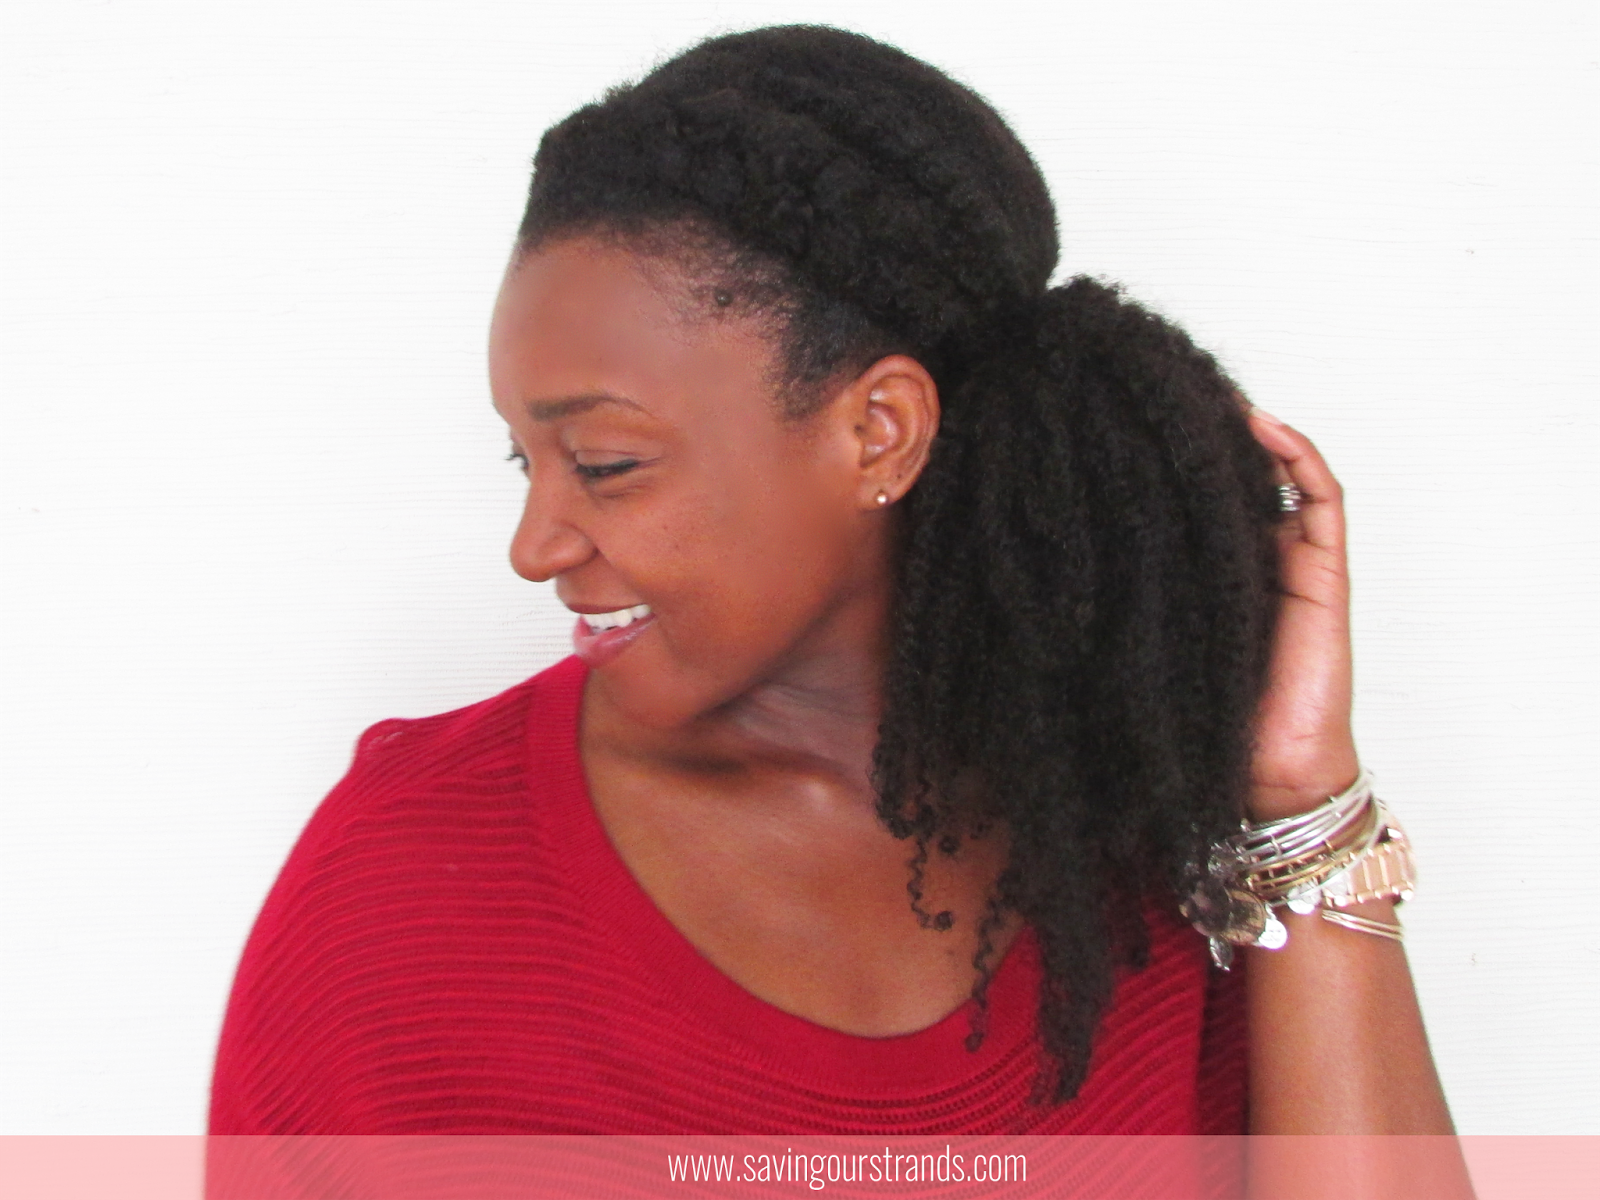
Summer brings out the best in my curls. The volume and my fluffy kinks give me all kinds of LIFE. But...it also brings out the worse in my hair. Think frizz and a mind boggling amount of SHRINKAGE. And when I'm on vacation, I just got no time for my hair's unpredictability. So on those days when my hair just won't act right, I toss it up into one of these uber cute fun in the sun vacation hairstyles:


1/ KURLY KLIPS [Clip in Extensions] (tutorial)

What I love about Kurly Klips is that they are quick, easy, and you can keep all of your hair hidden while still rocking big bad hair.

RELATED: How I Protect My Hair Under Kurly Klips

2/ TOP KNOT (tutorial)

The top knot will always be in season. Especially when it's hot, hazy, and humid. Adding a flirty flower accessory gives this style a fun vacation feel.

3/ DOUBLE DUTCH BRAID + BRAID (tutorial)

Two braids pulled into a low bun. Simple. Easy. Quick. Uber cute! I loved this style whilst I relaxed my hair but it's even better now that my hair is curly! 

4/ TUCK & ROLL (tutorial)

I literally tuck, roll, and pin my curls up into this style. It takes no effort at all, keeps my hair tamed, and looks like I spent more than 5 minutes getting myself together. Win Win!


5/ HEADBAND + CURLS (tutorial)

Just like adding a head band---the second easiest way to jazz up your vacation look is with a flirty fun headband. Head bands work double duty for me. It's a way to smooth my edges and give my messy updos an intentional look.

6/ LOW BUN (tutorial)

I love this low bun because it's voluminous, doesn't snatch my edges, and super comfortable. I don't have to use weave or one of those cute mesh donut thingamajigs either. The best part of this updo is that it doesn't ruin my curls. At night, I take all the pins out, shake my hair out then band it. (here are the dets on how I band my hair) When I release the bands the next morning, all I have to do is fluff and go! This is how I wore my hair the next day!

7/ TURBAN + PUFF (tutorial)

The high puff is my go to style when the heat and humidity makes me feel like I'm going to spontaneously combust. Adding a turban gives the style an extra oomph and va va voom.

8/ SIDE SWEPT WASH & GO (tutorial)

Wash and go's are perfect the summer. Here's a cute way to jazz it up: pull all your curls over to the side then add a few hair pins and maybe a decorative head band to give the style even more pizazz. This style works well for any curl set; especially perm rods!

9/ HEADWRAP (tutorial)

The absolutely easiest, chicest, sassiest, solution to your vacation hair problems. Just throw a colorful patterned headscarf on, add some hoop earrings, then call it done! With so many ways to tie a headscarf and their affordability, how can you say no?

10/ FISHTAIL BRAIDS (tutorial)

Goddess braids are super versatile. They're perfect for pool side lounging and vogue enough for a night out. The key to a thick braid is to gently tuck on each side of the braid to fluff it out.

What's your favorite vacation style? Link it up below!

Besitos!
KLP


Wednesday, June 22, 2016

[Tutorial] Low Bun For Natural Hair

Y'all know that I love a good updo. I'm still living that wash and go life, but by the end of my hectic the day, my curls are usually in this low bun situation.  I love this low bun because it's voluminous, doesn't snatch my edges, and super comfortable. I don't have to use weave or one of those cute mesh donut thingamajigs either.


Here's how to get this low bun:


  1. Moisturize, detangle, and seal your hair. 
  2. Create a middle part. (Any part will do. I like the middle part because I struggle to get my bangs pulled back when I do a side part)
  3. Apply a product to tame our edges. I used Eco Styler Krystal Gel (buy it here). 
  4. Smooth your hair back into a low puff using a hair tie. I used my DIY Ribbon Hair Ties (here's how to make them). The key is not to double the hair tie. 
  5. Roll, tuck and pin your hair around the perimeter of the hair tie to form your bun. 
  6. Finish with a light mist of hair spray (I used Chi Enviro Flex Hold Hair Spray to keep your curls in place and tame frizzy flyaways.  

The best part of this updo is that it doesn't ruin my curls. At night, I take all the pins out, shake my hair out then band it. (here are the dets on how I band my hair) When I release the bands the next morning, all I have to do is fluff and go! This is how I wore my hair the next day!

How was your #washdayexperience? Anyone else sporting an updo this week?

Besitos!
KLP


Wednesday, April 27, 2016

Kurly Klips are BACK! | The #WashDayExperience

These Kurly Klips are EVERTHING.

E V E R Y T H I N G !!!!!


They're perfect for bad hair days, I don't feel like doing my hair days, and omgosh what's wrong with my hair days.

Just the kinda days that I've been having.


I've been washing my hair. But not really styling it. Which basically means that it's been the puff life for the last 2-3 weeks.

RELATED: How I get the perfect high puff

To get myself out of the rut + a quick protective style---I brought my Kurly Klips back into rotation.

I know that it won't be long until I'm bored with them again (Just like last time). But that's cool. I trimmed my hair about a week ago and I picked up some Lush Caca Rouge Henna last weekend. 

Yep yep...I'm ready to get my curls on fleek for the summer!


How did you style your hair this week? Anyone else trying to get their hair summer ready?

Besitos!
KLP


Wednesday, January 20, 2016

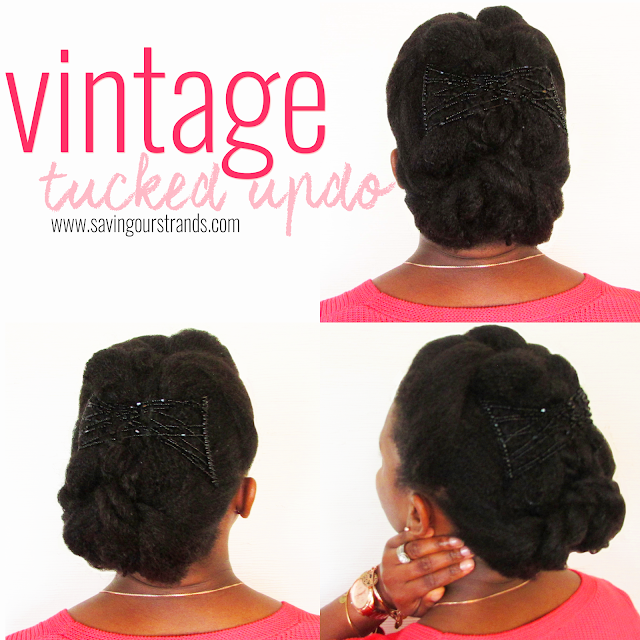
[Hairstyle] Vintage Tucked Updo For Natural Hair | The #WashDayExperience


My fishtail from last week lasted through a two hour hardcore soccer practice and three days of sweaty 5 mile runs before my yucky scalp begged to be co-washed. (In case you're wondering, here's how I co-wash) I tossed my hair into a bun and left it there until today's #washdayexperience.

Here's what I used:


Extreme Deep Condition: Audrey GPB Conditioner + Extra Virgin Coconut Oil
Leave ins- Almond Oil + Jessicurl Too Shea Conditioner + DIY Hair Butter


This week's #washdayexperience theme is "Something new" so I grabbed my new fave Aubrey GPB. Thanks to an amazing tip from Michelle over at FineNaturalHairAndFaith, I applied the GPB to my dry detangled hair and then sealed the conditioner in with Coconut oil. (Here's why I love that coco!) I let the conditioner absorb into my hair overnight and rinsed in the morning.

After rinsing the conditioner, my hair felt AHHMAZINGGG! Like omg omg omg I can't stop touching my curls AHHMAZINNNGGG...

And now Aubrey GPB is definitely a winner! I applied my usual leave ins and put my hair into a few large twists. Then I used hair pins and a Scunci Upzing (Buy your own here) to create this cute little Vintage Tucked Updo.


✓ Ends protected?
✓ Hair stretched?
✓ Crazy quick style?

Woot! What do you think? Yay or nay? And let me know if you want a tutorial on this style!

Besitos!
KLP


Sunday, December 27, 2015

[Tutorial] Curlformer Side Swept High Bun


I live for a fun side swept updo! All you'll need for this style is a hair tie and a few bobby pins.  First, I used Curlformers to stretch and set my hair. They're a fantastic way to smooth and elongate my curls without heat and with relatively low manipulation. For the products I used to get these crazy bouncy and smooth curls, check out my #washdayexperience here.
  1. Create a deep side part on stretched hair.
  2. Pull a large section of your bangs to the front of your head.
  3. Gently take the rest of your curls and pull them into a very loose high ponytail.  
  4. Swoop your bangs to the side (take care not to stretch the curl too far) and secure with a hair pin.
  5. Using a few more hair pins, tuck and secure the ends of your ponytail into a bun. 
  6. Add height by fluffing your bun and bangs.
Viola! That simple! Let me know if you recreate this look!

Besitos!
KLP

Wednesday, December 23, 2015

[Hairstyle] Curlformer Side Swept High Bun | The #WashDayExperience


First, I was obessed with Kurly Klips---now I'm TOTALLY in love with Curlformers!

AND

*drum roll please*

I figured out a way to install curlformers, let them dry, and get twice the amount of curls in 2 hours WITHOUT sleeping in them !!!!!!!!!


Let that sink in for a minute...

Install

+

Drying time

+

Double Curls

=

2 hours!!!!!

It's a Christmas miracle!


Here's what I used:
Pre-shampoo- Herbal Essence Hello Hydration Conditioner
Shampoo- Matrix Biolage Hydrasource Shampoo
Deep Condition- Matrix Biolage Hydrasource Conditioner + Almond Oil
Leave-ins- Almond Oil + Matrix Biolage Hydrasource Leave-In Conditioner + EVCO


And here's how I did it:
I started by applying a little Herbal Essence Hello Hydration Conditioner in sections to detangle my hair. Then I hopped in the shower and lathered up with Matrix Biolage Hydrasource Shampoo. I let my hair dry for a few minutes wrapped in a cotton t-shirt, then applied Matrix Biolage Hydrasource Conditioner plus a little Almond Oil to seal it all in. I covered with a plastic cap and sat under my heating cap for 2 hours. Then I kinda fell asleep. LOL. Overnight deep conditioning for the win!

My hair was crazy soft after rising the deep conditioner the next morning! After tshirt drying for a few minutes, I applied my leave ins- Almond Oil + Matrix Biolage Hydrasource Leave-In Conditioner + EVCO and installed all 40 curlformers in my set. It took me about an hour to install them.


I get double the amount of curls because I two strand twist the roots of each section then install the Curlformer! No snagging on the Curlformer plus two curls per rod! WINNING!!


Then I sat under my hooded dryer for an hour while they dried! I was utterly shocked that they only needed an hour to set!!!

This has been my shinest and smoothest curlformer set to date! Y'all better believe that I'm NEVER sleeping in these things again!


To style, I went for this kinda messy---kinda classy Side Swept High Bun. Here's how I did it:

  1. Create a deep side part on stretched hair. (I stretched my curls using Curlformers)
  2. Pull a large section of your bangs to the front of your head.
  3. Gently take the rest of your curls and pull them into a very loose high ponytail.  
  4. Swoop your bangs to the side (take care not to stretch the curl too far) and secure with a hair pin
  5. Using a few more hair pins, tuck and secure the ends of your ponytail into a bun. 
  6. Add height by fluffing your bun and bangs.
Fingers crossed that I can get this cute curly high bun to last until Christmas!

How are you styling your hair for the holidays?

Share the dets below!


a Rafflecopter giveaway

Wednesday, December 16, 2015

[Tutorial] Easy Crown Braid for Natural Hair | The #WashDayExperience


I moaned and complained about how TERRIBLE Curlformers are to sleep in last week.

And then I did it again.


*Hangs head*

But let me xplain!!!

My hair was crazy easy to manage last week! No tangles! Perfectly stretched! Moisturized like crazy! Did I mention NO TANGLES?!?

My #washdayexperience today was even easier. So easy that all I had to do was deep condition! Here's what I used:


Deep Condition- Matrix Biolage Hydrasource Conditioner + Almond Oil
Leave-ins- Almond Oil + Matrix Biolage Hydrasource Leave-In Conditioner + EVCO

And here's how I did it:

After rocking my Lace Braid for a few days, I unraveled and wore it in a bun. On wash day, I pulled my bun down, misted my ends with a little water, and then section by section, gently finger detangled to remove shed hairs. I applied Matrix Biolage Hydrasource Conditioner from root to tip and sealed the conditioner in with a little almond oil. Next, I covered my hair with a plastic cap and put on my heating cap for about 30 minutes.


In the shower, I rinsed and detangled in sections. Once I was done with one section, I put it in a chunky twist and moved on to the next section so that I could keep my hair stretched. Out of the shower, I applied my leave ins- Almond Oil + Matrix Biolage Hydrasource Leave-In Conditioner + EVCO and installed all 40 of the curlformers. Then I let the rods dry overnight.


This time, I loosed the rods a little at the base of my scalp to lessen the tension. BEST. IDEA. EVER! I didn't get the world's best sleep, but I did get more sleep this time than last time.

My curls were super super cute. My ends were a little frizzy. But that didn't matter I decided to go with a crown braid! Here's how I did it:


  1. Create a side part on stretched hair. (I stretched my curls using Curlformers)
  2. Begin your braid at your side part and braid along the perimeter of your hair.
  3. Continue this braid until you get to your nape. Then finish braiding the ends
  4. Start another braid from the opposite side and repeat
  5. Tuck the end of the first braid into the second braid and secure with a hair pin. 
  6. Repeat on the second braid.
My {not so} secret to BIG BIG braids? Fluff your braids by plucking apart the sides for a fuller look.

Can I just get a soul clap for the smoothness and shine of this braid?!? Gosh...I think that I'm rolling in deep with these curlformers!

How was your #washdayexperience?


a Rafflecopter giveaway

Thursday, December 10, 2015

[Hairstyle] Curvy Lace Braid | The #WashDayExperience


    My goal of rocking Kurly Klips until the end of the year sorta fell short. No shade to my darlin' Kurly Klips. They're fantastic. I was the problem. I was just bored! I really didn't know what I wanted to do with my hair. But I did know:

    I still wanted to honor my "protective style" pact that I made in August.
    and
    I needed to stretch my hair because it behaves better--aka  stays moisturized and has less tangles when it's stretched.

    So I picked up a package of Curlformers!

    My first curlformers experience was interesting. I wouldn't call it a win necessary. Yes, my hair was stretched, smooth, bouncy, and happy. But...

    OMG those things are HORRIBLE to sleep in. *le sigh*


    Anywhos, here's how my #washdayexperience went:

    Pre-shampoo- Herbal Essence Hello Hydration Conditioner
    Shampoo- Matrix Biolage Hydrasource Shampoo
    Deep Condition- Matrix Biolage Hydrasource Conditioner + Almond Oil
    Leave-ins- Almond Oil + Matrix Biolage Hydrasource Leave-In Conditioner + EVCO

    And here's how I did it:
    I started by applying a little Herbal Essence Hello Hydration Conditioner in sections to detangle my hair. Then I hopped in the shower and lathered up with Matrix Biolage Hydrasource Shampoo. I let my hair dry for a few minutes wrapped in a cotton t-shirt, then applied Matrix Biolage Hydrasource Conditioner plus a little Almond Oil to seal it all in. I covered with a plastic cap and sat under my heating cap for 2 hours.

    My hair was crazy soft after rising the deep conditioner. Then I applied my leave ins- Almond Oil + Matrix Biolage Hydrasource Leave-In Conditioner + EVCO and installed almost all of the curlformers. Then I let the rods dry overnight.

    I loved the curls, but it was a updo that I really wanted. So I went for this Curvy Lace Braid situation! Here's how I did it:

    1. Create a deep side part on stretched hair. (I stretched my curls using Curlformers)
    2. Begin your lace braid (which means that you only pull hair into the braid from the front of your hair) about an inch above your ear, then start to curve the braid towards the opposite direction across your head. Keep your turn tight so that your edges stay neat.
    3. Continue this braid until the end of your hair. Be sure to only pull hair from the front of your hair. This is what creates the "lace" effect.
    4. Start another braid from the same side and repeat with your remaining hair.
    5. Then roll the braided end of the second braid into a bun. 
    6. Tuck the braided end of the first braid into the bun with a hair pin. 
     Optional: Fluff your braids by plucking apart the sides for a fuller look.
    I can dress this style up or wear it to the gym which makes it a winner winner in my book!

    How was your #washdayexperience?


    a Rafflecopter giveaway


    Wednesday, December 02, 2015

    Bored Bored Bored | The #WashDayExperience


    I love my Kurly Klips.

    Love. LOVE. LOVE them thangs!

    It's definitely not a secret.

    I mean, these clip ins are the ONLY thing that I've talked about in the last just about 6 months.

    But...

    There's one teeny tiny problem....

    I'm soooo over them.

    It's not the clips.

    It's totally me.

    I just miss my hair.

    I can't put it off another day.

    So, let's all say goodbye to the Kurly Klips (for now)...

    I'm sitting with deep conditioner in my hair now. I have no idea how I'm going to style it, but I'm kinda siced. *bounces in her seat*

    Anyone else bored with their hair? How are you changing it up?


    Monday, November 16, 2015

    When My Hair Was Natural...The Last Time


    I've been completely natural a billion times in my life. No seriously...a BILLION. My mother only relaxed our hair for special occasions. Think Easter or Christmas. Maybe a birthday here or there. I had no idea how to care for my relaxed hair. I most certainly had no idea how to care for my hair while "stretching" my relaxer. And I definitely had no idea how to care for my natural hair---once all of the relaxed ends inevitably broke off. Ugh...it was a vicious cycle. My hair never grew past my shoulders.


    When my hair was natural (unprocessed)---the last time...

    I flat ironed it daily. Okay I'm lying. I flat ironed it twice a day.

    I never wore it curly.

    I lived for my blow dryer.

    I watched my hair grow.

    Then I cried as it all broke off.


    This time---it's different.

    This time---I've learned to love my curls.


    And this time---I gotta remember not to abuse my hair for just for a style.

    Because it's just not worth it.


    Tuesday, November 03, 2015

    [Hairstyle] High Ponytail | The #WashDayExperience


    I'm treating you guys to a regular old #washdayexperience this week!

    AND I tried a new product.


    Yep Yep. Your girl is doing BIG THANGS right hurrr

    *giggles hysterically*

    Feel free to judge me. I'm an absolute mess!


    Anywhos, here's what products I used in my #washdayexperience:

    Pre-shampoo- Herbal Essence Hello Hydration Conditioner
    Shampoo- Matrix Biolage Hydrasource Shampoo
    Strenthening Treatment- Aubrey's GPB Conditioner (NEW!)
    Leave-ins- Almond Oil + Jessicurl Too Shea Conditioner + EVCO

    And here's how I did it:
    I unraveled my twists and slathered my hair in Herbal Essence Hello Hydration Conditioner. My love for this stuff goes deep. So deep that I buy it in bulk, several gallons at a time. Again, you may feel free to judge me. LOL. But what I do know is that it's amazing slip was great for detangling and removing my week's worth of shed hair.

    Right after pre-shampooing, I went ahead and jumped into the shower, rinsed the conditioner, and shampooed twice using Matrix Biolage Hydrasource Shampoo. I haven't bothered diluting my shampoos anymore because (1) I only shampoo about once a month so I want to really clean my hair and (2) shampoo (especially) just doesn't strip my natural hair. I'm not sure if its because my hair has been ultra moisturized or if it's because my natural curls isn't as dry as my texlaxed hair was.


    I used Aubrey's GPB conditioner as my protein treatment. I've been moisturizing my hair like crazy and I know from experience that my hair thrives with regular strengthening treatments.I applied the coditioner to my damp clean hair, covered with a plastic cap, and sat under my heat cap for about 1.5 hours. I'll definitely give you guys a thorough review once I finish the bottle, but let me tell you: I was VERY impressed with how amazing my hair felt after rinsing this conditioner. Strong. Resilient. "Plumper." My curls were crazy defined and tightly coiled. But UBER soft. #winning #winning #WINNING

    I applied my leave ins: Almond Oil + Jessicurl Too Shea Conditioner + EVCO then two strand twisted my hair in random sections. I pulled all of the twists back into a low pony tail then let it dry overnight.


    The next morning, I decided that I'm really OVER my big hair look, so I went with this crazy cute high ponytail. This is one of my FAVORITE ways to wear my natural hair and these Kurly Klips didn't disappoint in recreating the look! (I pretty much followed this tutorial to the letter)

    I'll probably wear this look for the rest of the week, but y'all, I think that I need a break from my clip-ins. I love them. Don't get it twisted. But I realllly miss my hair. Any style recommendations?

    How was your #washdayexperience?


    Wednesday, October 28, 2015

    [Hairstyle] Braided Side Ponytail Using Kurly Klips


    I really miss my real hair, but I'm not quite ready to give up my clip-in extensions yet. So, I'm going for the double protective style this week with another braided do.

    Meet my Braided Side Ponytail (using Kurly Klips of course)!


    *cue Price is Right you won a car theme music*

    I love love love this style. It's fun and flirty but classy. Exactly what I look for in a protective style.


    Anywhos, here's how I got this quick cute do:

    1. Create a deep side part. (or whatever kind of part you want)
    2. Dutch braid your bangs.
    3. Install your Kurly Klips, leaving a little hair out to blend and camouflage the wefts
    4. Pull all of the hair and the braid to one side, securing with a hair tie. 
    5. Smooth your edges and fluff that ponytail honey!

    So what do you think? Easier than it looks right?


    Tuesday, October 27, 2015

    [Hairstyle] Double Strand Braid Using Kurly Klips | The #WashDayExperience


    Once upon a time I was actually able to do this style with my flat-ironed relaxed hair. Now that my natural hair is a whole lot shorter, I'm siced to have Kurly Klips to give me the length that I need to get'er done!

    The simplicity of this style is disgusting. Honestly, I don't even think that it's completely worthy of a #washdayexperience post. But---I'm started to get bored of rocking big hair.  

    I know, I know. I didn't think that that was even POSSIBLE! I just miss my simple updos, braids, and twists. *sad face*


    So meet my Double Strand Braid---using Kurly Klips of course!

    I started by following my usual boring regimen. (You can find it here.) After I deep conditioned my hair and applied my leave ins, I put my hair in about 20 twists then pulled then all back into a low pony tail to dry. In the morning, I haphazard unraveled the twists, split my hair into two with a heavy side part, then installed 5 two-clip wefts on each side.

    Once the clip-ins were installed, I two strand braided each side. Viola! All done!

    I told you that it was disgustingly simple.

    But I liked it so much that I'll be testing out a few more braided styles this week. Double protective style for the win! #woot

    What do you think? Sophisticated or childish?


    Wednesday, October 14, 2015

    [Hairstyle] Headband Braid | The #WashDayExperience


    I didn't think that I would have this much fun playing around and styling my Kurly Klips! But today I'm back to share another, kinda sorta #washdayexperience with you guys starring this uber cute  Headband Braid.

    I started by following my usual boring regimen. (You can find it here.) I've noticed that my hair has been crazy moisturized lately. Note to self to work in a legit protein strengthening treatment soon. After I deep conditioned my hair and applied my leave ins, I put my hair in about 20 twists then pulled then all back into a low pony tail to dry. In the morning, I arranged my Kurly Klip wefts into this crazy easy style.


    Here's how I did it:
    1. Separate your hair into two parts leaving about 2 inches of your hair out in the front.
    2. Install your clips as usual in the back half of your hair using the "Reverse Clip" Technique shown here to maximize volume.
    3. Start your dutch braid at your ear. Continue braiding incorporating only hair on the right side until you get to your other ear. Finish the braid and secure with a small hair pin.
    4. Pin your hair back for a mini pompadour then fluff the back half of your hair.


    This style keeps my hair out of my face while still allowing me to rock BIG BIG HAIR! As you can see, I left a very small bit of my hair out so that I could blend it back. It's crazy windy today here at the beach and I just couldn't get the clips in the front to act right. Ha-ha!

    What do you think? Would you test drive this style?


    Wednesday, September 23, 2015

    2 Ways To Install Clip-In Extensions Without Leave Out | The #WashDayExperience

    Headband Technique

    I think that the most important part of a long term protective style whether it be braided extensions, weave, or wigs, is that it actually protects your real hair AND doesn't cause damage. I mean---the last thing that you really want is to have nasty breakage to deal with when you're trying to grow out your hair.


    The cool thing about Kurly Klips is that the chances of breakage are pretty slim. You don't have to blend your real hair with the clip-ins to get a natural look plus there's also no stress on your edges. I know I know---it sounds a little too good to be true---but I promise---it's legit.

    Headband Technique

    Thanks to Lana's (the genius owner of Kurly Klips) amazing YouTube videos, I figured out two ways to install my Kurly Klips without leave out.

    Headband Technique

    What you'll need:
    • Two sets of Kurly Klips. I used one set each of the Shoulder Chic and Mermaid length from the My Fro collection. I like using two different lengths to create a blunt full hemline and increase the volume. Volume is your friend when you're not leaving out any of your real hair. It helps hide the wefts plus---its cute!
    • 2-3" head band ( I use Goodie Ouchless Hair Wraps)
    • Hair ties
    • Hair pins

    Reverse Clip Technique
     Here's how I install my Kurly Klips without leave out:

    1. First, I moisturize and seal my real hair. (Click here to see what I use and how I do it) I pull it back into a low pony tail and secure any shorter sections with hair pins.
    2. Starting with the Shoulder Chic clips, place 3 clip weft from ear to ear about an inch above your nape.
    3. Place the 4 clip Shoulder Chic weft next.
    4. Next place three of the 2 clip shoulder chic wefts side by side.
    5. Then,  place the 4 clip Mermaid length weft. 
    6. You'll have a small area remaining at your crown. You can fill this area my adding your remaining 2 clip wefts horizontally using the headband technique. Just hide the wefts with a simple headband and fluff the hair. OR...
    7. You can use the "reverse clip" technique to create an invisible part. First, snap a Mermaid 2 clip wefts backwards at the edge of your part. The volume makes the clips appear to be growing out of your scalp. (Hello AWESOMENESS!) Repeat until you fill in your crown area.

    Reverse Clip Technique

    Here's a video for my visual learners!


    So what do you guys think? Which no leave out method do you like the best?


    How was your #washdayexperience?