Friday, April 29, 2016

That One Time They Came For My Edges...

I live unbothered. Low key, happy go lucky, tunnel vision focus on my hubby, kids, and keeping my house from looking like a tornado hit it.

People, places, things---they just don't irk me or my high puff. We sit. We play. We chill.


Until that one time they came for my edges.

So here's the story:

I posted this volume check pic on social media with the caption: "Progress"


Less than 30 seconds later someone wrote:
"I can tell especially the edges"


Hold up bruh...

I had to look at what I posted again...just to make sure that I wasn't tripping. That some trolling computer gremlin hadn't switched up my post with somethang cray cray.


Nope...no gremlins, no glitches, no vampires...no mistake.

That comment was meant for ME...and MY EDGES...

Then I am like...DID HE JUST COME FOR MY EDGES???

Nah...He couldn't have come for my edges...


That before pic doesn't have edges laid by the GAWDS.

Those sideburns won't swooped for days.

There ain't nothing sleek or slick about it..

But honey, I'd rather have thick full frizzy edges than not have any at all.


Yes...THAT was a READ. 

The worse part:

After his rude boi unmerited shady comment...

I got a TON of questions asking how I grew back my edges...


*hangs head*

I politely answered, reiterating that won't nothing wrong with my edges before here's a link to my regimen, be blessed and highly favored blah blah...

But I'm still kinda salty.

When did slayed and laid edges become that IT thing? Do my baby hairs have to be sleek and slick in order to sit at the healthy hair table? Is that what we consider progress? And does that mean that if you don't---folks have the right to come at you for your edges?

Idk y'all...

I'm just not feelin it. And for my laid edge social media quality control brotha...

I don't wanna sit at ya table cuz you mean and rude anyway...


RANT OVER.

Whew...Glad to get that off my chest. 

Now I'm gonna go play in the rainbow glitter and positive pixie dust storm that that unicorns left in the backyard.

What's your take on "laid edges?"

Besitos!
KLP

Wednesday, April 27, 2016

Kurly Klips are BACK! | The #WashDayExperience

These Kurly Klips are EVERTHING.

E V E R Y T H I N G !!!!!


They're perfect for bad hair days, I don't feel like doing my hair days, and omgosh what's wrong with my hair days.

Just the kinda days that I've been having.


I've been washing my hair. But not really styling it. Which basically means that it's been the puff life for the last 2-3 weeks.

RELATED: How I get the perfect high puff

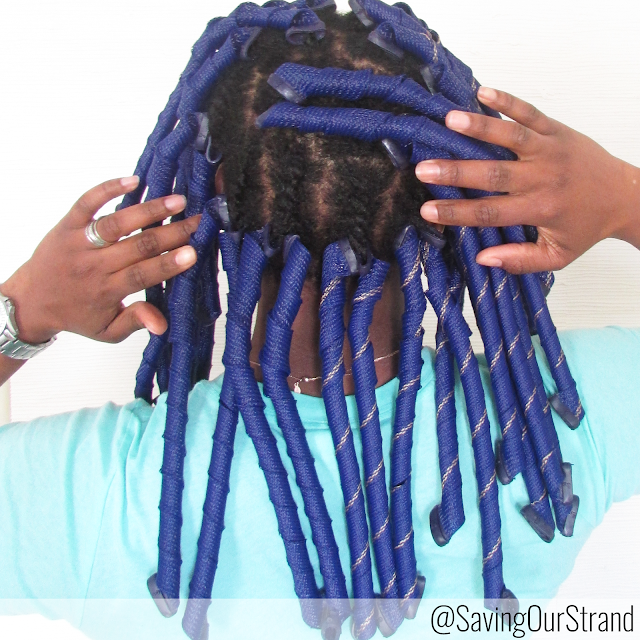
To get myself out of the rut + a quick protective style---I brought my Kurly Klips back into rotation.

I know that it won't be long until I'm bored with them again (Just like last time). But that's cool. I trimmed my hair about a week ago and I picked up some Lush Caca Rouge Henna last weekend. 

Yep yep...I'm ready to get my curls on fleek for the summer!


How did you style your hair this week? Anyone else trying to get their hair summer ready?

Besitos!
KLP

Tuesday, April 26, 2016

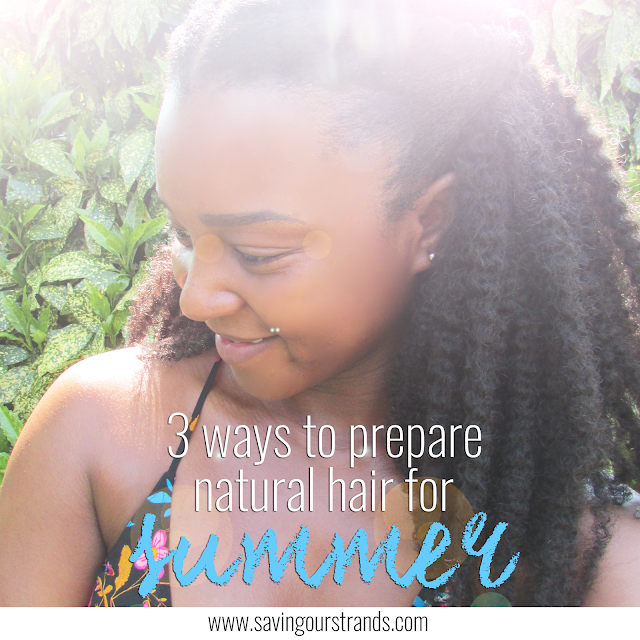
3 Ways To Prepare Your Curls For Summer

I'm so ready for summer! But, I'm not so sure that my hair is. I feel like I've got my minimalist regimen down pact. I know what styles...

*clears throat* Hey Curlformers!!!

...worked for my hair during the cooler months. However, I think that it's time to give my curls a pick me up. Here's how I'm getting my hair ready for summer:

Summer Natural Hair www.savingourstrands.com

START WITH A TRIM

My last trim was in December and although I'm not one to really trim on a schedule, I do want to start the summer without splits and single strand knots.

RELATED: 6 Ways To Trim Natural Hair


DEEP MOISTURIZING TREATMENT

Y'all know how much I love deep conditioning my hair overnight. I talk about it constantly because iIt's a staple technique in my regimen. Plus I already know what will happen if I don't stick to what works for my hair. Last summer, I lived in my high puff. I didn't moisturize my hair regularly and my ends suffered because of it. In learning from my mistake, I want to be proactive instead of reactive and keep my ends in good shape.

RELATED: Why I deep condition overnight


RE-EVALUATE YOUR HAIR STYLE

My curlformers have been very good to me, but I need to be realistic. I live at the beach and the humidity + heat + 100% chance of rain erryday just won't let me be great. I don't think that I'll turn into a wash and go pro, but I really want to find a styling technique that can work with the elements instead of revolting against them. Until then---I'll be rocking the mess outta these Kurly Klips!

In what ways are you pepping your hair for summer? What's your signature summer style?

Besitos!
KLP
Tuesday, April 19, 2016

Meet My Natural Hair | Keyda Update


I cannot believe it has been this long since I have posted! It has been so much going on that sometimes I'm not sure if I have time to just BE! I am sure ALL of you know where I am coming from! #queenin #blackgirlmagic So, many hats, so many super women!

Well, I have realized that I have not received a touch-up since July 2014!!!!!! And it was a journey through a long year. In fact, prior to my wedding day, I had a ...


BIG CHOP! Yes, this is not a typo! I cut off the rest of my relaxed ends and am officially all natural! It has been AMAZING! I LOVE MY CURLS and have grown to love my "fro". Honestly, I was very timid about wearing my curls out as I have not seen my hair in curls since middle school. Of course, I  make that face the moment someone goes for my hair (you know which one!) and try to bite my tongue when asked how does my hair curl (normal response.."wash it"). *le sigh* I have learned to own it and walk confidently in my natural hair, so who knows when, if ever, I will get another perm. I still love a good blow out! Although, my last one was for my wedding!

Positives:
  • My hair is manageable.. surprisingly.. like really. While the tangles are not always fun, I am definitely more pleased taking them out compared to before. 
  • My scalp can breath! It has not been as itchy or irritated in-between my washes. 
  • I can literally just ... GO! Like, it's amazing that I can simply fluff and go! :) 
  • Confidence. This is not something about my "hair" but what has grown in me since going natural. I have always been a fierce one hehe but now I just feel so much more confident in any style I wear and feel no judgement. 
Negatives:
  • Laziness due to the fluffiness. Honestly, I have difficulty changing up my styles and remembering to wash at least 2 times a week. I hope to co-wash more often in-between my full-on wash days. (I need to do better)
  • Trimming. I really need to find a method so I will definitely be exploring some of the ways KLP was discussing here
I have grown to have a few "go-to" styles that are easy and manageable with my hair. However, as my hair grows, I try to mix it up and I definitely plan on trying Curlformers that KLP raves about! I cannot wait to give them a try! :)

Let me know what you think and how your journey is going!

xoxo
Keyda

Wednesday, April 13, 2016

10 Quick and Easy Updos For Natural Hair

I LIVE and DIE for a quick and easy updo. Especially since I stopped relaxing my hair. I just don't have time for crazy complicated hair styles.


I'm guilty of hitting the snooze button one too many times. I often forget to set my hair the night before. And don't get me started on all of my failed wash and gos. Nonetheless, I refuse to walk out of the house looking a hot mess. So instead of giving you a boring #washdayexperience this week, I decided to share 10 of my favorite super  quick and easy updos: 

1/ SWIRLED CROWN BRAID (tutorial)

The perfect way to elevate a humble dutch braid. The key to this style is gently fluffing the sides of the braid to give it volume and make it look thicker.

2/ KNOTTED UPDO (tutorial)

Not a braid. Not a bun. All protective. Stupid simple. This Knotted Updo is perfect for any length hair. I used a technique called banding to stretch my curls.

RELATED: How to stretch natural (and transitioning) hair without heat! 

3/ TWO STRAND TWIST UPDO (tutorial)

The final chop of my texlaxed ends left my bangs super short which made styles other than a high bun difficult. After a little trial and error, I realized that two strand twisting my bangs first + a few well placed hair pins was all I needed to create a cute "not a boring bun" look. 

4/ FLAT TWIST BUN (tutorial)

I love using curlformers to stretch my hair then pulling the curls up into a protective style. And this Flat twist Bun is the perfect example of that. This style is chic but simple and the longer that you leave it in, the more voluminous it makes your hair look. So if you have hair on the finer side---this style is for you!


RELATED: How to use Curlformers on Natural Hair


5/ FISHTAIL BANANA CLIP (tutorial)

Banana clips are a fun way to put your hair into a quick updo. Then you can pin your ends up to turn the updo into a protective style.

6/ SWIRLED FLAT TWIST BUN (tutorial)

Make one large flat twist then two single twists then BOOM you gotta super cute hairstyle! Again, the length of your hair doesn't matter for this style.

7/ HIGH PUFF (tutorial)

Of course this list wouldn't be complete without my high puff. It's the style that I love to hate. It's the epitome of easy but it makes me soooo lazy with my hair. 

8/ FLUFFY TOP KNOT (tutorial)

As I got deeper in my relaxer stretch turned transition, pulling my hair into a high bun got harder and harder. That is until I worked my hair into this gorgeous fluffy top knot.

9/ HEAD WRAP SCARF BUN (tutorial)

This style has two steps: Bantu knot your bangs then wrap your hair in your favorite printed scarf. Easy peasy!

10/ CURLY UPSWEEP (tutorial)

Necessity is the mother of invention. All I had was a failed twist out, 5 minutes, and a stretched out hair tie; and it was all I needed to create this style. I pulled my hair into a high puff leaving down a large section to give myself a curly bang.

What's your favorite updo? Link it up below!

Besitos!
KLP


Wednesday, April 06, 2016

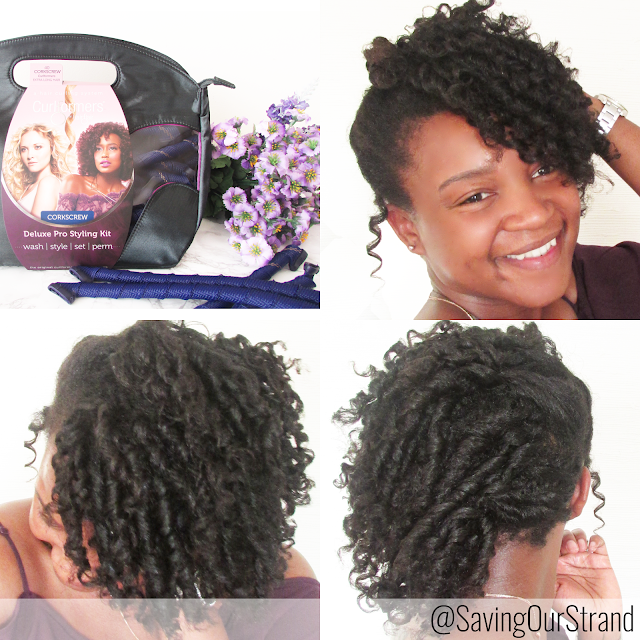
Corkscrew Curlformer + Flat Twist Out on Natural Hair


www.savingourstrands.com

I had such great success with my Spiral Extra Long and Wide (Pink and orange) Curlformer styling kit that I've really been debating on whether or not I wanted to invest in the Corkscrew Long and Narrow (Blue and Green) kit. These kits aren't cheap and ya girl ain't rich so I put those thoughts on the back burner for a while.

Apparently someone over at HairFlair (the makers of Curlformers) heard about how I'd been screaming singing the praises of these little gems for months and they offered me the opportunity to try the corkscrew curlers for free.


Yep.

That's me.

Happier than a 5 year old on Christmas.

Anxiously, I put these bad boys to the test over the weekend. I used my usual products but I had to change my technique up a little bit.

www.savingourstrands.com


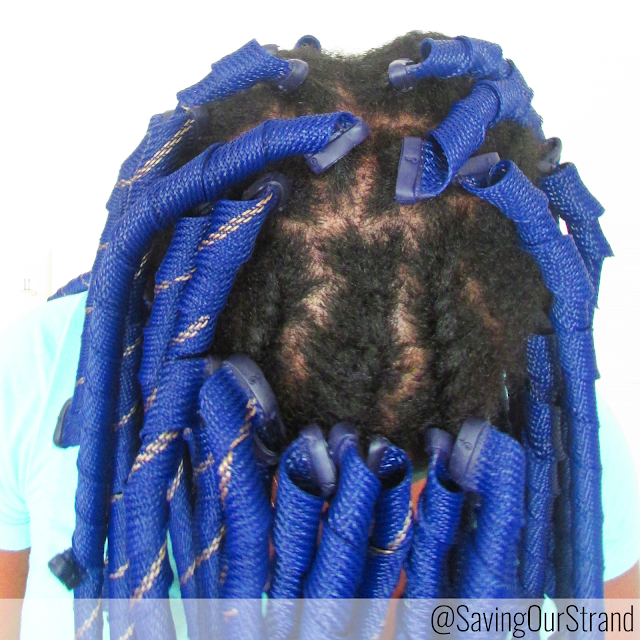
These curlformers are more narrow and my hair is pretty thick, so I wasn't sure if my set of 40 would be enough for my entire head. I decided to try a flat twist out---with the curlformers at the end.

www.savingourstrands.com


I did a total of 13 flat twists with 2 curlformers on the ends of each. Then I used the rest of the curlformers at the very top of my head for added volume. I also added a tiny dab of gel to the ends before installing to keep the curls smooth after take down.

www.savingourstrands.com


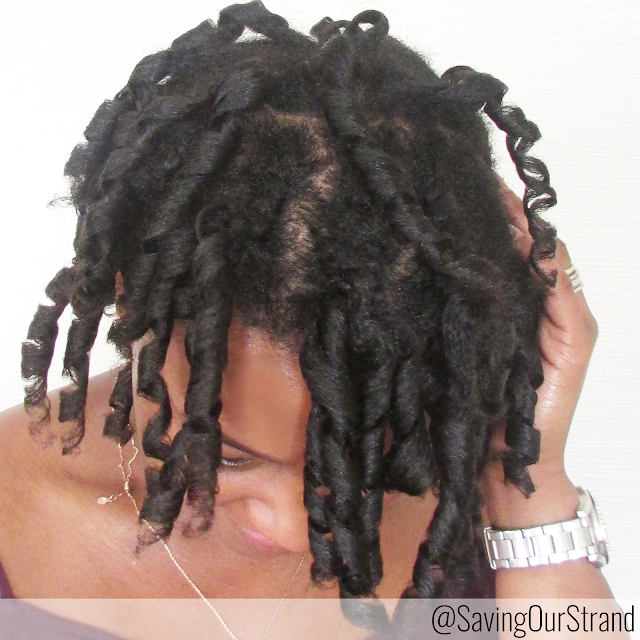
Here's what it looked like after take down.

www.savingourstrands.com


Then I had to fluff it like crazy because the curls were defined---but flat.


I don't hate it---but I'm not sure if I love it either. For the first day, I did a half up/half down high bun. They next day, I pulled all of the curls over for a romantic sideswept look. I have to admit, the curls really held up well. My hair was super moisturized and the addition of that dab of gel on the ends was a game changer.

www.savingourstrands.com


Have you ever tried the corkscrew curlformers? Were they winners?

Besitos!
KLP


Tuesday, April 05, 2016

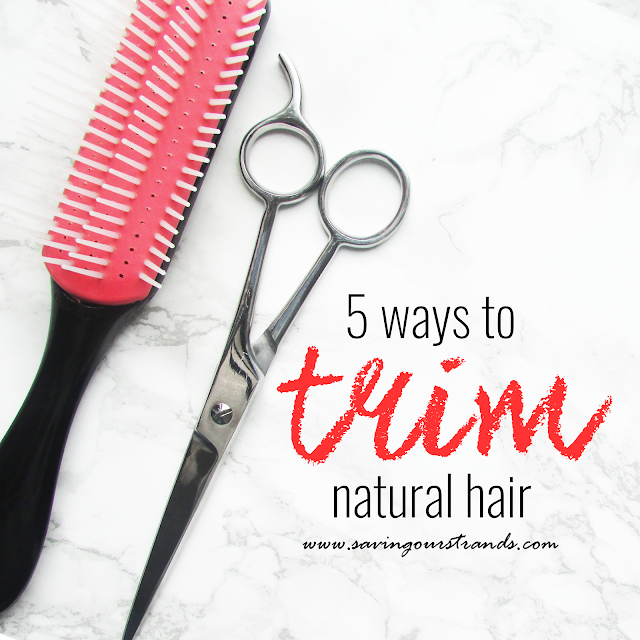
5 Ways To Trim Natural Hair

www.savingourstrands.com)

I'm scissor happy and cut apprehensive all at the same time. I'm not at all afraid to trim my hair. I know that my curls will look better, feel healthier, and behave properly when my ends are maintained. But I just don't want to over do it.

My goals for trimming my hair are simple:

Keep length
Remove splits
Create shape
Without using heat

I want to keep my length, while removing any split or rough ends, and give my curls some shape, all without having to straighten my hair with heat. I know I know...I'm asking for a lot here. So I took to YouTube in hopes of finding a few tips to help me beyond a better DIY trimmer. Here's what I found:


THE TWO STRAND TWIST METHOD

Time consuming but thorough. I like this method because it allows me to wash, trim, and set my hair all at once. However, I doubt that it will give my hair shape.


THE STRETCHED FRO METHOD

Because my hair is typically stretched from a Curlformer set, the stretched fro method would definitely be convenient for me. I sort of used this method during my last trim, but I found that I snipped off a tad bit more length than I would have liked because my ends love to curl up on itself.


THE CURLY SEARCH & DESTROY METHOD

I love this method because it truly takes into account what your ends look like while wet while concentrating on getting rid of single strand knots. There are times when my stretched ends will look wonky and uneven but once it curls up---it's perfectly fine. Again, this method is tedious but you're guaranteed not to take off too much length.


THE DIY DEVA CUT METHOD

I won't lie, this DIY Deva Cut Method is personally the scariest technique that I found because it's all about achieving that perfect shape. I don't trust my trimming skills enough yet to even attempt this free hand method, but I'm saving it for that day when I feel bold!


THE BANDING METHOD

I love the way that Laila uses a hair tie to determine where to trim her ends. She concentrates on keeping the trim even, only snipping off the splits and keeping her layers in tact.

What are your tips for trimming your hair? Have you tried any of these methods? Share your dets!

Besitos!
KLP