Showing posts with label KLP. Show all posts

Thursday, July 07, 2016

10 Cute Vacation Hairstyles For Natural Hair

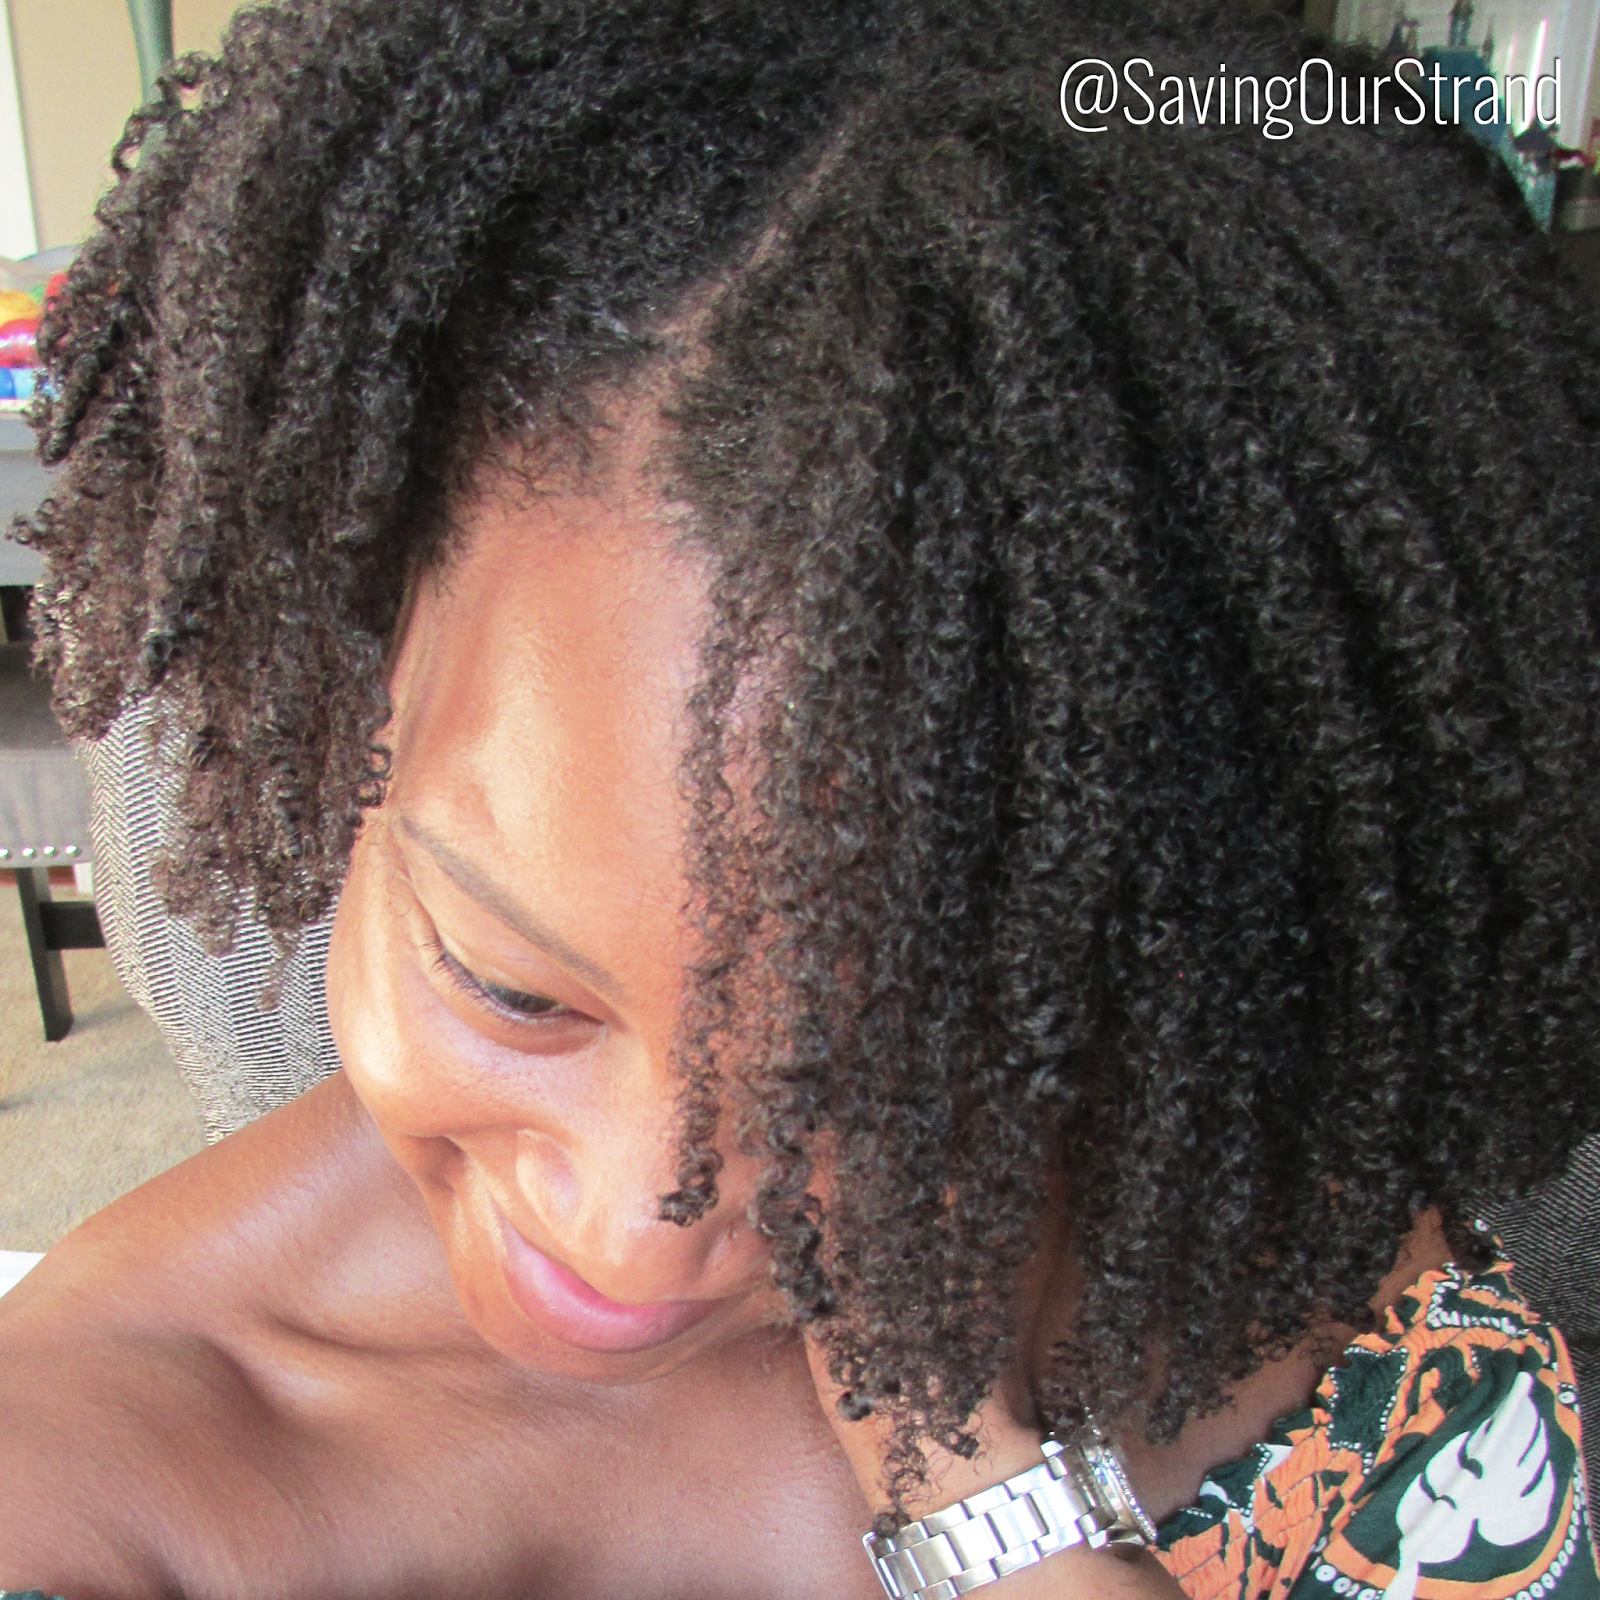
Summer brings out the best in my curls. The volume and my fluffy kinks give me all kinds of LIFE. But...it also brings out the worse in my hair. Think frizz and a mind boggling amount of SHRINKAGE. And when I'm on vacation, I just got no time for my hair's unpredictability. So on those days when my hair just won't act right, I toss it up into one of these uber cute fun in the sun vacation hairstyles:


1/ KURLY KLIPS [Clip in Extensions] (tutorial)

What I love about Kurly Klips is that they are quick, easy, and you can keep all of your hair hidden while still rocking big bad hair.

RELATED: How I Protect My Hair Under Kurly Klips

2/ TOP KNOT (tutorial)

The top knot will always be in season. Especially when it's hot, hazy, and humid. Adding a flirty flower accessory gives this style a fun vacation feel.

3/ DOUBLE DUTCH BRAID + BRAID (tutorial)

Two braids pulled into a low bun. Simple. Easy. Quick. Uber cute! I loved this style whilst I relaxed my hair but it's even better now that my hair is curly! 

4/ TUCK & ROLL (tutorial)

I literally tuck, roll, and pin my curls up into this style. It takes no effort at all, keeps my hair tamed, and looks like I spent more than 5 minutes getting myself together. Win Win!


5/ HEADBAND + CURLS (tutorial)

Just like adding a head band---the second easiest way to jazz up your vacation look is with a flirty fun headband. Head bands work double duty for me. It's a way to smooth my edges and give my messy updos an intentional look.

6/ LOW BUN (tutorial)

I love this low bun because it's voluminous, doesn't snatch my edges, and super comfortable. I don't have to use weave or one of those cute mesh donut thingamajigs either. The best part of this updo is that it doesn't ruin my curls. At night, I take all the pins out, shake my hair out then band it. (here are the dets on how I band my hair) When I release the bands the next morning, all I have to do is fluff and go! This is how I wore my hair the next day!

7/ TURBAN + PUFF (tutorial)

The high puff is my go to style when the heat and humidity makes me feel like I'm going to spontaneously combust. Adding a turban gives the style an extra oomph and va va voom.

8/ SIDE SWEPT WASH & GO (tutorial)

Wash and go's are perfect the summer. Here's a cute way to jazz it up: pull all your curls over to the side then add a few hair pins and maybe a decorative head band to give the style even more pizazz. This style works well for any curl set; especially perm rods!

9/ HEADWRAP (tutorial)

The absolutely easiest, chicest, sassiest, solution to your vacation hair problems. Just throw a colorful patterned headscarf on, add some hoop earrings, then call it done! With so many ways to tie a headscarf and their affordability, how can you say no?

10/ FISHTAIL BRAIDS (tutorial)

Goddess braids are super versatile. They're perfect for pool side lounging and vogue enough for a night out. The key to a thick braid is to gently tuck on each side of the braid to fluff it out.

What's your favorite vacation style? Link it up below!

Besitos!
KLP


Tuesday, June 07, 2016

Lush Henna Caca Rouge Results (3rd Application)

I did my third application of Lush's Henna Caca Rouge over the weekend! I used the same prep process and application as the previous two times. The only difference was that instead of co-washing before the application, I shampooed because my hair was still full of product from my last wash and go.

RELATED: How to use Lush Henna on Natural Hair 


Henna is a tedious process. It adds 4-5 hours to my usual wash day. It takes me about 20-30 minutes to apply the henna. I let it sit for 3 hours (one of which, I'm under my hooded dryer). Then it takes an additional 20-30 minutes to fully rinse the henna from my hair. Luckily for me, the results are are so worth it. Here's why:

VIBRANT HIGHLIGHTS

My hair is naturally dark brown with peeks of auburn highlights.  What I love about henna is that my natural sun-kissed highlights are now more vibrant coppery color. In the sun light, it's almost like I have a subtle bronze halo around my curls.


STRONGER SOFTER HAIR

I'm not sure if it's my new minimalist regimen, my latest obsession with wash and go's or a combination of both but my hair has been on it's very best behavior. My strands feel uber moisturized, despite the fact that I'm only washing my hair once a week. I haven't had to moisturize or seal between wash days and my curl definition is even better. (I didn't think that was a possibility!) I've also noticed less breakage.


CUMULATIVE

With each henna application, the color gets deeper and richer. So, I have many more applications before I'll get close to the firey copper glow that I really want. Fingers crossed that my time at the beach this summer will help expedite the process!


Any one else playing with henna? Do you have any tips or tricks to share?

Besitos!
KLP

Tuesday, May 31, 2016

How I Maintained My Wash and Go for 5 Days

I never thought that I could actually get any style to last. Especially not for 5 days. Especially not a wash and go. And especially when I've never even had a presentable wash and go to begin with. But my wash and go from last week was pure magical. Not only was it beautiful on day 1---it was still gorgeous on day 5!


And I practially did NOTHING to maintain it. Legit y'all. No moisturizing or sealing. No reapplication of gel. No nada. Here's what I did:


BANDING

Every night, I banded my hair. Banding is a super simple concept and even easier to do. First, divided my hair into about 5-9 sections (the more sections you have the more stretch you'll be able to achieve), then used an extra wide hair tie to secure the section at the base. Next, I wrapped the the rest of the pony along the length my hair. I don't band the very ends of my hair to keep the curls in tact.

Banding elongates my curls without destroying the curl pattern. It also counteracts the ridiculous amount of shrinkage that I have. The best part about banding is that it's heat free, doesn't cause breakage, and it's incredibly gentle on my strands.

Related: How To Band Natural Hair 

Day 1
 

EXERCISING

I workout every morning---and night. During my morning workouts, I keep my hair banded and covered with a satin scarf. At night, I throw my hair up into a high puff.

Related: What I used for this wash and go!

Day 2 Wash and go

MORNING ROUTINE

On the mornings when I started the day with cardio---I noticed that my roots were a little damp. So I sat under my hooded dryer---on cool---for about 10 minutes until my roots were dry. Then I removed the bands, shook my hair, fluffed it a little with my fingers for some volume, then went about my business.

Day 3 Wash and go

NIGHTLY ROUTINE

After my night workout, I banded my hair into those same 5 sections. I didn't moisturize. I didn't seal. I didn't really do much of anything besides band my hair and cover with a scarf.

Day 4 Wash and Go


I'm not really used to one wash day a week anymore. I was afraid that my hair was going to be a dry frizz ball. But believe it or not, my hair felt amazing. I had a little frizz in the front---most likely from my time on the treadmill with covering my hair. *hangs head* So on day 5, I pulled it up into a high puff. I washed my hair the next day but I feel like I could have pushed it one more day in another high puff if I needed to.

Day 5 Wash and go


I'm feeling really optimistic about the future of my wash and gos!

Are you a wash and go girl? How do you maintain your curls?

Besitos!
KLP

Wednesday, May 25, 2016

Wash and Go Magic! | The #WashDayExperience

Every time that I wash my hair---I fall in love with my curl pattern a little more. Aren't my curls just the tiniest coiliest kinkiest curls that you ever did see? Okay, maybe I'm bias. But for as much as I love a good stretched curl former set, high puff, or updo---I love my curls 3 million times more. Which is why I'm more determined than ever to get this wash and go thing right.


Plus in honor of this week's #washdayexperience: "Next Day Hair." I used an old technique in a new way to give my wash and go a little stretch without heat.


Here's what I used:

Pre-shampoo/Strengthening Treatment- DIY Moisturizing Mist (tutorial here) + Aubrey Organics GPB Conditioner (review here)
Deep Condition- Jessicurl Deep Treatment Conditioner (review here)
Clay Rinse- Here's the dets on my recipe
Leave-Ins- Castor Oil + Jessicurl Too Shea Conditioner (why I love this stuff here) + EccoStyler Krystal Klear Gel (shop it!)


RELATED: My Minimalist Natural Hair Regimen

First, I spritzed the ends of my hair with my DIY Moisturizing Mist (tutorial here). Then I slathered my hair in warmed Aubrey Organics GPB Conditioner (review here) as I detangled. I love this conditioner because it helps makes breakage disappear, defines my curls and it has a TON of slip. I covered with a plastic cap and sat under the dryer for about 20 minutes.

RELATED: Tips for making your deep conditioner more effective 

Day 1 hair

After rinsing the conditioner in the shower, my hair felt amazing. Soft but strong and the curl definition/elongation was on point. Yay for protein treatments! I t-shirt dried for a few minutes then applied my FAVEEEE deep conditioner Jessicurl Deep Treatment (review here). Next, I layered on a little Extra Virgin Coconut Oil to seal in the conditioner. I covered with a plastic cap and left it in overnight.

RELATED: Why I Deep Condition Overnight

The next morning, I rinsed the conditioner, t-shirt dried for a couple of minutes then applied Jamaican Black Castor oil (shop it)+ Jessicurl Too Shea Conditioner (why I love this stuff here) as my leave ins.

Day 1 hair

My Wash and Go Technique #2


I put my hair into 5 sections then secured each with a hair clip. Starting with the back, I spritzed it with water until it was soaking wet then finger detangled until my hair clumped into curls. Then I smoothed a little gel on the roots. Next, I raked a little more gel through all the way until the ends and gently shook out the curls. (aka the rake and shake technique)

The application process took me about 35-40 minutes to do. Then I let my hair air dry for the rest of the day (approx 5 hours)

My hair was a bit damp at the roots, but I didn't want to use heat and potentially disturb my curl pattern. So I banded my hair using some extra wide hair ties. Then let my hair dry overnight.

Banding to stretch my curls


The banding actually helped break the gel cast and stretched my curls without destroying them (like I did the first time...smh) I noticed that the front of my hair is where I have the worse gel cast. Does this happen to anyone else?


So far this is the best wash and go that I've been able to produce! Here's an outline of what I did differently: Clay rinse after deep conditioning, applied castor oil instead of coconut oil to my freshly  washed hair, changed from EccoStyler EVOO to EccoStyler Krystal Klear, and I let my hair air dry then banded to elongate the curls. The next day---I banded again and got even BETTER results!


I finally got my curls to look the same when they are wet---as when they are dry! WASH AND GO MAGIC!!!! For my next wash and go, I plan to use regular ol castor oil instead of JBCO. I love the way that the JBCO kept my hair moisturized and really defined my curls, but the scent is just too woodsy for me. Plus, regular old castor oil is definitely more economical. I feel like I'm getting closer and closer to perfecting this wash and go thing!


How was your #washdayexperience? Feel free to share the details with the rest of our healthy hair tribe!

Besitos!
KLP


Tuesday, May 24, 2016

3 Awful Ways To Trim Natural Hair

I can't even count the times that my hair was butchered at a salon. You go in asking for a trim and come out with INCHES missing or you ask for a blunt cut and come out with layers. I've made so many mistakes when it comes to trusting that a stylist knows what I want, which is why I researched DIY techniques to trim my hair. But I was searching, I stumbled upon 3 of the most AWFUL terrible I-can't-believe-they-are-serious ways to trim/cut curly hair.


The Tunnel Cut

The premise of this cutting technique is to reduce the bulk your curls without affecting curl formation no matter the curl type. The stylist cuts diagonal "tunnels" into the sides of the hair at the root.

An actual, supposedly trained stylist did this. *hangs head* This atrocity is the absolute worse natural hair trimming technique that I've ever seen. I actually wanted to cry for her. I understand that BIG hair ain't for everyone but this cut CANNOT be the solution. I mean, can you even imagine what her hair will look like as it grows out?


The Razor Cut

Razor cuts thin out your ends and supposedly prevent that heave mushroom shape as your hair grows out.

If you're a curly girl that only wears straight hair, then the razor cut pixie look can be a totally chic look. However, when you wear your hair curly, don't be surprised if your ends look thin and limp or if your curls are frizz and piece-y. When you add the fact that most curlies have more than one curl pattern, razor cuts lack styling versatility.

The Straighten First Insist

In this method, a stylist insists on straightening your hair before cutting or trimming in order to "more accurately cut.

I've debated this technique so many times that it makes my head hurt. The truth of the matter is that you don't need to straighten your hair just to trim it. In fact, you can do your hair more harm than good when excessive heat and high manipulation are involved. Because I'm still learning my curl pattern, I want to learn ways to work with my curl instead of against it---and that includes how I trim it. Here are 5 ways that you can trim your hair without using heat.

What's the worse method or technique that you've seen to trim your hair?

Besitos!
KLP


Wednesday, May 18, 2016

Caruso Steam Rollers on Natural Hair | The #WashDayExperience

In honor of today's #WashDayExprience theme, I took a break from attempting to perfect my wash and go technique so that I could throw my hair up in some big ol voluminous curls.


Here's what I used:

Jessicurl and Shea Moisture www.savingourstrands.com


Deep Condition- DIY Moisturizing Mist (tutorial here) + Jessicurl Deep Treatment Conditioner (review here) + Extra Virgin Coconut Oil
Clay Rinse- How I get my curls to POP!
Leave-Ins- Extra Virgin Coconut Oil (Why EVCO is AMAZING here) + Jessicurl Too Shea Conditioner (why I love this stuff here) + DIY Hair Butter

And here's how I did it:

I started my spritzing the ends of my hair with my DIY Moisturizing Mist (tutorial here). Then I slathered my hair in Jessicurl Deep Treatment (review here). My hair was super dry so I sealed in the conditioner with a little Extra Virgin Coconut Oil (here's the kind that I use $) then left it in overnight.


RELATED: Why I Deep Condition Overnight

The next morning, I hopped in the shower, rinsed the conditioner section by section then applied my Clay Rinse with a narrow tip applicator bottle. I still adore how this treatment makes my curls perfectly springy, defined, and moisturized. Out of the shower, I t-shirt dried for a couple of minutes then applied little more Extra Virgin Coconut Oil + Jessicurl Too Shea Conditioner (why I love this stuff here) as my leave ins. Then I faux banded my hair to stretch it a little while it dried.

RELATED: How To Stretch Natural Hair Without Heat


I thought about doing bantu knots, but then decided to try an oldie but goodie: CARUSO STEAM ROLLERS!! It's been forever since I rocked a set of big fluffy steam curls so I wasn't sure what to expect.

RELATED: How To Use Caruso Steam Rollers on Natural Hair

I set my hair on the rollers using a little Shea Moisture Curl Enhancing Smoothie as my styler/holding product. I'm pretty shocked that in 3 years, I haven't done an official review on this stuff. Just know that it's amazing and EVER so perfect for setting perm rods, bantu knots, and twist outs. Plus the scent is to. die. for.


I let my rollers air dry for about 30 minutes then sat under the dryer for another 15 minutes just to make sure that they were dry. For my chicas with super thick hair---you know the struggle to get any kind of roller set dry in a decent amount of time.

I'd forgotten how much I love how steam roller curls look on me! My hair is uber moisturized and has tons of volume. The next day it rained so I wore it up in the high puff  + bangs situation.


How was your #washdayexperience? What's your favorite way to get big voluminous curls? Share all the dets below!

Besitos!
KLP


Wednesday, May 11, 2016

How To Use Lush Henna on Natural Hair


Henna has been on my must try list for years. No really. YEARS. Why? Because it looks messy, time consuming, and seems a little more complicated than this chemistry flunking chica can handle. Plus I was just plan scurred.


RELATED: Why I have henna on the brain


Fast forward to a few weeks ago. I'm in Lush and I see their Caca henna collection. They did all the hard work for you. Pick your color, chop up the amount of henna you need, add water and then apply. Like---have you ever seen a henna recipe that simple?

So I picked up a block of the Caca Rouge and did a happy dance. Here's how I got started, prepped the henna, and applied my henna.

START WITH A STRAND TEST


Have y'all seen this video by Chemese? She had a severe allergic reaction to what she thought was henna. Yeah---enough said. So the day before I decided to do a strand test. I started by chopping off a tiny bit of the henna block, adding a little warm water to it and applying it to a small section of my nape. I left it on for about 3 hours then rinsed. I also tested a patch on the inside of my arm just to make sure.


PREP YOUR HENNA BLOCK


The next day, I moved ahead with a full application. Here's how to prep the henna:
  1. Break the henna into pieces. 
  2. Put your pieces into a glass bowl
  3. Add boiling water a few tablespoons at a time. 
  4. Then mix and add water until you have a cake batter consistency.  Keep the henna mixture warm for easily application. (I just placed my bowl in a warm water bath to keep it warm)

    APPLY YOUR HENNA


    When I did the strand test, I noticed that it was really difficult to apply the henna to my hair dry. So I decided for the full application, to apply the henna to freshly co washed hair. (I also did this because my hair had a ton of product in it from my previous wash and go style. I didn't want the product buildup to prevent the henna from absorbing into my hair.) Starting with damp clean hair, I applied Lush's Ultrabalm to my hairline and ears to prevent staining. Then I:
    5. Apply the warm henna in sections to your hair, cover hair with cling film and leave for 3 hours.
    6. Wash the henna from your hair using warm water then deep condition. 

    After application, I hopped under my hooded dryer for an hour then I let the henna sit on my hair for 3 more hours. The Lush salesgirl told me that heat would activate the henna even more and allow my hair to absorb more color.

    I rinsed the henna for what felt like FOREVER until the water ran clean. Then I did my usual clay rinse.

    RELATED: How to get your curls to POP!

    I've done two henna treatments over the last month. Here are what my results look like so far:


    HENNA RESULTS


    The first time that I henna'd it was pretty much impossible to catch the subtle color on camera. But the second time, I really saw a difference, especially in sun. It actually reminds me of what my color looks like after a summer at the beach. The effect of henna on your hair color is cumulative--meaning that each time you do a treatment, your color will get deeper and richer. Which is exactly what I'm looking for! The process was actually easier than I thought it would be and my hair feels thicker and dare I say fuller (as if my hair wasn't already stupid full) than before.

    How was your #washdayexperience? Would you ever consider using henna on your hair?

    Besitos!
    KLP


    Wednesday, May 04, 2016

    Wash and Go FAIL | The #WashDayExperience

    Last spring, I attempted my first wash and go. It was pretty terrible. My hair took hours to dry, my curls were stupid frizzy, and by the time that it dried---my hair felt like straw. I tried a couple more times before I gave up and moved on to curlformers.


    www.savingoursrands.com

    But the problem is---I LOVE my curl pattern. My curls are tiny and stupid coily and ever so kinky. And when moisturized my curls pop like crazy. Ugh...Do you guys understand how much I just wanna wake up like this? Perfectly moisturized, just the right amount of shrinkage, and curls for ddaaayyyssssss....

    www.savingourstrands.com

    So I gotta find a technique + product that will help my curls hold this pattern instead of frizzing up completely. (No shade to frizz---I do love a good fuzzy frizzy high puff every now and again...lol)


    www.savingourstrands.com)


    So I'm determined to figure get this wash and go situation right for the summer. And how perfect is this week's #WashDayExperience theme: Summer Prep!?!

    Here's what I used:

    www.savingourstrands.com


    Deep Condition- DIY Moisturizing Mist (tutorial here) + Jessicurl Deep Treatment Conditioner (review here)
    Leave-Ins- Extra Virgin Coconut Oil (Why EVCO is AMAZING here) + Jessicurl Too Shea Conditioner (why I love this stuff here) + EccoStyler Extra Virgin Olive Oil Gel (buy it here)

    And here's how I did it:

    I started my spritzing the ends of my hair with my DIY Moisturizing Mist (tutorial here). Then I slathered my hair in Jessicurl Deep Treatment (review here). My hair was super dry so I sealed in the conditioner with a little Extra Virgin Coconut Oil (here's the kind that I use $) then left it in overnight.

    RELATED: Why I Deep Condition Overnight

    The next morning, I rinsed the conditioner, t-shirt dried for a couple of minutes then applied little more Extra Virgin Coconut Oil + Jessicurl Too Shea Conditioner (why I love this stuff here) as my leave ins.

    www.savingourstrands.com

    My Wash and Go Technique #1


    I put my hair into 5 sections then secured each with a hair clip. Starting with the back, I spritzed it with water until it was soaking wet then finger detangled until my hair clumped into curls. Then I smoothed a little gel on the roots. Next, I raked a little more gel through all the way until the ends and gently shook out the curls. (aka the rake and shake technique)

    The application process took me about 35-40 minutes to do. Then used a diffuser to dry the ends and the concentration nozzle to stretch the roots.

    Everything seemed to be going well. Until I realized two things:

    FLAKES and MORE FLAKES


    That gel cast is NOT a joke.

    I also noticed that I stretched my roots a bit too much which made the top of my hair really flat. It was impossible to get a presentable pic of how bad it really was.

    www.savingourstrands.com


    So I pulled it up into a high puff and called it a day.

    I'm thinking that I'll try a new gel next week, do a clay rinse (to get those curls re-hydrated), and try not to blow-fry my roots again. Do you have any tips on getting your wash and go just right? Dimelo!

    Besitos!
    KLP


    May #WashDayExperience Themes

    Your #WashDayExperience themes are back for May! I don't know about you but my wash days have been...

    Boring

    Monotonous

    ...and completely uninspiring lately.

    Which is why I love #WashDayExperience themes! They actually give my wash days purpose and intention. For anyone new to the #WashDayExperience, you're probably totally confused! So let me back up for a second...

    W H A T   I S   T H E   # W A S H D A Y E X P E R I E N C E?

    The #washdayexperience is a place for ladies who are striving for healthier hair to share the hows, whats, whens, and whys of their weekly wash day ritual. It doesn't matter what state your hair is in: natural, colored, relaxed, texlaxed, curly, straight, or loc'd---ALL ARE WELCOME. You may share via blog/vlog, Insta, G+, Twitter, and Facebook.


    # W A S H D A Y E X P E R I E N C E   T H E M E S

    Wash day can be one part "omgosh I'm not here for this" and 4 parts "but I just don't wannnaaaaa". So Jen and I created a few themes to spice it up a bit. Here are your themes for May:

    Week 1: Summer Hair Prep
    Goodbye winter and hello summer! What are you doing to revive your hair for the summer? Which styles do you plan to try?

    Week 2: Hair Color & Care
    Are you thinking about coloring your hair (or have you already)? Henna? A Rinse? Permanent color? How are you caring for your color?

    Week 3: Voluminous Curls
    Big hair don't care! What is your favorite technique for big bad voluminous curls?

    Week 4: Next Day Hair
    Yes, your hair is perfect on wash day---but how do you style it the day after? What's your favorite next day hair style?

    HOW TO JOIN THE # W A S H D A Y E X P E R I E N C E

    Our look might have changed over the last year, but the rules for all this positivity are still the same:
    1. Share the direct link to your #WashDayExperience linkup. We go live every Wednesday.
    2. Add the #WashDayExperience badge to your post
    3. Give the chica that linked up before you a little comment love. 

    Stupid easy! Will you join the madness? Share a link to your blog below!

    Besitos!
    KLP

    PS: The themes aren't mandatory---just a way to have a little more fun! Si que claro, you can join without adhering to the themes!

    Friday, April 29, 2016

    That One Time They Came For My Edges...

    I live unbothered. Low key, happy go lucky, tunnel vision focus on my hubby, kids, and keeping my house from looking like a tornado hit it.

    People, places, things---they just don't irk me or my high puff. We sit. We play. We chill.


    Until that one time they came for my edges.

    So here's the story:

    I posted this volume check pic on social media with the caption: "Progress"


    Less than 30 seconds later someone wrote:
    "I can tell especially the edges"


    Hold up bruh...

    I had to look at what I posted again...just to make sure that I wasn't tripping. That some trolling computer gremlin hadn't switched up my post with somethang cray cray.


    Nope...no gremlins, no glitches, no vampires...no mistake.

    That comment was meant for ME...and MY EDGES...

    Then I am like...DID HE JUST COME FOR MY EDGES???

    Nah...He couldn't have come for my edges...


    That before pic doesn't have edges laid by the GAWDS.

    Those sideburns won't swooped for days.

    There ain't nothing sleek or slick about it..

    But honey, I'd rather have thick full frizzy edges than not have any at all.


    Yes...THAT was a READ. 

    The worse part:

    After his rude boi unmerited shady comment...

    I got a TON of questions asking how I grew back my edges...


    *hangs head*

    I politely answered, reiterating that won't nothing wrong with my edges before here's a link to my regimen, be blessed and highly favored blah blah...

    But I'm still kinda salty.

    When did slayed and laid edges become that IT thing? Do my baby hairs have to be sleek and slick in order to sit at the healthy hair table? Is that what we consider progress? And does that mean that if you don't---folks have the right to come at you for your edges?

    Idk y'all...

    I'm just not feelin it. And for my laid edge social media quality control brotha...

    I don't wanna sit at ya table cuz you mean and rude anyway...


    RANT OVER.

    Whew...Glad to get that off my chest. 

    Now I'm gonna go play in the rainbow glitter and positive pixie dust storm that that unicorns left in the backyard.

    What's your take on "laid edges?"

    Besitos!
    KLP

    Wednesday, April 27, 2016

    Kurly Klips are BACK! | The #WashDayExperience

    These Kurly Klips are EVERTHING.

    E V E R Y T H I N G !!!!!


    They're perfect for bad hair days, I don't feel like doing my hair days, and omgosh what's wrong with my hair days.

    Just the kinda days that I've been having.


    I've been washing my hair. But not really styling it. Which basically means that it's been the puff life for the last 2-3 weeks.

    RELATED: How I get the perfect high puff

    To get myself out of the rut + a quick protective style---I brought my Kurly Klips back into rotation.

    I know that it won't be long until I'm bored with them again (Just like last time). But that's cool. I trimmed my hair about a week ago and I picked up some Lush Caca Rouge Henna last weekend. 

    Yep yep...I'm ready to get my curls on fleek for the summer!


    How did you style your hair this week? Anyone else trying to get their hair summer ready?

    Besitos!
    KLP


    Tuesday, April 26, 2016

    3 Ways To Prepare Your Curls For Summer

    I'm so ready for summer! But, I'm not so sure that my hair is. I feel like I've got my minimalist regimen down pact. I know what styles...

    *clears throat* Hey Curlformers!!!

    ...worked for my hair during the cooler months. However, I think that it's time to give my curls a pick me up. Here's how I'm getting my hair ready for summer:

    Summer Natural Hair www.savingourstrands.com

    START WITH A TRIM

    My last trim was in December and although I'm not one to really trim on a schedule, I do want to start the summer without splits and single strand knots.

    RELATED: 6 Ways To Trim Natural Hair


    DEEP MOISTURIZING TREATMENT

    Y'all know how much I love deep conditioning my hair overnight. I talk about it constantly because iIt's a staple technique in my regimen. Plus I already know what will happen if I don't stick to what works for my hair. Last summer, I lived in my high puff. I didn't moisturize my hair regularly and my ends suffered because of it. In learning from my mistake, I want to be proactive instead of reactive and keep my ends in good shape.

    RELATED: Why I deep condition overnight


    RE-EVALUATE YOUR HAIR STYLE

    My curlformers have been very good to me, but I need to be realistic. I live at the beach and the humidity + heat + 100% chance of rain erryday just won't let me be great. I don't think that I'll turn into a wash and go pro, but I really want to find a styling technique that can work with the elements instead of revolting against them. Until then---I'll be rocking the mess outta these Kurly Klips!

    In what ways are you pepping your hair for summer? What's your signature summer style?

    Besitos!
    KLP

    Wednesday, April 06, 2016

    Corkscrew Curlformer + Flat Twist Out on Natural Hair


    www.savingourstrands.com

    I had such great success with my Spiral Extra Long and Wide (Pink and orange) Curlformer styling kit that I've really been debating on whether or not I wanted to invest in the Corkscrew Long and Narrow (Blue and Green) kit. These kits aren't cheap and ya girl ain't rich so I put those thoughts on the back burner for a while.

    Apparently someone over at HairFlair (the makers of Curlformers) heard about how I'd been screaming singing the praises of these little gems for months and they offered me the opportunity to try the corkscrew curlers for free.


    Yep.

    That's me.

    Happier than a 5 year old on Christmas.

    Anxiously, I put these bad boys to the test over the weekend. I used my usual products but I had to change my technique up a little bit.

    www.savingourstrands.com


    These curlformers are more narrow and my hair is pretty thick, so I wasn't sure if my set of 40 would be enough for my entire head. I decided to try a flat twist out---with the curlformers at the end.

    www.savingourstrands.com


    I did a total of 13 flat twists with 2 curlformers on the ends of each. Then I used the rest of the curlformers at the very top of my head for added volume. I also added a tiny dab of gel to the ends before installing to keep the curls smooth after take down.

    www.savingourstrands.com


    Here's what it looked like after take down.

    www.savingourstrands.com


    Then I had to fluff it like crazy because the curls were defined---but flat.


    I don't hate it---but I'm not sure if I love it either. For the first day, I did a half up/half down high bun. They next day, I pulled all of the curls over for a romantic sideswept look. I have to admit, the curls really held up well. My hair was super moisturized and the addition of that dab of gel on the ends was a game changer.

    www.savingourstrands.com


    Have you ever tried the corkscrew curlformers? Were they winners?

    Besitos!
    KLP