Wednesday, March 11, 2015

[Tutorial] Top Knot For Natural Hair | The #WashDayExperience


I'm celebrating the #WashDayExperience first anniversary by sharing the number one most requested pictorial ever. Well, maybe I'm exaggerating a little here. See...what had happened was that I do this style alll the time and every time that I do, y'all ask me for a pictorial...soo...yeah...what was I saying---most requested blah blah yada yada... I'm finally showing you guys step by step how I pull off my fluffy top knot.


What you'll need:
Moisturizer: (My favorite is Jessicurl Too Shea)
Hair Ties (Karina Elastic Ties are great)
Hair Pins: (You can never have enough Conair Black Bobby Pins)
Hair Brush (I use my hubby's...don't tell him!)


  1. Detangle and moisturize hair then gather hair at the top of your head securing with a hair tie making a giant puff. (Sometimes, I have to secure the hair tie with a hair pin on each side.)
  2. Divide the puff into 6 equal parts.
  3. Using only the two front sections, cross them forming an X, then wrap around the base of your puff. Secure ends with a hair pain or tuck under the hair tie.
  4. Using only the two middle sessions, cross them forming an X, then wrap across the top of your puff. Secure ends with a hair pin (once again, if your hair is longer, tuck your ends under the hair tie.
  5. Using the remaining back two sections, cross them forming an X, then wrap across the around the base of your puff. 
  6. Fluff your top knot until it's the right size for you.

This style outlasts spin class, long distance running, rain, summer humidity, and snow. And I know because I've lived in this top knot at least once a week for the last year. It was a perfect way to blend my roots and my relaxed ends while I was in my relaxer-stretch-turned-transitioning.

So there you have it! The most requested #WashDayExperience style on SavingOurStrands! Let me know if you re-create it!

How was your #WashDayExperience chica? Share the dets below!


Saturday, March 07, 2015

[Hairstyle] Wedding Hair Inspiration


Hola Chicas! 


I am in the midst of planning a wedding! Ahhhh... It is getting quite real! :P I wanted to share a few of my bridal hair ideas and see if you all had any more ideas for inspiration. 

Here is a little information about wedding! It will be rustic and elegant. I am having a late August wedding with a outdoor ceremony/cocktail hour and our reception within a lodge that looks like a "log house" with a GORGEOUS fire place. A lot of things are DIY so this summer will be quite busy! hehe 

My fiancĂ© Mark was born and raised in Hawaii, so I will be wearing a traditional Haku Lei (flower crown) over my head and he will be wearing a Ti Leaf lei. These are meant to ward off bad spirits and to further bring happiness in our marriage! :) And they look gorge! So, naturally, I have some ideas... Check them out! 


1. Braided Crown with Flowers -- I think this style is gorge! I think it would definitely fit my face and my dress. The Haku Lei would also fit perfectly atop my head in this style or it can even be worked through my hair. 


2. Long Side Loose Braid  -- This would also be quite lovely. However, I am worried about my hair making me hot if it is on my neck the entire time. But it has a nice flow to it! 


3. Knotted Side Swept Up-Do - Again, the Haku Lei would fit perfectly atop this style. I think it goes lovely with my dress and envisioned jewelry. I also think that it will not make me hot with this and actually help keep me cool. 


These are my top inspirations and ideas for my wedding day! If you have some, let me know! Here is my dress so you get an idea of my style... :D CAN NOT WAIT FOR MY FITTING!  


Let me know your thoughts and ideas! 

xoxo
Keyda


Friday, March 06, 2015

The Best Foam Roller Routines on YouTube | #FtinessFriday


My half-marathon training is back in full swing. I've been running somewhere between 30-40 miles a week and O to the M to the G am I sore! I finally caved and picked up the foam roller that was on my half-marathon lust list from my local sporting goods store last week. As I walked gingerly into my house, I went straight to YouTube for guidance. And here are the best foam roller routines that I found:


Tone It Up: Frisky Fall Foam Roller Routine!


I love the ladies at Tone It Up. Karina's Foam Roller Routine is intense and thorough. What I love about this routine is that it works the upper body, lower body and you even get some core work in thereh too. Foam rollers aren't fun---but I feel GREAT after these stretches.


Full-Body Rolling Out Routine | Perfect Form With Ashley Borden


Ashely Borden is an amazing fitness instructor and I adore her foam roller routine. She offers great tips and tricks for newbies while also explaining how to make your foam roller routine more intense as your body gets used to pressure. She goes rather quickly through the different moves---so if you didn't catch it all or you need a written reference, check out her website for her FREE rolling out guide.


Dr. Sarah Solomon- Foam Rolling, Stretching, Postural Correction & Ergonomics


Sarah is a fitness beast--model, instructor, coach---all that jazz. I love her foam rolling routine because she stresses the importance of stretching for injury prevention and treatment---both things that I need! Her video is in real time and super easy to follow. Once I get used to foam rolling (aka it doesn't hurt like heck anymore!) I'm definitely going to upgrade to the advanced rumble roller that she uses.

My goal is to get into the habit of foam rolling every day! Fingers crossed that I can make it!

What's your favorite foam rolling stretch?

Besitos!
KLP


Wednesday, March 04, 2015

[Hairstyle] 7 Days 7 Ways | The #WashDayExperience


Have you ever gotten into a hair rut? Same style day in and day out? I realized that I was becoming obsessively addicted to my lazy low bun. So, I decided to challenge myself to a week of no repeats. Plus give you guys an inside look into what I do with my hair between wash days!


DAY 1: Deep Condition + Perm rods
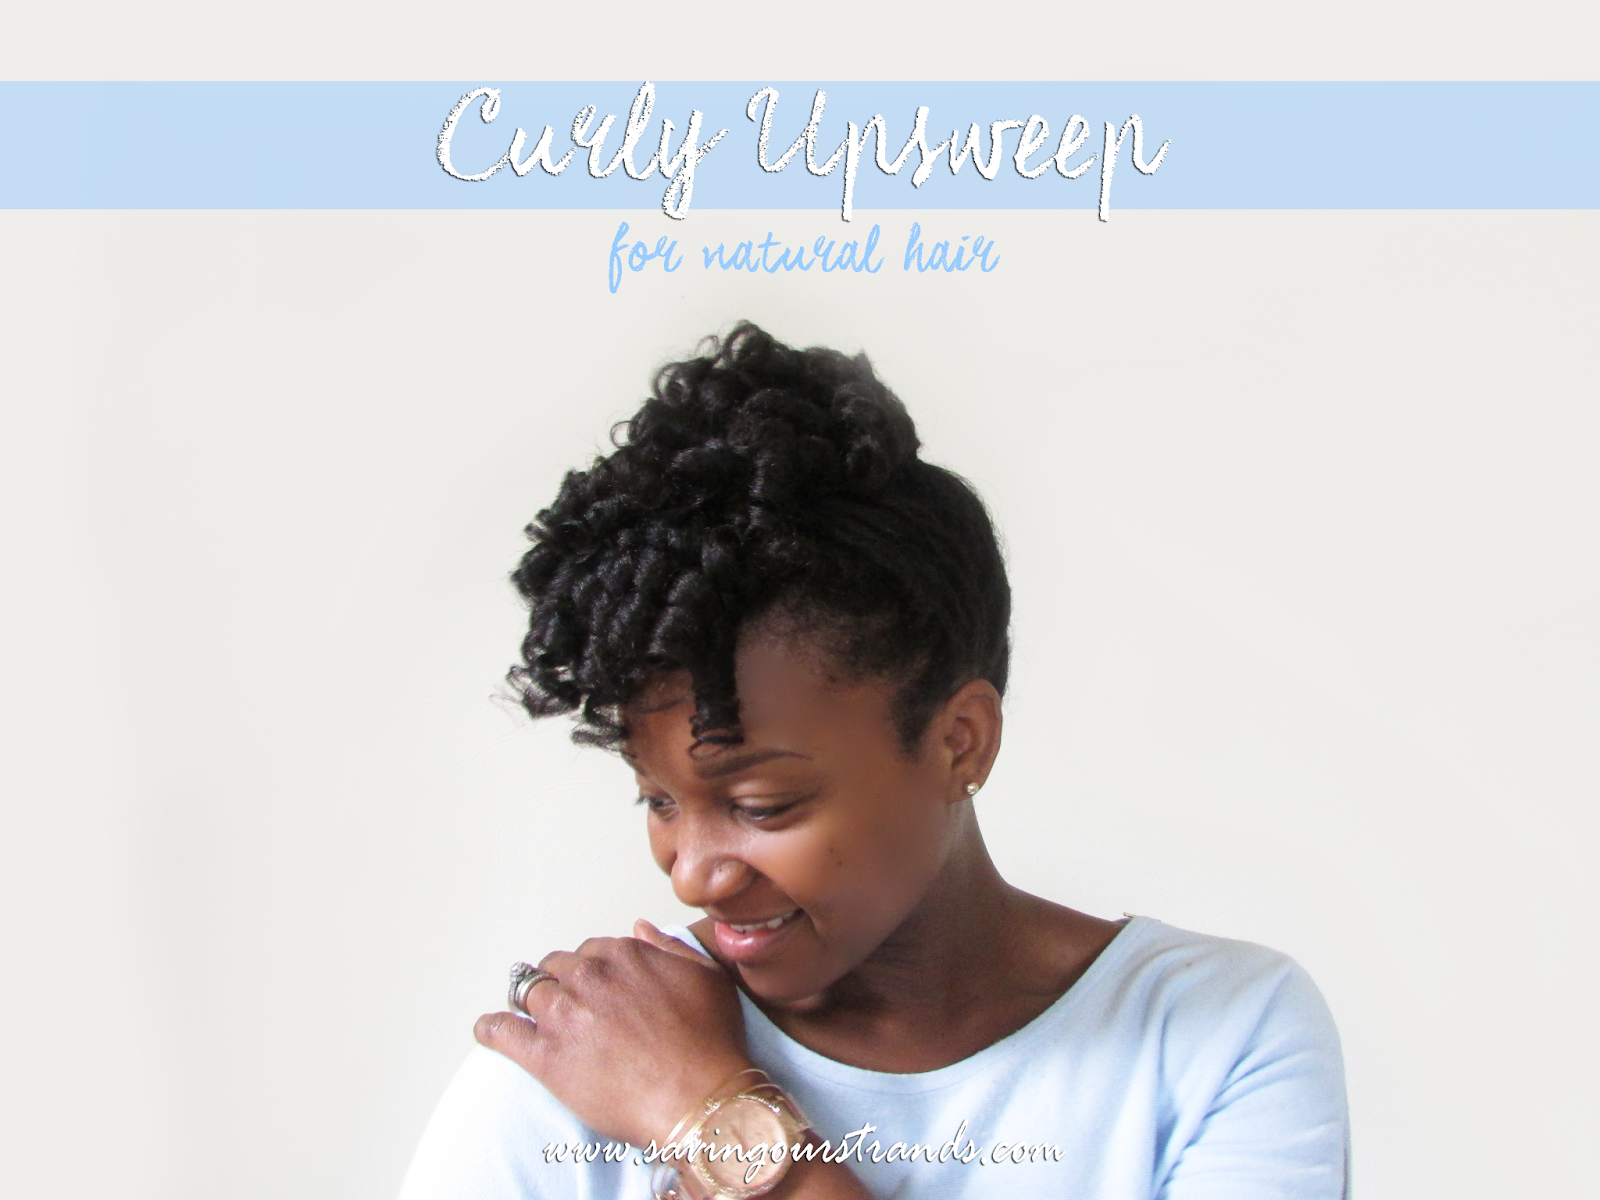
Curly Upsweep

Starting with last week's #washdayexperience, here's my curly upsweep. I adored this look. It was so simple but still really classy. Truth be told--I didn't plan on getting this look, when I pulled down my perm rods, the curls were super defined and really tight. I didn't want to fluff them to death and possibly ruin a chance at a good next day style so I pulled them up into this do.


Then, I went beast mode in cardio kickboxing. Poor poor curls didn't stand a chance. I get asked a lot how long my perm rod curls last. Honestly, I really don't know. I workout 5-6 days a week and the purpose of a perm rod set to me is to stretch my hair and make styling easier in the days after. I'm so sorry guys!
 
That night, I took what reminded of my curls and flat twisted them in 6 sections. I secured the ends with white perm rods and went to bed. Surprisingly, it only took me 15 minutes to set my hair. #winning.


DAY 2: Low Manipulation Style
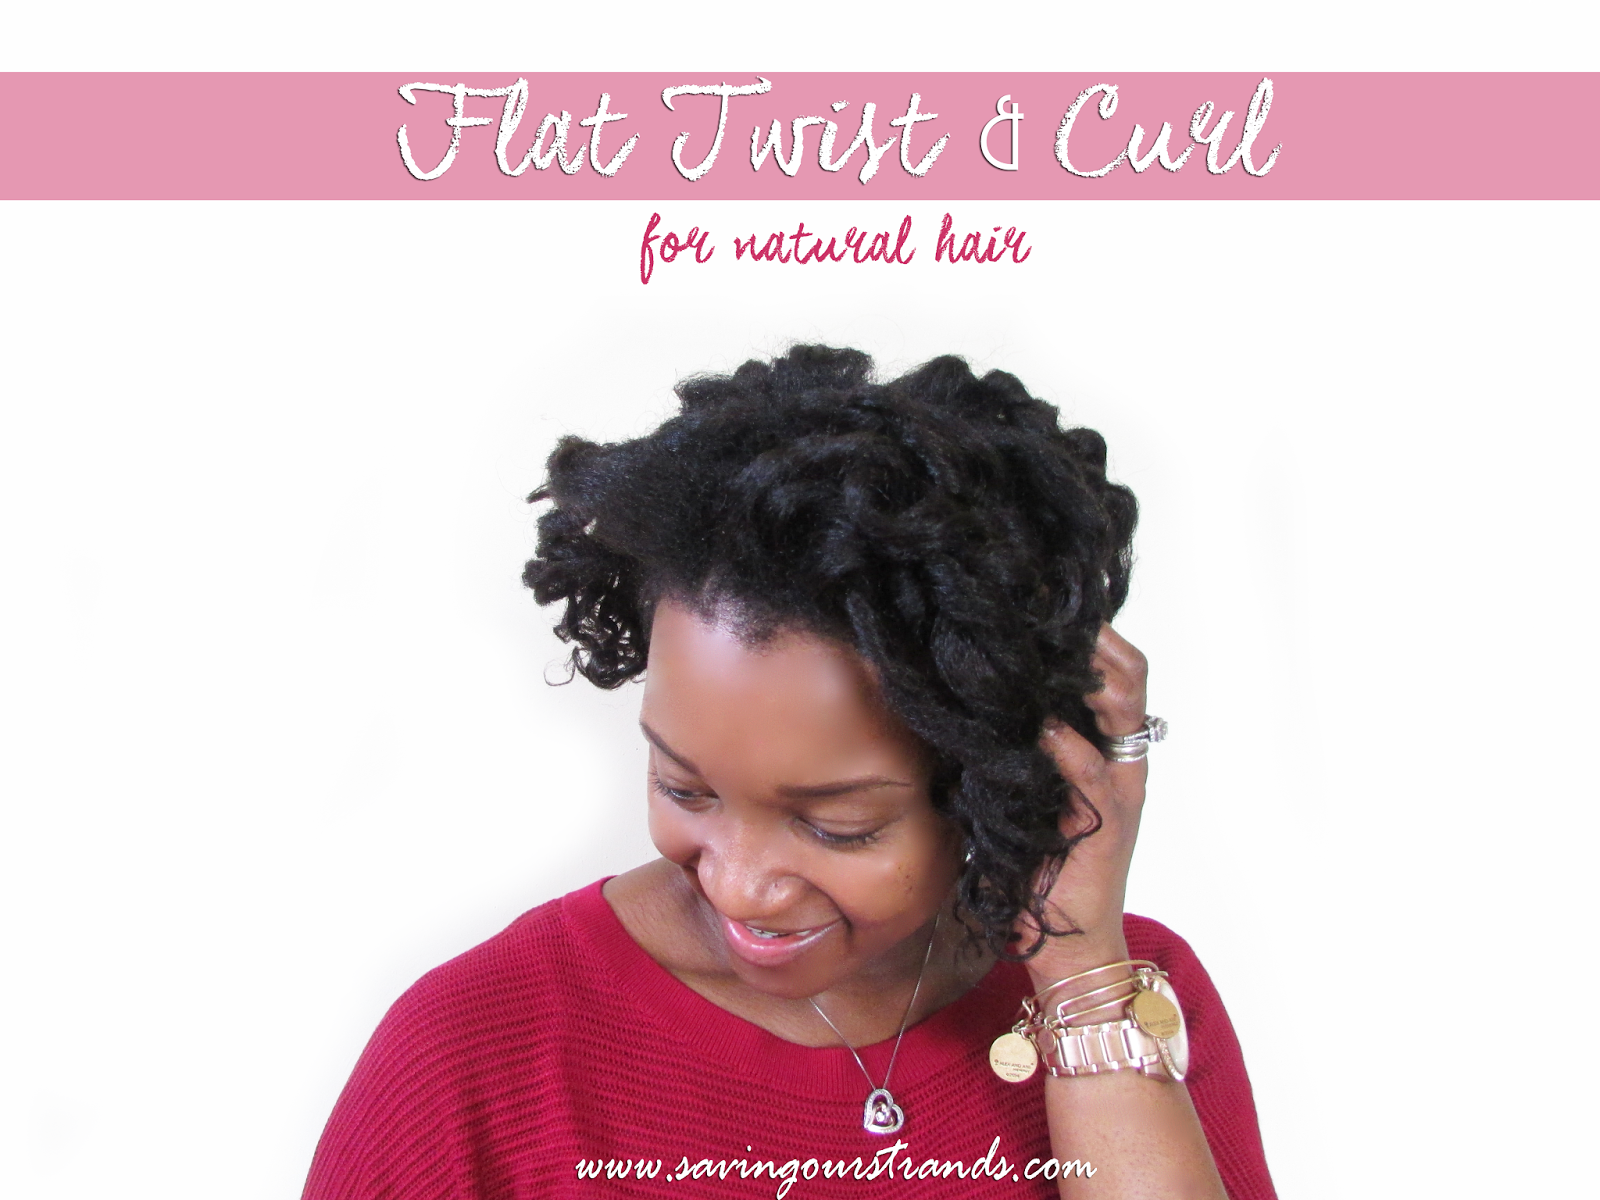
Flat Twist Out and Curl

This was one of my favorite styles of the week! I wasn't really expecting much from my flat twist and curl. After suffering from years and years (I'm NOT exaggerating here y'all. My twist outs have served epic hair fail after epic hair fail) of really bad twist outs, I've learned to lower my expectations. So when this style actually looked presentable, I twirled y'all! That night, I bantu knotted my hair in 6 sections and went to bed.


Both of my successful twist outs have been done on stretched hair---I think that I might be ready for a more defined wet set! Fingers crossed that it doesn't look all jacked up!


DAY 3: Protective Style
Head Band Tuck x2

I must have bantu knotted my hair in the dark--with one hand tied behind my back---because my curls were really wonky.  Whenever I don't know what to do with my hair, my go to style is the Head band tuck.

After looking at the pictures, I really hated my first take. So I took it down, shook my head around to loosen up the curls more then tried again. For the second take, I skipped the jeweled headband, let a few curls frame my face and made the tuck tighter on the sides. Much much much better!


DAY 4: Co-wash + Protective Style
Banana Clip French Tuck


I deep condition or co-wash my hair every 3-4 days. This isn't really new, but since my big chop it is definitely easier to commit to because my hair doesn't tangle in the wash! I applied Carol's Daughter Black Vanilla Moisturizing hair smoothie to my dry tangle free hair, massaged a little extra virgin coconut oil on top, then covered with a plastic cap and let it sit for a while without heat. I used this conditioner last summer (You can check it out here) but it didn't wow me. This time, I was intrigued by how soft and fluffy my hair was when I rinsed it all out. In fact, my hair was so moisturized that I didn't use a leave in conditioner after wards! I just added a little more extra virgin coconut oil then pulled my hair into this french tuck using a banana clip and 3 large bobby pins.


I really struggle with styling my wet hair. Right now, I'm all about stretched hair so I don't usually allow my hair to dry without being stretched. Luckily, this style is a 1-2 combo. It stretched my roots and kept my ends moisturized. That night, I removed one side of the banana clip to loosen it up then covered with my scarf.


DAY 5: Protective Style
Top Knot

My roots were beautifully stretched from my previous style so it made it super easy to pull my hair up into this top knot. I just pull my hair into a high puff, twist it into 4-6 sections then wrap them around to form a bun. Okay...that explanation was terrible. I owe y'all a tutorial! 

That night, I covered with a scarf and went to bed.


DAY 6: Protective Style
Knotted Updo

I'm perfectly obsessed with knotted hair styles right now! I revisited my knotted updo from a few weeks ago. But I kinda forgot to take pictures---so y'all get stuck with the one from the tutorial.

I didn't need to band my hair this time---it was already stretched from the previous day's styles. before knotting, I moisturized with Jessicurl Too Shea Conditioner---my favorite leave in of allll time---and sealed with a little hair butter. 


Day 7: Protective Style
Goddess Braids

With my half-marathon training back into full swing, I dawned a set of Goddess Braids for my long training session. 7+ sweaty miles later, every single hair was still in place. Even though my hair still felt really moisturized, it's time to wash and start the process all over again!


So now you know my terrible dirty little secrets. I don't moisturize and seal daily. I wash my hair frequently. I live in protective styles. I hope you still like me! Ha-ha!

Would you take the 7 days 7 ways challenge?

How was your #washdayexperience?

Besitos!
KLP


Friday, February 27, 2015

3 Tips for Exercising With Natural Hair | #FitnessFriday


I'm only a few weeks post big chop, but I'm totally not new to the struggle to keep your hair looking cute and going beast mode in the gym. Here's how I'm managing---so far.

Instead of shampooing---co-wash

If you workout more than 4 hours a week, you should probably be washing your hair twice a week. Shampoos tend to strip my hair so, I started co-washing a few summers ago while I was stretching my relaxers. Co-washing made my roots soft and fluffy. While it kept my scalp free of sweat, dirt, and grime. I was able to prevent my ends from knotting by detangling pre-wash and then washing in sections. Since my chop, I'm loving co-washing even more! My hair actually doesn't tangle anymore! #winning.

Protective Styles

I love me a good protective style! Top knots, low buns, halo braids,  french twists. You name it---I'm about it. If you're used to having your hair free, then it will take a lot of getting used to, but I promise that your hair will thank you. Plus in an updo--you won't have to fuss about with your hair!


No heat

If you love a wash-and-go---then you're good to go. But if you're like me and not about that life (yet) then you need to find a way to stretch your hair...without heat. Damage from using heat tools too frequently is real! Make air drying will be your friend. I've been using the banding technique for about a 1 1/2 year (even before I big chopped) to stretch my hair. You can find the dets here.

What are your tips for keeping your hair cute while you get your sweat on?

Besitos!
KLP


Wednesday, February 25, 2015

[Hairstyle] Curly Upsweep (Perm Rods) | #WashDayExperience


My natural regimen and my stretching-turned-transitioning regimen hasn't been all that different. Plus so far all of my favorite products since work like a charm! Thank ya Jesus! Here's how my #washdayexperience went:


  1. Extreme Deep Condition- As I detangled my hair in sections, I applied Jessicurl Deep Treatment from root to tip then massaged in a little extra virgin coconut oil to seal the conditioner in. I covered with a plastic cap and sat under my heat cap again for about an hour. 
  2. Air dry- After rinsing the deep conditioner, I blotted my hair with a cotton t-shirt, applied a little extra virgin coconut oil in sections then wrapped it in the t-shirt to dry a bit more.  
  3. Leave-ins- My hair was about 80% dry when I applied a mist of Nexxus Humctress Luxe Leave In, Jessicurl Too Shea Conditioner and a dab of my hair butter then I set my hair on a mix of purple and white perm rods. I let them dry overnight. 

The Results:

My hair loves everything about Jessicurl Deep Treatment. It's crazy thick, dreamy creamy, and simply one of the most moisturizing deep conditioners that I've ever used. If they ever changed the formula, I'd cry. No seriously...I'd cry ugly Oprah crocodile tears. That's how much I love this stuff. 


I co-washed a few days before this #washdayexperience so I didn't shampoo. My scalp felt clean and my hair was actually well moisturized. I probably could have waited another day or two to wash but one thing that I've discovered since chopping is that my hair behaves a lot better when I wash every 3-4 days as opposed to washing once a week. I sorta knew this before I chopped but dealing with the tangling between all my textures just didn't make bi-weekly wash sessions it worth it. It seems to be a mortal sin to wash more than once a week around the healthy hair community but whatevs y'all. If it works---it works. If it doesn't---it doesn't. So far---it's working. 


I'm in love with the way that my curls turned out. The mix of purple and white rollers gave my curls dimension and a fullness that orange rods hadn't since I chopped. To style, I pulled all of the curls up and to right side then secured with a bunch of pins. Easy peasy!

How was your #washdayexperience?

Besitos!
KLP


Tuesday, February 24, 2015

[Tutorial] Easy Knotted Updo for Natural Hair


I know that this style looks quite complicated, but I promise you that it's not. PLUS it takes all of 5 minutes to do. If you struggle with braiding your own hair, are transitioning and want to hide your ends, or just looking for an easy protective style then this is the updo for you! It's literally a row of knots pinned into a bun. Here's how I do it:
  1. Make a heavy side part then position your bangs behind your ear (if necessary).
  2. Starting that your crown, grab two large sections of hair. 
  3. Loop the section into a knot. (Like you would tie two pieces of string together) Place a bobby pin through the center of the knot to secure.
  4. Hold on to your previous sections, plus gather a little more hair in each hand. Loop another knot. Secure with a bobby pin. 
  5. Repeat step 4 again and again until you reach your nape. I did 4 knots. If your hair is longer or you use smaller sections, you may need to do more knots.
  6. Tuck the reminding hair around your final knot and secure with a bobby pin on each side. 

Polish the look by smoothing your edges with little edge control. (My favorite is Chi Twisted Fabric) Then cover with a satin/silk scarf to tame flyaways.

Oh and of course this look is gorgeous on straighter hair too. Check out Keoshia's sleeker Knotted look:


So what do you think? Is this one worth a try?

Besitos!
KLP

Friday, February 20, 2015

My #FitnessFriday Lust List

Since confessing my half-marathon fails to you guys last week, I feel re-energized and focused. I was able to get a couple really good runs in before my part of the world got hit with a super cold arctic freeze that dumped 1/2 - 1" blanket of ice over everything. My times were fanastic and surprisingly my endurance was even better. It kinda made me wonder if my month break was exactly what my body needed. Anywhos, while I was out running in the I cannot believe that its this cold at the beach weather, I realized that I was going to need to add a few more items to my half-marathon running gear just in case it's this stupid cold next month. Here's what's on my #FitnessFriday Lust List today:

1// Nathan Trail Mix Hydration Belt ($45)
I've never been a fan of hydration belts. I was afraid that they would be bulky or bounce about while I ran. I'm incredibly clumsy just standing still, so attempting to run, pull a water bottle out, drink from it, and put it back is going to take some serious practice. #judgeme #imterrible But after my 20 mile run/walk a few weeks ago, I realized that there is no way that I can tackle long distances without water. Before my half-marathon, I'm definitely investing in a hydration belt so that I don't die. The added bonus: it's roomy enough to hold my keys, a couple of dollars, and my id. #winning Plus my running buddies from BGR say that this Nathan belt is amazing.

2// Under Amour Knit Gloves ($18)
I already have really warm moisture-wicking (texting) running gloves, but in this cold, they just aren't enough to keep my fingers warm! I'm hoping that another layer of cozy knit warmness will do the job.


3// Under Armour Knit Beanie ($18)
Monday, I ran in 20 degree temps. While my body was super warm and my ear-warmer headband kept my ears nice and toasty. But my head was COLD! This cute little Under Arnour Knit hat matches my running jacket, is sweat resistant and has coating that retains body heat! I can not believe that I'm this siced for a hat. #runninggirlproblems

4// Foam Rollers (price varies by size)
Another bit that I learned from my 20 miler. I hate foam rollers. But OMG that are a necessary evil. Especially if you---maybe want to walk the day after a ridiculously long run. Once I started running 10+ miles I noticed aches and pains in all kinds of muscles that I never knew that I had. Foam rollers are excellent at working out the kinks.

Cross your fingers that the hubster is reading!

What's on your #FitnessFriday lust list?

Besitos!
KLP


Thursday, February 19, 2015

[Review] DermOrganic Products {Keyda}


Hola Chicas!
Over a month ago, I stumbled across "DermOrganic" as I was shopping for my DC. After reading the ingredients, I was intrigued as I desperately need to keep the moisture and strength in my hair. So, I bought travel size bottles of their shampoo, conditioner and hair repair masque. I wanted to use it for a significant amount of time before reviewing. I must say this might be a new found treasure. :) 


DermOrganic Daily Conditioning Shampoo with Argan Oil 


Ingredients:Aqua/Eau/Water, Disodium Cocoyl Glutamate, Decyl Glucoside, Sodium Cocoyl Isethionate, Cetearyl Glucoside, Methyl Gluceth-20, Argania Spinosa (Argan) Kernel Oil, Helianthus Annuus (Sunflower) Seed Extract, Vitis Vinifera (Grape) Seed Extract, Rice Amino Acids, PCA, Panthenol B5, Tocopheryl Acetate (Vitamin E), Glycereth-2 Cocoate/Benzoic Acid, Parfum/Fragrance
 

Directions:
Apply to wet hair, massage, and rinse. Follow with DermOrganic Masque and/or DermOrganic Daily Hydrating Conditioner.
 

The Real: I absolutely love how clean it makes my scalp/hair feel. It also lathers up really well and there is still a lot in my "travel" size container. You only need a small amount to fully clean your hair. With my increase in tangles, it helped tremendously to detangle my hair and make it more manageable. I have actually found pre-detangling now less of a headache (still a small one lol) and more manageable as I have used DermOrganic consistently. My scalp has also been less irritated as well. During the winter and stressful times, my eczema gets pretty bad and effects my scalp as well. And it is winter...and I am planning a wedding... lol 


DermOrganic Daily Conditioner


Ingredients:Aqua/Eau/Water, Caprylic/Capric Triglyceride, Stearalkonium Chloride, Stearyl Alcohol, Cetearyl Alcohol, Panthenol B5, Rice Amino Acids, Methyl Gluceth-20, Organic Argania Spinosa (Argan) Kernel Oil, Tocopheryl Acetate (Vitamin E), Organic Helianthus Annuus (Sunflower) Seed Extract, Organic Vitis Vinifera (Grape) Seed Extract, PCA, Glycereth-2 Cocoate & Benzoic Acid, Parfum/Fragrance.

Directions: 
Apply and distribute throughout clean hair, then rinse. Follow with DermOrganic Leave-In Treatment or DermOrganic Shine Therapy.
 

The Real:  
My hair is in a very weird phase to me haha! I have not had a touch-up since July and I am ensuring there is minimal damage to my hair while it still grows. This conditioner is AWESOME! It has helped detangled my hair and has really been beneficial to both my natural/texlaxed strands. It adds a nice shine as well but it mainly helps keep my strands not as frizzy. 


DermOrganic Intensive Hair Repair Masque 

Ingredients:Aqua/Eau/Water, Cetearyl Alcohol, Behenamidopropyl Dimethylamine, Stearyl Alcohol, Caprylic/Capric Triglyceride, Organic Argania Spinosa (Argan) Kernel Oil, Organic Vitis Vinifera (Grape) Seed Extract, Organic Helianthus Annuus (Sunflower) Seed Extract, Methyl Gluceth-20, Rice Amino Acids, Panthenol B5, Tocopheryl Acetate (Vitamin E), Glycereth-2 Cocoate/Benzoic Acid, Parfum/Fragrance.

The Real: Again, another hit for DermOrganic! I am not a huge fan of the smell but it works. It also does not have much slip but you can work it through your hair. It made my hair feel soft right away and I noticed stronger hair after the second use. 


Overall, I definitely want bigger sizes of the products and to rotate this product in my regimen. Especially, since I am not sure when/if I will be getting another touch-up. I will be seeing what other products DermOrganic has and may give them a try. With natural ingredients and a great feeling in my hair...I might have a winner! We shall see... 


Have you tried this before!? 


xoxo
Keyda 


Wednesday, February 18, 2015

[Hairstyle] Knotted Updo for Natural Hair | The #WashDayExperience


After reading about all of the lust worthy protective styles that you guys were sporting last week---I kinda felt left out! So this week, I skipped the bantu knots, perm rods, and twist outs for something simpler. Here's how my #washdayexperience went:


  1. Pre-Shampoo- To start, I gently detangled and applied Aussie Moist 3 Minute Miracle from root to tip. I massaged in a little extra virgin coconut oil to seal in the conditioner, covered with a plastic cap and sat under my heat cap again for about an hour. 
  2. Shampoo- I rinsed the pre-shampoo treatment then shampooed my hair with Matrix Biolage Hydratherapie Shampoo once.
  3. Protein Treatment- After using a cotton t-shirt to absorb most of the water, I applied Joico K-Pak Revitalisant (the cheaper thinner cousin of K-Pak Revitaluxe). I left it on for about 20 minutes before...
  4. Extreme Deep Condition- rinsing and applying Matrix Biolage Ultra-Hydrating Balm + a little coconut oil. I covered my hair with a plastic cap, sat under my heat cap for an hour, then left it in over night.
  5. Air dry- After rinsing the deep conditioner, I blotted my hair with a cotton t-shirt, applied a little extra virgin coconut oil in sections then wrapped it in the t-shirt to dry a bit more.  
  6. Leave-ins- My hair was about 80% dry when I applied a mist of Nexxus Humctress Luxe Leave In, Jessicurl Too Shea Conditioner and a dab of my hair butter then I faux banded my hair in 4 sections to stretch it.
The Results
I dusted my ends again. I know I know. I'm borderline obsessed with trimming right now. But I've come to terms with a few things in the last couple of weeks:
  1. I love love love this long bob cut. It's not too short and it's not too long. I can still get my hair into a high bun and a cute little low bun. I love it so much that the thought of growing it out makes me really sad. 
  2. I'm probably going to end up at the same length at the end of 2015 that I was at the end of 2014. Because...
  3. I'm going to keep dusting and made do a mini chop or two until I'm certain that all of the texlaxed bits are gone. 
  4. I have no idea how long that's gonna take. LOL


I caught a lot of flack when I professed overnight deep conditioning last year. So here's the thing: do what works best for your hair, your lifestyle, and your goals. If that doesn't include overnight deep conditioning---you're a lucky chica! And if it does---woot woot for you! There are no right and wrong answers. Just do you!


To stretch my hair, I faux banded it in 4 sections. I've been faux banding my hair for almost a year now and it's my favorite way to elongate my hair without heat. The process is incredibly simple. I just detangle in sections, apply product then stretch the hair and hold it with a hair clip. Uber simple!


To style, I opted for a 5 minute knotted updo. If you struggle with braids, are transitioning and want to hide your ends, or just looking for an easy protective style then this is the updo for you! Here's how I did it:
  1. Make a heavy side part then position your bangs behind your ear (if necessary).
  2. Starting that your crown, grab two large sections of hair. 
  3. Loop the section into a knot. (Like you would tie two pieces of string together) Place a bobby pin through the center of the knot to secure.
  4. Hold on to your previous sections, plus gather a little more hair in each hand. Loop another knot. Secure with a bobby pin. 
  5. Repeat step 4 again and again until you reach your nape. I did 4 knots. If your hair is longer or you use smaller sections, you may need to do more knots.
  6. Tuck the reminding hair around your final knot and secure with a bobby pin on each side. 
How was your #washdayexperience? 

Besitos!
KLP


Friday, February 13, 2015

My Half-Marathon Training Fails | #FitnessFriday


I was a beast out the gate. My first month of half-marathon training was amazing. I was getting stronger. My endurance increased. I broke every single personal record that I had ever made.


Then....well...life happened.


And I didn't run for a month...

I feel like such a failure.

I feel like I have some xplaining to do. I swear that I have legit excuses reasons...

https://morethanamilitaryspouse.files.wordpress.com/2012/11/milwifeecard.jpg

Military Life:
My superhero hubby went off to save the world away from home for a few weeks. While I'm uber proud of his hunky heroism, I won't lie, the separation stinks. Especially with two young children. Especially with a crazy demanding schedule. Especially in a new town. And especially without a solid support network. Finding time to take a shower was hard enough. Running didn't even make it on the to-do list.

http://www.yousignedupforwhat.com/wp-content/uploads/2014/01/Elsa-polar-vortex.jpg
Winter stinks:
I've run in temps as low as 20 and loved every minute of it. However, without the hubby to lean on, the minions would have to ride along in our double jogger. And while, I've come to enjoy running in the cold---I just won't take them out in anything below 40. How many above 40 days have we seen lately? Smh...not that many.

No gym:
Finding a gym has been on my to do list for months. MONTHS y'all. I'm picky and I'm ballin on a budget. My ideal gym has to be within 5 miles of my house, have a great childcare center, and offer group classes when I can actually attend them. Who knew that it would be this hard or this time consuming to find something that works?!? 

But this update isn't alll bad. I have accomplished a few crazy awesome things in the meantime.

Displaying PART_1419784487005_20141228_113404.jpg

20 miler
I ran 10 miles and then walked back 10 more miles. Crazy right?!? Yeah, didn't think that through. While I was running, I took note that I needed to invest in a water carrying system that's actually easy and functional to use. I also realized that running/walking that distance on an empty stomach is dumb dumb dumb. But that running/walking that distance with a low cell battery was even dumber! Nonetheless, I'm just proud that I made it back!


Better Eating Habits
Because I wasn't working out as much, I wanted to do my best to get things right in the kitchen. I focused on getting more fruits and veggies in my diet thanks to my obsession love affair with my NutriBullet. I even started logging my food in my FitBit and I increased my water intake.

Now that the hubster is back, I'm a little pverwhelmed by the amount of catching up that I have to do. My half-marathon is 5 weeks away! I don't want to stress about it but I also don't want to disappoint myself. *Le sigh* Wish me luck! I'm gonna need it!

Besitos!
KLP