Wednesday, January 27, 2016

[Tutorial] Braided Headband Tuck For Natural Hair | The #WashDayExperience


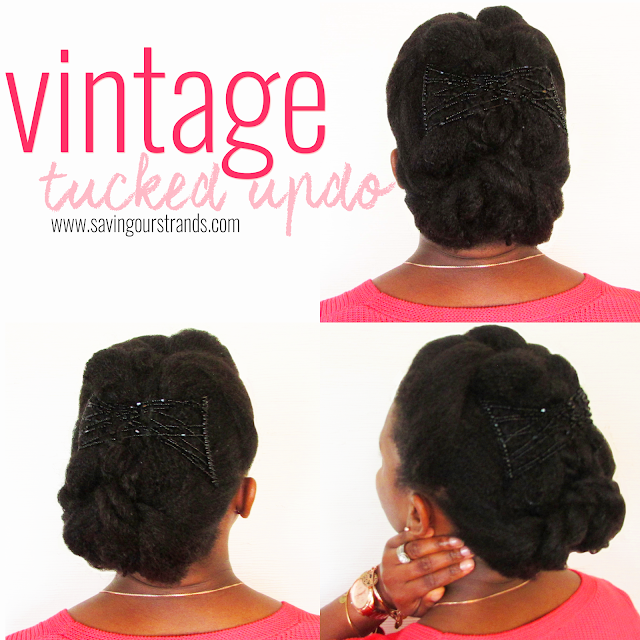
My Vintage Tucked updo (you can check it out here) from last week was super cute and kept my ends tucked away but OMG now I remember why I don't use that Scuni Upzing that often; It gives me the worse headache! After two days of my updo, I pulled it down and rocked a twist out.


Then it snowed/rain/sleeted all over the best twist out I've ever gotten. *sad face* *shakes angry fist at the universe* Why won't you let me be great?!?

I had no choice but to wash my hair. Here's what I used:


Pre-shampoo- DIY Moisturizing Mist (tutorial here) + Herbal Essences Hello Hydration Conditioner (review here)
Shampoo- Jessicurl Cleansing Cream (review here)
Deep Condition- Jessicurl Deep Treatment Conditioner (review here)
Oil Rinse- Green Tea Infused Hair Oil Rinse (tutorial here)
Leave-Ins- Jessicurl Too Shea Conditioner (why I love this stuff here) + DIY Hair Butter

And here's how I did it:
I started my spritzing the ends of my hair with my DIY Moisturizing Mist (tutorial here). I initially created this concotoion to moisturize my hair between washes, but now I also use it to detangle pre-wash thanks to an amazing tip from my linkup partna in crime Jen at JGA! Then I slathered my hair root to tip in Herbal Essences Hello Hydration (which has amazing slip btw! You can check out my full review here)

I hopped in the shower, shampooed with Jessicurl Cleansing Cream (review here) and rinsed. Next, I deep conditioned with my all time fave conditioner Jessicurl Deep Treatment Conditioner (review here), coated my ends in Extra Virgin Coconut oil to seal in the conditioner and plopped under my hooded dryer for about an hour.

RELATED: Why I'm in love with the Coco (Coconut Oil of course!) 


After rinsing the conditioner, I used a narrow tip applicator bottle (Like this one of these) to apply my latest potion: A Green Tea Infused Hair Oil Rinse---in honor of this week's #washdayexperience theme "Tea for Two" (Wondering what the heck it is or how to make it? Read the tutorial here) I let the oil sit in my hair for a few minutes then rinsed.

GIIIRRRLLLLL....

I can't even describe it...


Let's just say that I will DEFINITELY do this again, especially with this disrespectful cold weather floating around! My hair felt crazy moisturized strong but soft. I t-shirt dried for about 10 minutes then installed my beloved Curlformers using Jessicurl Too Shea Conditioner (why I love this stuff here) + DIY Hair Butter as my leave ins.


My curls were gorgeous, but I wanted an updo, so I whipped my hair into this Braided Headband Tuck. Here's how I did it:


  1. Begin with stretched hair (I stretched my hair using Curlformers.) Then create a heavy side part.
  2. Secure your bangs with a hair clip.
  3. Using a stretchy headband, place it at the crown of your head. (It might shift about now. That's cool. We'll get it to stay put in just a sec.)
  4. Now braid your bangs and incorporate hair from the front and behind the headband. (Trust me---it will look cute) Continue the braid until the end of your hair
  5. Gently pull on the sides of the braid to make it wider (and fuller)
  6. Then tuck it into the head band
  7. Now tuck the rest of your hair into the head band one section at a time until the headband is hidden.
Optional: Polish the look by smoothing your edges with little edge control. I finally ran out of Chi Twisted Fabric so I used Curls Blueberry Paste instead.

How did you style your hair this week? Did you use a tea rinse? Share the dets with the rest of our healthy hair tribe below!


Tuesday, January 26, 2016

Green Tea Infused Oil Rinse for Natural Hair


My love affair with green tea rinses began when my hair was relaxed, I was suffering with  postpartum shedding, and I just wanted a way to slow down the shedding. You can read about my many adventures with green tea rinses here, here, and here.

RELATED: Herbal Tea Rinses to Combat Shedding

I don't shed like crazy anymore, but in honor of tomorrow's #WashDayExperience themes, I decided to experiment with tea again. This time---for a Green Tea Infused Oil Rinse!

How I made it:
  1. Place 3 green tea bags in a glass mason jar. (I used Celestial Seasonings Green Tea)
  2. Cover with 1 cup of warmed extra virgin coconut oil (or other carrier oil of your choice).
  3. Bring a pot with 2-3 inches of water to the brink of boiling. Turn off heat. Place the jar in the the water for 15-20 minutes. 
  4. Carefully remove jar from hot water. Cover with lid and steep overnight. 

And here are semi-scientific reasons green tea oil rinses rock:
  • Tannins- is an astringent compound that binds to and precipitates proteins in plants. The tannins in tea can attached to the hair shaft making the hair appear fuller. Tannins have antibacterial properties that can help soothe itchy/flaky scalp issues that would increase shedding. The tannins also tighten pores, which better protects your scalp from excessive oil and dirt while strengthening your strands to prevent damage.
  • Caffeine- Green tea has 35mg of caffeine. Caffeine is known in the hair world for stimulating the scalp, increasing blood flow, and thus allowing your scalp to get more oxygen and more "food."
  • Pantheol, Vitamin C and Vitamin E- Pantheol, which is found in tons of hair products, acts as a humectant, drawing moisture into the hair and helps prevent split ends while conditioning. Vitamin C is known as an antioxidant thought to help heal the scalp. Vitamin E also acts as an antioxidant that aids effective circulation in the scalp due to increased oxygen uptake in blood.
  • Extra Virgin Coconut Oil- Coconut oil has been shown in studies to be the only oil that prevents protein loss while helping hair retain moisture. It reduces hair porosity making it spectacular for chemically relaxed hair which is typically higher porosity. Washing your hair can cause hygral fatigue, which is a fancy way of saying damage caused by frequent swelling (absorbing moisture) and shrinking (losing moisture) of hair fiber.
RELATED: Why I'm in love with the Coco (Coconut Oil of course!) 


To apply the rinse to my scalp, I used a narrow tip applicator bottle (Like this one of these) in the shower after conditioning. I let it sit for a few minutes then rinsed. My hair felt crazy moisturized strong but soft. (Don't worry, I'll give you all the details in tomorrow's #WashDayExperience!}

Have you ever tried a green tea rinse for you hair? What's your favorite recipe?

Besitos!
KLP

Wednesday, January 20, 2016

[Hairstyle] Vintage Tucked Updo For Natural Hair | The #WashDayExperience


My fishtail from last week lasted through a two hour hardcore soccer practice and three days of sweaty 5 mile runs before my yucky scalp begged to be co-washed. (In case you're wondering, here's how I co-wash) I tossed my hair into a bun and left it there until today's #washdayexperience.

Here's what I used:


Extreme Deep Condition: Audrey GPB Conditioner + Extra Virgin Coconut Oil
Leave ins- Almond Oil + Jessicurl Too Shea Conditioner + DIY Hair Butter


This week's #washdayexperience theme is "Something new" so I grabbed my new fave Aubrey GPB. Thanks to an amazing tip from Michelle over at FineNaturalHairAndFaith, I applied the GPB to my dry detangled hair and then sealed the conditioner in with Coconut oil. (Here's why I love that coco!) I let the conditioner absorb into my hair overnight and rinsed in the morning.

After rinsing the conditioner, my hair felt AHHMAZINGGG! Like omg omg omg I can't stop touching my curls AHHMAZINNNGGG...

And now Aubrey GPB is definitely a winner! I applied my usual leave ins and put my hair into a few large twists. Then I used hair pins and a Scunci Upzing (Buy your own here) to create this cute little Vintage Tucked Updo.


✓ Ends protected?
✓ Hair stretched?
✓ Crazy quick style?

Woot! What do you think? Yay or nay? And let me know if you want a tutorial on this style!

Besitos!
KLP


Tuesday, January 19, 2016

[Review] Aubrey Organics GPB Conditioner


I know that it's not really a popular stance for ladies with naturally curly hair to love protein, but my hair just loves Aubrey Organics GPB Conditioner---and it's loaded with protein. Here's why:

Breakage. THE ENEMY. I just cringe when I see those little itty bitty broken strands of my curls in the sink. Sure, my hair isn't supposed to be unbreakable but when I use protein regularly to strengthen my curls, I see less breakage. I also retain moisture better and longer. 

Curl definition. I'm on my 3rd bottle of this stuff. It makes my curls smooth, strong, but still pliable and soft. My hair feels perfectly balanced (moisturized but strong)---oh and it smells really great too. The ends of my curls are always POPPIN and perfectly clumped when I deep condition with GPB.

Slippage. Yes. Slippage is a word y'all. (Google it if you must...lol) Anywhos, GPB has some of the best slip in a conditioner that I've ever used. Apply a little of this stuff on your knots and VIOLA! The tangles just melt. Plus, my hair stays detangled after rinsing. Real talk, what more can a curl want?!?

I've used it both as a pre-shampoo treatment and as a deep conditioner and both ways yield fantastic results. You can check out the details on how I've used it in my #WashDayExperience here

And here are all the specs---just in case you're interested:

Price: $9.99 USD

Purchased at: The Vitamin Shoppe and Amazon

Ingredients: Aloe barbadensis leaf juice*, aqua, cetyl alcohol (from coconut), brassicyl isoleucinate esylate, caprylic/capric triglyceride, alcohol denat. (38b, lavender), brassica alcohol, glyceryl caprylate, glycerin, lactobacillus/eriodictyon californicum ferment extract**, phospholipids**, milk protein, salvia officinalis (sage) oil*, ricinus communis oil (rice), citrus grandis (grapefruit) extract, rosmarinus officinalis (rosemary) leaf oil*, ascorbic acid (vitamin C), tocopherol (vitamin E), leuconostoc/radish root ferment filtrate, brassica campestris/aleurites fordi oil copolymer, alcohol, equisetum hiemale (horsetail) extract, fragrance, gluconolactone, arginine, tussilago farfara (coltsfoot) leaf extract, urtica dioica (nettle) extract*, sodium benzoate. *Organic **Glycoprotein Natural isolate blend sourced from essential oils D015 Certified to NSF/ANSI 305 by QA

Promises: Feed your hair a healthy, balanced diet with our # 1-selling conditioner.
Nutrient-rich, protein-based GPB rehydrates and re-energizes your hair. Glycoproteins strengthen hair fiber, repair damage from salon treatments and restore softness manageability and shine. Our most popular product ever.
Nourishes & strengthens for full, shiny, healthy hair. 100% Natural Ingredients
No Parabens or Petrochemicals


Thursday, January 14, 2016

The Best Natural Hair Products of 2015


I can officially say that I'm a reformed product junkie.

*applause please*

I spent all of 2015 purging my stash and only keeping products that I knew I couldn't live without. Now I'm praying that they're never discontinued! (You do it too...don't get bougie on me now. Keep it 100!) 

Here are my favorite natural hair products from 2015!

How I Used Kurly Klips To Protect My Natural Hair

1. Kurly Klips

I talk so much about Kurly Klips that it's even starting to annoy me! I just need y'all to understand how deep my love for these thangs go! When I said that they are the most versatile protective style for your hair---I meant E V E R Y word of it and they are worth every penny.


2. Aubrey Organics GPB Glycogen Protein Balancing Conditioner

I had Aubrey GPB on my list of conditioners to try for ages! In late 2015, I finally went ahead and took the plunge. My hair thanks me for it. While I haven't posted a full review, last just say this: I'm on my 3rd bottle of this stuff. It makes my curls smooth, strong, but still pliable and soft. My hair is perfectly balanced---oh and it smells really great too. I know that my hair really likes protein so I wasn't surprised that my curls loved it. If you're looking for a gentle mild protein conditioner---Aubrey GPB is your guy!


3. Bentonite Clay Hair Mask Treatment

Whenever my hair feels BLAH...I know that it's time for a clay mask. Bentonite Clay is amazingness in a jar. It's moisturizing, detoxifying, a shine enhancer, frizz eliminator----just curl defining goodness. I mix it up with a little apple cider vinegar, glycerin, and aloe vera juice to form a conditioning mask, cover with a plastic cap for a little while, then rinse it out. BOOM. And just like that it feels like I have a head of new "act right" curls. 


4. Jessicurl Deep Treatment

So Jessicurl Deep Treatment isn't new for 2015. But, I've reaffirmed my love for all of it's creamy moisturizing goodness. I just adore this stuff. So if you are dealing with dry, brittle curls---give your hair a dose of Jessicurl Deep Treatment and I guarantee that you'll be joining me on the mountain top singing Jessicurl's praises. Oh and remember when I told you guess that Jessicurl was coming to a brick and mortar near you? Well you can grab the line in Sallys now! #winning


5. Camille Rose Naturals Curl Maker

This is the product that I didn't see coming. I'm minding my own business in the curl girl aisle in Target, when an older lady passes by. She has the most beautiful curls---we strike up an conversation that ended up lasting an hour! Anywhos, she recommended Camille Rose Curl Maker and of course I went ahead and bought it! Everything that she said about it was true. While it's technically a gel, it doesn't flake or make your hair too hard. It's has a light/medium hold. And it's actually moisturizing. Oh and it smells AMAZING! A little goes a long way too. My first bottle lasted for about 3 months. I'm on my second bottle now.

My favorite Twist out of 2015 using Camille Rose Naturals Curl Maker

I'm totally keeping these gems in my stash for 2016. What products did you discover in 2015 that made the cut? Share them (and your review) below! Fingers crossed that I don't have a relapse in my product junkie ways!

Besitos!
KLP

Wednesday, January 13, 2016

[Tutorial] Fishtail Udpo for Natural Hair | The #WashDayExperience


My Caruso Steam Roller curls from last week were EVERYTHING. Y'all just don't understand how good it felt to bounce around with big fluffy hair.


But like all good things---those curls had to come to an end. Plus, my scalp was not happy about not washing for 2 weeks. I whipped out my staple products and went to work.


Here's what I used on this #WashDayExperience:

Pre-shampoo- DIY Moisturizing Mist + Herbal Essences Hello Hydration Conditioner
Shampoo- Jessicurl Cleansing Cream
Deep Condition- Jessicurl Deep Treatment Conditioner
Leave-Ins- Almond Oil + Jessicurl Too Shea Conditioner + Camille Rose Whipped Butter

My favorite part of the #WashDayExperience is picking up tips from other bloggers. I knew that my stretched hair was craving moisture so I'm glad that I stumbled upon this little tip from Jen of JGA (you can check it out here). I started by spraying a little of my DIY Moisturizing Mist to detangle my hair in sections then I applied one of my favorite conditioners: Herbal Essences Hello Hydration Conditioner. I let it sit for about an hour. My curls felt AH-MAZING. Shout-out to Jen for the tip!

Next, I rinsed in the shower, shampooed using Jessicurl Cleansing Cream and t-shirt dried for about 5 minutes. This shampoo cleans the gunk (sweat + dirt + product build up) without robbing my curls of moisture. I deep conditioned with Jessicurl Deep Treatment Conditioner overnight. (Here's why I deep condition overnight). Rinsed the conditioner in the morning, then applied my leave-ins as I installed my curlformers.


I love these curls, but I'm still all about that protective styling life so I whipped my hair into this Fishtail updo. Here's how I did it:
  1. Begin with stretched hair (I stretched my hair using Curlformers.Then divide your hair in half. Secure the left side.
  2. Grab a small section of hair on the left side of the part and divide it into two sections.
  3. Use a small piece from the front section, cross it over the top, and add it into the back section.
  4. Take a small piece from the back section over the top and add it into the front section.
  5. Repeat steps 4-5 around the perimeter of your head until the braid reaches your middle part and then continue braiding in a regular style fishtail braid to the end of your hair. (You may need a hair tie here. I didn't)
  6. Fluff your braids by plucking apart the sides for a fuller look and then repeat steps 2-5 on the right side.
  7. Cross and pin the ends of each braid to the opposite side of your head
Optional: Polish the look by smoothing your edges with little edge control. (My favorite is Chi Twisted Fabric)

Thanks to my old faithful products my hair was crazy moisturized and uber smooth. May Jessicurl NEVER go out of business!

How did you style your hair this week? Which staple products did you use? Share your #washdayexperience too!


Tuesday, January 12, 2016

Happy Birthday SavingOurStrands + Top Stories of 2015


We're three years old!

Pop the confetti, sprinkle the glitter, it's Saving Our Strands BIRTHDAY!!!!

Omgosh so much has changed over the last year...

I went from MBL

Final Relaxed Hair Length Check


to "chile I don't even know how long my hair is"....

My hair lately: twist and curl


My bloggy bestie got hitched....

Just Married Mark & Keyda


and I rocked extensions for the first time in YEARSSS!

Meet My Kurly Klips!

It's still hard to believe that SavingOurStrands is 3 years old! Keyda and I NEVER imagined that our silly slightly neurotic hair blog would attract hundred's of followers or nab over 505,000+ page views from 10 countries across the global. Y'all DA REAL MVP! Thanks for allowing us to share our shenanigans and teeny tiny spot in your hearts.

Un mil besitos!
KLP


Wednesday, January 06, 2016

[Tutorial] How To Use Caruso Steam Rollers on Natural Hair | The #WashDayExperience


My heatless blowout (Click here for the tutorial) last week allowed me to sport an array of high and low buns with ease. My hair started to feel a little dry, but I didn't want to wash my hair just yet, so I whipped out my steam rollers.


I've been yelling my love for Caruso Steam Rollers for almost 2 years now, but I've yet to give you guys an inside look at how I do them. Until today!

*cue the dramatic drum roll*


Let's change that! Here's how I got these big bouncy curls:
  1. Start with stretched hair. (I stretched my hair using Curlformers and then a heatless blowout)
  2. Divide the hair into 8 sections.
  3. Very very lightly moisturize and seal your hair. (I used a mist of my DIY Moisturizing Spray and a little hair butter)
  4. Now it's time to install the steam rollers. Set up your steamer. For these curls, I only used the small size rollers. I place the roller on the steam for about 10 seconds. 
  5. Using a small section of hair in the back, divide it in two, two strand twist it once, then coil the hair to the ends.
  6. Holding the bottom of coiled hair, place your roller near your roots, then wrap the hair around the roller clockwise. 
  7. Place the cap on the roller. 
  8. Then repeat until all of your hair is rolled. Let the rollers dry for at least 30 minutes until the curls are set. (Pressed for time? Sit under a hooded dryer for 10 minutes on high then 5 minutes on cool.)
  9. Once your curls are set, remove the rollers.
  10. Fluff your roots using your fingers. (This will get rid of those parts.)
  11. Then gently separate your curls to give your hair volume. (Aren't you glad that you two strand twisted the root? It makes separating the curl soooo much easier and prevents frizz!)
  12. Mist the curls with hair spray. (Try a light spray of Chi Enviro Flex Hold Hair Spray keeps my curls in place without making my hair crunchy. )
I'd usually reserve this light bouncy style for a warm summer day, but chile, the heat and humidity of this beach town won't let me be great! It looks like this would only be an early winter/spring style for now! 


So what do you think? Yay or nay? (you know that I had to take a quick selfie too!)

Let's get 2016 started off right! Share your #washdayexperience too!


Tuesday, January 05, 2016

[Tutorial] How To Do A Heatless Blowout on Natural Hair


Here's a close up look at how I achieved my Heatless Blowout from my last #WashDayExperience along with step by step instructions on how you can do it too!
  1. Start with stretched hair. (I stretched my hair using Curlformers a few days before)
  2. Divide your hair into 8 sections. I made 4 sections in the back and two on each side of my hair. Secure each section with a hair clip.
  3. Beginning with a small section of hair from the back, very very lightly mist the section with water. You'll want a good misting bottle for this. I use this cool gem from the Vitamin Shoppe. One spritz could do the trick.
  4. Next, start to gently finger detangle from our ends up to the roots.  
  5. Apply a little oil or hair butter to seal your ends. I'm using Camille Rose Whipped Butter in the pictorial. 
  6. Then to achieve a more stretched look, further detanlge gently using a modified Denman Brush.
  7. Secure the detanlged section with a hair clip then move on to the next section. 
  8. Repeat until all of your hair is "blown out"
  9. (Optional) Fluff hair using a wide tooth comb

Have you ever done a heatless blowout? What are your secrets to smooth stretched hair?
 
Besitos!
KLP