Thursday, July 07, 2016

10 Cute Vacation Hairstyles For Natural Hair

Summer brings out the best in my curls. The volume and my fluffy kinks give me all kinds of LIFE. But...it also brings out the worse in my hair. Think frizz and a mind boggling amount of SHRINKAGE. And when I'm on vacation, I just got no time for my hair's unpredictability. So on those days when my hair just won't act right, I toss it up into one of these uber cute fun in the sun vacation hairstyles:


1/ KURLY KLIPS [Clip in Extensions] (tutorial)

What I love about Kurly Klips is that they are quick, easy, and you can keep all of your hair hidden while still rocking big bad hair.

RELATED: How I Protect My Hair Under Kurly Klips

2/ TOP KNOT (tutorial)

The top knot will always be in season. Especially when it's hot, hazy, and humid. Adding a flirty flower accessory gives this style a fun vacation feel.

3/ DOUBLE DUTCH BRAID + BRAID (tutorial)

Two braids pulled into a low bun. Simple. Easy. Quick. Uber cute! I loved this style whilst I relaxed my hair but it's even better now that my hair is curly! 

4/ TUCK & ROLL (tutorial)

I literally tuck, roll, and pin my curls up into this style. It takes no effort at all, keeps my hair tamed, and looks like I spent more than 5 minutes getting myself together. Win Win!


5/ HEADBAND + CURLS (tutorial)

Just like adding a head band---the second easiest way to jazz up your vacation look is with a flirty fun headband. Head bands work double duty for me. It's a way to smooth my edges and give my messy updos an intentional look.

6/ LOW BUN (tutorial)

I love this low bun because it's voluminous, doesn't snatch my edges, and super comfortable. I don't have to use weave or one of those cute mesh donut thingamajigs either. The best part of this updo is that it doesn't ruin my curls. At night, I take all the pins out, shake my hair out then band it. (here are the dets on how I band my hair) When I release the bands the next morning, all I have to do is fluff and go! This is how I wore my hair the next day!

7/ TURBAN + PUFF (tutorial)

The high puff is my go to style when the heat and humidity makes me feel like I'm going to spontaneously combust. Adding a turban gives the style an extra oomph and va va voom.

8/ SIDE SWEPT WASH & GO (tutorial)

Wash and go's are perfect the summer. Here's a cute way to jazz it up: pull all your curls over to the side then add a few hair pins and maybe a decorative head band to give the style even more pizazz. This style works well for any curl set; especially perm rods!

9/ HEADWRAP (tutorial)

The absolutely easiest, chicest, sassiest, solution to your vacation hair problems. Just throw a colorful patterned headscarf on, add some hoop earrings, then call it done! With so many ways to tie a headscarf and their affordability, how can you say no?

10/ FISHTAIL BRAIDS (tutorial)

Goddess braids are super versatile. They're perfect for pool side lounging and vogue enough for a night out. The key to a thick braid is to gently tuck on each side of the braid to fluff it out.

What's your favorite vacation style? Link it up below!

Besitos!
KLP


Monday, July 04, 2016

July #WashDayExperience Themes


I absolutely adore #WashDayExperience themes! Right now my hair is on auto-pilot and I want to shake things up a little bit before I get too lazy and stop giving my hair The timing of these themes couldn't be more perfect! But let's start from the beginning!

WHAT IS THE #WASHDAYEXPERIENCE?

The #washdayexperience is a place for ladies who are striving for healthier hair to share the hows, whats, whens, and whys of their weekly wash day ritual. It doesn't matter what state your hair is in: natural, colored, relaxed, texlaxed, curly, straight, or loc'd---ALL ARE WELCOME. You may share via blog/vlog, Insta, G+, Twitter, and Facebook.


#WASHDAYEXPERIENCE THEMES

Wash day can be one part "omgosh I'm not here for this" and 4 parts "but I just don't wannnaaaaa". So Jen and I created a few themes to spice it up a bit. Here are your themes for July:

Week 1: Vacation Hair Styles
How are you styling your hair this summer or on vacation? Which styles do you plan to try?

Week 2: Sun & Swimming Hair Protection
The sun can suck the moisture out of your hair whilst chlorine is extremely damaging. How are you protecting your hair from the wind, water, or sand this summer?

Week 3: Humidity Help
What are your favorite techniques and tips for combating frizz and fuzz from the increased humidity?

Week 4: Big Bad Heatless Curls
Big hair don't care! What is your favorite technique for big bad voluminous curls?

HOW TO JOIN THE #WASHDAYEXPERIENCE

Our look might have changed over the last year, but the rules for all this positivity are still the same:
  1. Share the direct link to your #WashDayExperience linkup. We go live every Wednesday.
  2. Add the #WashDayExperience badge to your post
  3. Give the chica that linked up before you a little comment love. 

Stupid easy! Will you join the madness? Share a link to your blog below!

Besitos!
KLP

PS: The themes aren't mandatory---just a way to have a little more fun! Si que claro, you can join without adhering to the themes!

Friday, July 01, 2016

6 Ways To Style A Wash and Go

Letting your curls fly wild and free is always fun and perfect for summer---but what do you do when the dynamic devilish duo of frizz and shrinkage attack your wash and go? Luckily I've got 6 ways that you can style your wash and go without ruining your curls, combat shrinkage, and give your frizz that "I woke up like this" slayage:


1/ SIDE SWEPT (tutorial)

I am in LOVE with this style. It's effortless, sophisticated, and super easy. Pull all your curls over to the side then add a few hair pins and maybe a decorative head band to give the style even more pizazz. This style works well for any curl set; especially perm rods!


2/ HIGH PUFF (tutorial)

Of course this list wouldn't be complete without my high puff. I usually love my high puff voluminous and fluffy---which usually leads to tangles and dehydrated curls. But not when my hair is in a wash and go! My wash and go technique ensures that my curls are tangle free and uber moisturized.

RELATED: How To Maintain Your Wash and Go for 5 Days!!


3/ FROHAWK (tutorial)

Frohawks are fierce, edgy, and fun but I'm not gonna lie---I'm gonna need some time to get used to this one on me because it's not my usual sleek sophisticated (aka mom hair) look. I'm not yet comfortable with really bold styles on my curls but at the same time---I feel really empowered by its carefree wildness.


4/ BANGS (tutorial)

Shaping your curls requires either a cut or some strategic fluffing. Because I'm not really ready for that cut life, I choose to band my curls to elongate them. My bangs are completely overgrown so a add a few hair pins to the front to give the illusion of face framing fluffy bang realness. (Say that 10 times fast! LOL)

RELATED: Perfecting Your Wash and Go with Banding


5/ LOW PUFF (tutorial)

My curls in the front of my hair tend to frizz up faster than the ones in the back---but instead of washing--I usually pull my hair back into a low puff. Low puffs are functional (it keeps my hair out of my face) but classic. Adding a little edge control tames my edges and flyaways for a sleek look.

6/ HALF UP

Ever wake up with one side of your curls smushed and flat? (Hope that someone else besides me is raising their hand right now...) There are times when no matter how much fluffing I do---my curls on one side just won't act right--enter my half up style. I just pin up the offending curls, shake the style out a little and boom! The perfect "I meant to do that" style!

What's your favorite style for a wash and go?

Link it up below!

Besitos!
KLP


Thursday, June 23, 2016

My Top 3 Deep Conditioners

That moment. Oh that moment when you find the one. The one deep conditioner that makes your curls supple, soft, and elongated. The one deep conditioner that your hair sinks into your strands enveloping every kink, curl, and coil with moisture. The one deep conditioner that you can't imagine your hair without. Yep. That moment when you find your holy grail deep conditioner is what hair care fanatics long for.

I've tried a lot of deep conditioners, but there are 3 that I find myself buying over and over. I have at least 2 bottles of each on hand at all times. Here are my top 3 deep conditioners and why they slay:


JESSICURL DEEP TREATMENT

(full review here) (buy it here)
If you're on the search for a beautifully insane moisturizing conditioner, I doubt that Jessicurl Deep Treatment will disappoint. I thought that this conditioner was perfect for my telaxed hair but it's even BETTER for my curls. It's thick and creamy. Doesn't leave a residue and it's ingredients make my curls smile. Late last year, when my ends were feeling frizzy, dry and damaged, I whipped this conditioner back out, applied it to my dry hair, sealed with a little oil, then left it in overnight. By the morning, my curls were revitalized. My hair felt so good that I didn't even bother rinsing the treatment. (you can check out that #washdayexperience here) Needless to say, if when my hair is in need of mega moisture, Deep Treatment is the conditioner that I call.

RELATED: 4 Deep Conditioning Hacks

MATRIX HYDRASOURCE CONDITIONER

(full review here) (buy it here)
Again, I've used the conditioner for years. (4 years to be exact) It was my holy grail when my hair was relaxed back then, it was amazing while I transitioned, and today is still nourishes my curls from root to tip. I love the way that this conditioner sinks into my hair. This conditioner is fantastic when applied without heat, but when you add heat---it takes its replenishing properties up to that next next level.

RELATED: Why I deep condition overnight

AUBREY GPB CONDITIONER

(full review here) (buy it here)
My curls have shown me that they thrive on moisture, but that they need protein to stay strong and resilient. That's where my Aubrey GPB Conditioner comes into play. This conditioner offers the perfect balance of moisture and protein. It defines my curls, has a ridiculous amount of slippage, and prevents breakage. I've used it both as a pre-shampoo strengthening treatment and as a deep conditioner.  So if you've ever had that moment when your curls limp or don't have that much spring to them---give this conditioner a try. (You can thank me later!)

What's the best deep conditioner that you've ever tried? Share a link to your review of it below!

Besitos!
KLP

Wednesday, June 22, 2016

[Tutorial] Low Bun For Natural Hair

Y'all know that I love a good updo. I'm still living that wash and go life, but by the end of my hectic the day, my curls are usually in this low bun situation.  I love this low bun because it's voluminous, doesn't snatch my edges, and super comfortable. I don't have to use weave or one of those cute mesh donut thingamajigs either.


Here's how to get this low bun:


  1. Moisturize, detangle, and seal your hair. 
  2. Create a middle part. (Any part will do. I like the middle part because I struggle to get my bangs pulled back when I do a side part)
  3. Apply a product to tame our edges. I used Eco Styler Krystal Gel (buy it here). 
  4. Smooth your hair back into a low puff using a hair tie. I used my DIY Ribbon Hair Ties (here's how to make them). The key is not to double the hair tie. 
  5. Roll, tuck and pin your hair around the perimeter of the hair tie to form your bun. 
  6. Finish with a light mist of hair spray (I used Chi Enviro Flex Hold Hair Spray to keep your curls in place and tame frizzy flyaways.  

The best part of this updo is that it doesn't ruin my curls. At night, I take all the pins out, shake my hair out then band it. (here are the dets on how I band my hair) When I release the bands the next morning, all I have to do is fluff and go! This is how I wore my hair the next day!

How was your #washdayexperience? Anyone else sporting an updo this week?

Besitos!
KLP


Tuesday, June 21, 2016

6 Reasons To Try a Wash and Go


If you're reading this, you've probably either attempted a wash and go or are thinking about attempting a wash and go. You might not think that wash and gos work for your hair type. You might not have found your perfect wash and go curling cocktail. But, I'm here to give you a gentle encouraging nudge to give the wash and go life a chance. Here are 6 reasons why you should try a wash and go (again):


Increased Curl Definition 

The wash and go is less about achieving a certain "style" and more about figuring out what technique + product selection encourages your strands to clump, curl and pop. There are tons of methods that you can use to define your curls (I use the rake and shake + praying hands for example). With each wash and go I've seen increased curl poppage and curl memory

Low Maintenance

I literally do nothing to my hair after wash day. No moisturizing and sealing. No detangling. No restyling.To keep my curls shaped, I band it at night using my DIY Ribbon Hair Ties and then cover with a satin cap/scarf. (You can find out more about banding here---just trust me, it's AMAZEBALLS)  My curls stay defined for days.

RELATED: DIY Ribbon Hair Ties For Natural Hair

Quasi-Protective Style

While I can't say that the wash and go is a legit style that will protect your ends. I can say this: Because of my product cocktail, my ends stay uber moisturized between washes. My shrinkage doesn't allow my curls to touch my shoulders, so I don't have to worry about the ends of my hair rubbing and snagging on anything. Then there's the business of the gel cast. The gel cast is almost like a protective curl exoskeleton (say that 10 times fast!). The cast prevents moisture from escaping (as quickly) from your strands and keeps your curls weighed down which prevents tangling.Which leads me to my next point...

Less Tangles

In the past, when I tried wash and gos, my gel application was lousy (I only used gel on my ends instead of the entire strand), my hair wasn't properly moisturized prior to applying the gel, and I didn't band my hair. All of this was a recipe for tangles, knots, and general natural hair mayhem.

Gym/Workout Friendly

I work out 5-6 days a week, 30 minutes to an hour. Now I'm not talking yoga---where you don't sweat and look cute. I'm talking 2 mile morning runs + 30 minute cardio kickboxing with a few plyometric and circuit training courses sprinkled in. I sweat like a sinner in church. But my wash and go never shows it! I shared all of the details on how I do it here: How to Maintain Your Wash and go for 5 days!

RELATED: Workout styles for natural hair

Long Lasting

My very first wash and go experience was terrifying to say he least. The style lasted all of 24 hours before I gave up, co-washed then put my hair up in a bun. Luckily, I'm stupid persistent because at almost a year later, I'm alllll about the wash and go. My curls are moisturized, defined, and last for dayssss (so far the longest I've been able to go is 8 days between wash and gos). So even if you've failed time and time again to get the wash and go of your dreams---I encourage you to keep trying. Because your curls were made for this. Literally!

If you've mastered your wash and go, share some of your fave tips below. And if you are still figuring it all out, drop a question in the comment section. We're here to support, encourage, and throw a little positive pixie dust your way!

Besitos!
KLP

Wednesday, June 15, 2016

10 Things to Know Before You Use Henna On Your Natural Hair

Since introducing henna into my natural hair regimen, I've noticed a ton of positives. Henna is strengthening; I have less breakage. The color is stunning in natural light. But I've also noticed slight changes in my curl pattern. If you are considering henna, here is a list of 10 things you need to know before you start:


PERMANENT

Henna is permanent. It's a natural plant. It's not a chemical create in a lab nor is it ink. The henna plant only makes one color: Red.

CUMULATIVE

The effect of henna on your hair color is cumulative--meaning that each time you do a treatment, your color will get deeper and richer. It takes a few days for your henna to fully oxidize and produce the finished effect.

HEAT

Using a warm henna paste + sitting under the dryer after applying your henna will give your hair a deeper richer color.

RELATED: How to use Lush Henna on Natural Hair


DOES NOT LIGHTEN HAIR

Henna can not lighten your hair tone. Henna  does not open the cuticle and lift or lighten your hair's natural hair pigment. Henna coats your hair like a varnish, which means your individual shade sits underneath the henna, creating a color that's unique to you. Essentially, henna stains your hair the same way that a beet will stain whatever it touches. The result is a mix of the red from the beet and whatever color the object was before the beet touched it.

INDIGO

Indigo is not henna. It's another plant that can be used to dye/stain your hair. When mixed with henna it creates brown hues.

CASSIA

Cassia obovata is not henna. It's another plant that can be used to dye/stain your hair. Cassia has a yellow tint that typically doesn't show up on dark hair. Thus it's been called "neutral henna" because it has many of the same benefits of henna without the color.

RELATED: Lush Caca Rouge Results (3rd Application)

Curl Loosening Theory From JC @ NaturalHairHaven

CURL LOOSENING

Henna can loosen your curl pattern. According to my favorite Curly Scientist, with each henna application your hair absorbs the henna, but it also absorbs water. The henna + water combo weighs the strands down thus elongating the curl. If you strip all the science-y stuff away, to me, it sounds like henna can "over-moisturize" your hair depending on your hair's texture, porosity, and the frequency of henna use. I have noticed that my curls are more elongated following my henna applications. However, my curl returns to normal a few days later. My curl definition has also changed. When my hair is wet, it's a bit more frizzy, however when it dries (for example in a wash and go) the definition is actually greater and it lasts.

DRYING

Henna can be drying. The drying affects of henna can be combated by applying an oil to your hair before application, adding moisturizing ingredients to your recipe or deep conditioning your hair after application. I like to deep condition for at least an hour under my hooded dryer or over night after henna treatments.

APPLICATION

Applying henna to damp hair makes the application process easier. I like to co-wash my hair before applying my henna paste.

STRAND AND PATCH TEST

Always perform a patch test on your skin then a strand test on your hair of your henna paste before using. This video by Chemese about her severe allergic reaction to what she thought was henna should be enough to convince you. Because I love my hair and I can be stupid paranoid, I've only used Lush's Caca Rouge. Lush's henna treatments are premixed and reputable.

For right now, the pros of henna outweigh the negatives. I'm extremely happy with the health of my hair and the hair is EVERYTHING!

If you are a henna pro--share your experience with henna below. If you're a henna newbie---feel free to ask questions!

Besitos!
KLP


Tuesday, June 14, 2016

DIY Ribbon Hair Ties For Natural Hair

Have you ever struggled to find the right hair tie for your high puff or low bun? The new hair tie is too tight. The old hair tie has been stretched out too far. Let's not even try to count how many hair ties your hair has destroyed. The struggle is so real. But I have GENIUS solution for you: Make your own hair tie that is the perfect size and stretchiness for your 'do.

RELATED: How To Get The Perfect High Puff


Ribbon Elastic Hair ties are stupid easy to make; literally effortless. If you can tie a knot---then you can make a boat load of hair ties. Personally, these are my favorite hair ties for banding my wash and go. Banding with these hair ties doesn't cause breakage and prevents those weird indents that I get from regular hair ties.

RELATED: Perfecting Your Wash and Go with Banding
 

Benefits of Ribbon Elastic Hair Ties

  • No metal to snag your hair on
  • Ceaseless
  • Incredibly gentle
  • Stupid cheap
  • Comfortable
  • Always the perfect size
  • Customize your color

Here's what you'll need:
5/8" (or larger) Fold Over Elastic
Fabric Scissors
Ruler/ Measuring Tape
Optional: Candle flame/lighter to seal the ends


How To Make Ribbon Elastic Hair Ties

  1. Measure your fold over elastic. For medium hair ties, I used 11" of elastic. Large (think for your high puff) I used 20". And for headbands I used 28". 
  2. Cut your desired length. Regular scissors will due but fabric scissors are best. Fabric scissors are very sharp which will give your cut a clean edge.
  3. Match the ends together with the shiny side up. 
  4. Make a knot at the ends then slide the knot closed leaving about 1/2" at the end. 
Optional: You can use the flame from a candle or a lighter to seal the ends of the ribbon elastic to keep it from fraying. In my experience, this step isn't really necessary. Because I use very sharp fabric scissors, the ends of the ribbon rarely frays, even after heavy use.

Viola. You're done.  No more headaches from your headband being too tight and your puff or bun will still be slicked for the 'gawds.


Have your say! Would you use DIY Ribbons Hair ties?

Besitos!
KLP


Wednesday, June 08, 2016

Fro with Bangs | The #WashDayExperience

My wash and go is more of a wash, apply products, wait wait wait wait wait wait, wait some more wait wait wait wait until it air dries, band to stretch the curls a bit, then go. But you know what's weird? I honestly wouldn't have it any other way because this style lasts me for 5-6 days. My hair stays uber moisturized. I've experienced less breakage, less shedding, and more curl popping definition.


I can alternate between a high puff and wearing it out, without ruining my curls. I don't have to moisturize and seal daily. And I'm only washing my hair once a week. Like seriously---I dare not complain because the universe is a jealous fickle beast.

Day 2 of my wash and go from last week

Day 3 of my wash and go from last week

Most wash and go queens report that they have better definition and less frizz when they apply their leave ins in the shower. Well, my wash and go from last week frizzed up sooner than I was expecting (around day 3-4) and when I did that last week. So this week---I went back to applying my leave ins outside of the shower. Proof that what works for gander---might not work for this goose. Ha-ha!


Here is what I used:

Pre-shampoo- DIY Moisturizing Mist (tutorial here) + Trader Joe's Tea Tree Tingle Conditioner (review) (buy it)
Shampoo- Jessicurl Cleansing Cream (review)(buy it)
Henna TreatmentHow to use Lush Henna on Natural Hair
Deep Condition- Jessicurl Deep Treatment Conditioner (review)(buy it) + Extra Virgin Coconut Oil (buy it)
Clay Rinse- Here's the dets on my recipe
Leave-Ins- Castor Oil (buy it)+ Jessicurl Too Shea Conditioner (review)(buy it)
Styler- Eco Styler Krystal Gel (buy it)

And here's how I did it:

PRE-SHAMPOO

I love my pre-shampoo sessions because they allow me to detangle/remove shed hair before I get into the shower plus it gives my hair an extra boost of either moisture or protein. I started by spraying my hair with my DIY moisturizing mist. If you haven't tried this recipe yet--WHAT ARE YOU WAITIN FOR?!?! It's not just moisturizing but it's an excellent detangler too! After I sprayed each section, I slathered on a little Trader Joe's Tea Tree Tingle Conditioner. This conditioner has some of the best slip of any conditioner that I've ever used and the essential oils make my scalp feel happy.  I covered with a plastic cap and sat under the dryer for about 20 minutes.

RELATED: The Best Moisturizer For Natural Hair EVER!

SHAMPOO

With my hair secured in about 7 sections (4 in the back and 3 in the front), I rinsed the conditioner then shampooed with Jessicurl Cleansing Cream (review here). I expected tangles and a week's worth of shed hair, but surprisingly the process was quick and tangle-free. Now that I'm shampooing more often, I'm thinking about trying out the Trader Joe's Tea Tree Tingle Shampoo too. It's stupid cheap (like $4!) and if it's anything like the conditioner---it might be a winner! Have you tried it before?


HENNA TREATMENT

Henna applications double the time that it takes to wash my hair. Ugh. But the results are sooo worth it. I applied my Lush Caca Rouge mixture to my freshly washed hair in sections, covered with cling film and let it sit for about 3 hours (one hour I spent under the dryer). You can read more about my latest excursion with henna here.

RELATED: How to use Lush Henna on Natural Hair

Henna Results

DEEP CONDITION + CLAY RINSE

After rinsing the henna for what felt like forever, I t-shirt dried for a few minutes then applied my FAVEEEE deep conditioner Jessicurl Deep Treatment (review here). Next, I layered on a little Extra Virgin Coconut Oil (shop it!) to seal in the conditioner. I covered with a plastic cap and sat under my dryer for about an hour. I wanted to make sure that my hair was moisturized after using the henna because it can make your hair feel a little dry. I rinsed the conditioner in the shower then did my Clay Rinse treatment. Clay rinsing defines my curls like no other treatment that I use. If you only try ONE thing from my regimen---clay rinsing is the one to try. Especially if you are having trouble getting your curls to clump and pop.

RELATED: How I Get My Curls To POP!

LEAVE-IN + STYLER

Out of the shower, I applied my moisturizing leave in, Jessicurl Too Shea Conditioner (why I love this stuff here) then sectioned off my hair to prep for applying the gel. I used the same exact technique from last week. Starting with the back, I spritzed it with water until it was soaking wet then finger detangled until my hair clumped into curls. Then I smoothed a little gel on the roots--but not on my scalp. Next, I raked a little more gel through all the way until the ends and gently shook out the curls. (aka the rake and shake technique)


FRO WITH {FAUX} BANGS

The application process still takes me about 35-40 minutes to do. And because I didn't want to be waiting waiting waiting waiting waiting, and waiting some more, I decided to sit under my hooded dryer. Believe it or not--my hair was just about completely dry after an hour. Boom pow. No more air drying for this chica! Of course my roots were still a little damp. This just comes with the thicker than thieves hair that I have. I banded my hair using my new DIY Ribbon Elastic Hair Ties (tutorial coming soon!)

Ribbon Elastic Hair ties don't leave nearly has many ceases in my curls when I band, they are super comfortable and very very gentle on my hair. The next morning, all I had to do was remove the bands---which is super easy and doesn't cause breakage---shake my hair out a little then fluff.


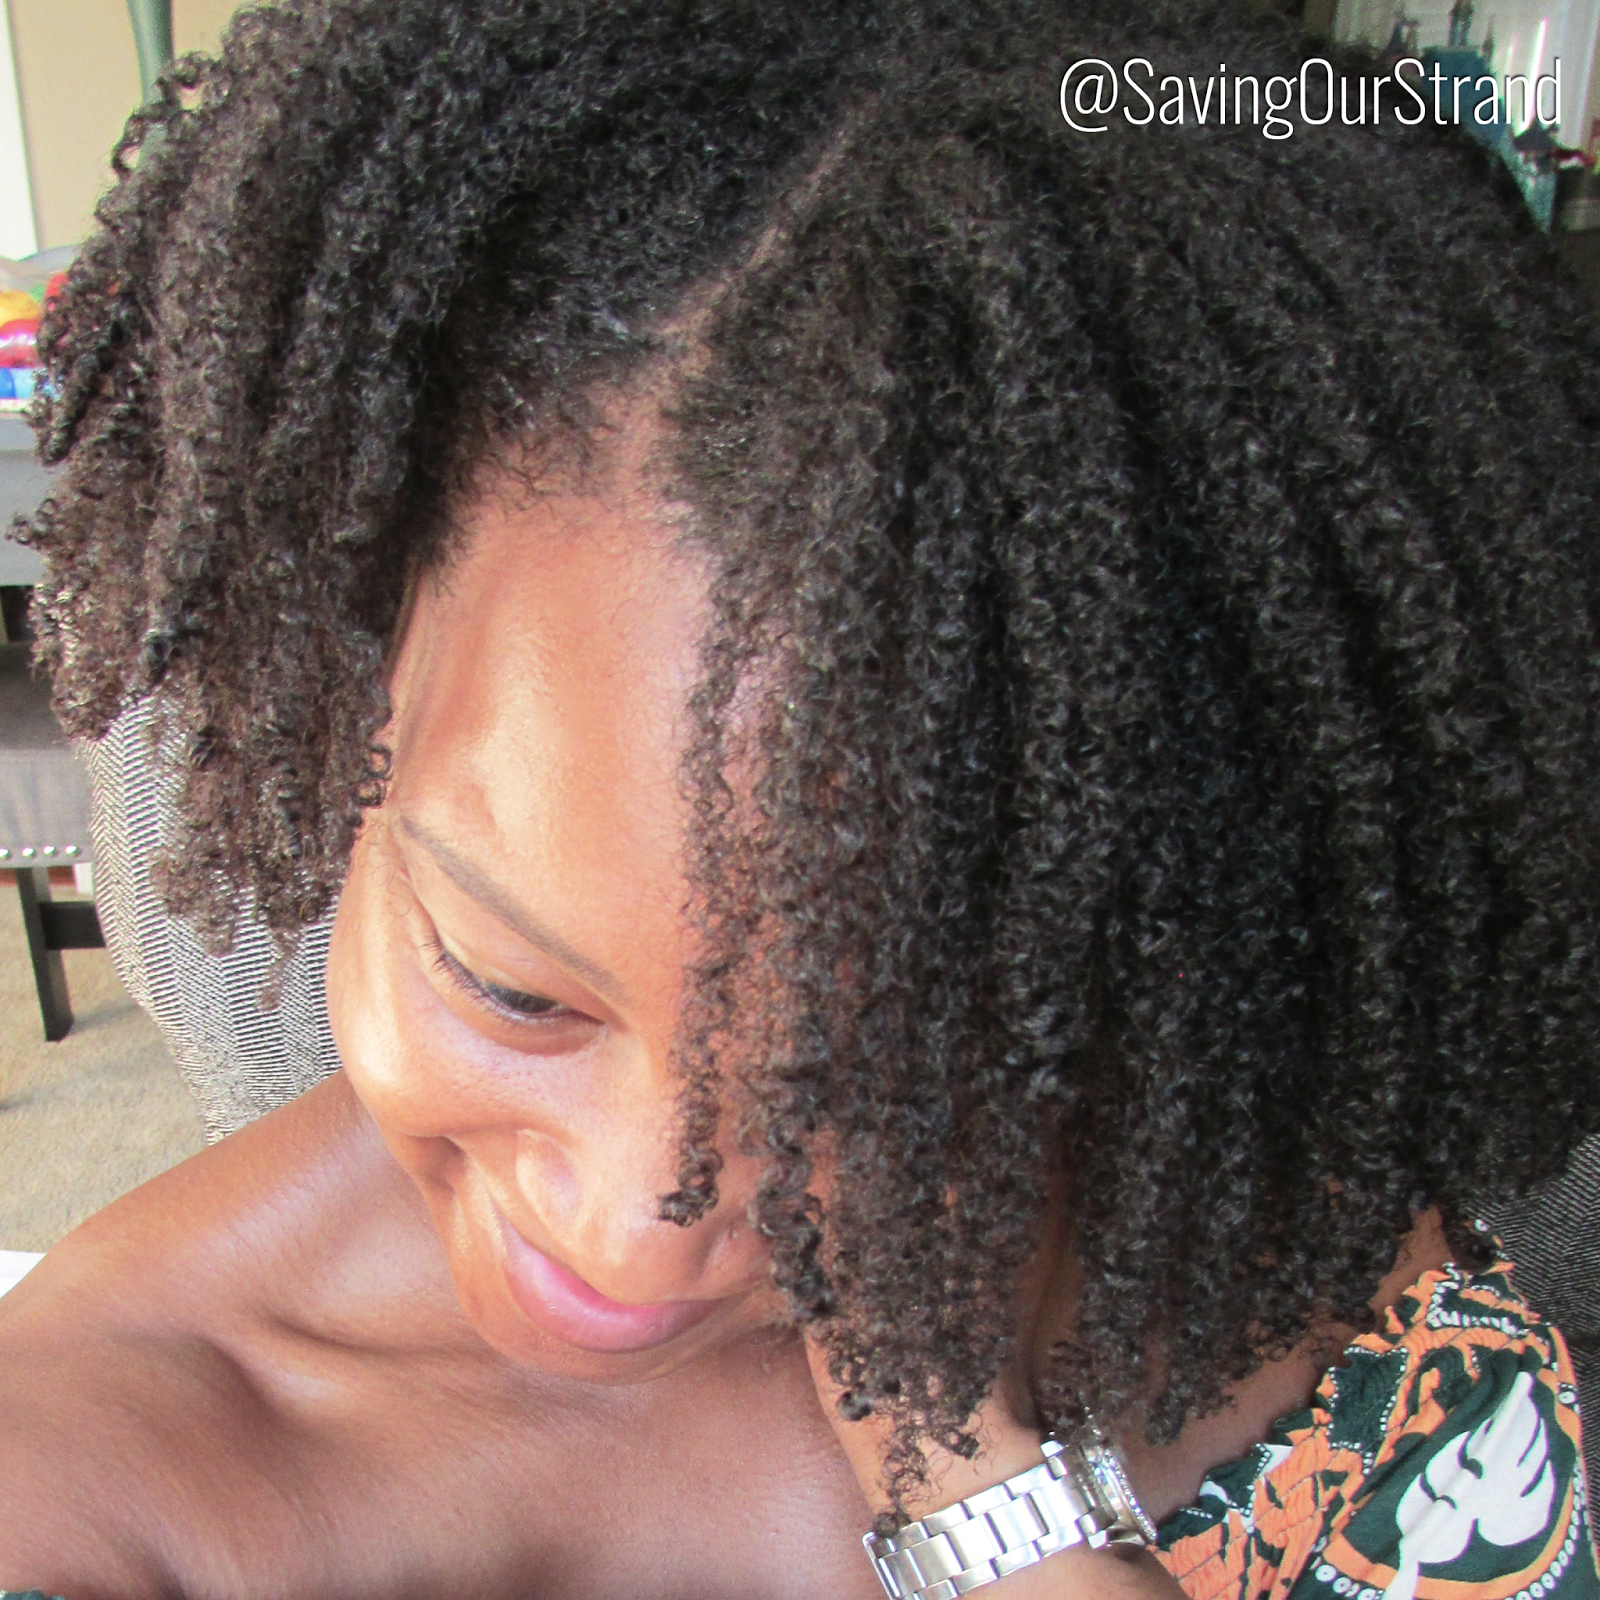
I forgot to take pictures of my first and second day hair but this third day hair tho?!?!? I decided to pin my overgrown bangs up a little to get them above my eyes and rock this stretched curly fro.

Fro + Bangs? Shoot...y'all can't tell me NOTHING!


Let me know if y'all want a tutorial on how I pinned my bangs and got all this stupid crazy volume!

How was your #washdayexperience?


Tuesday, June 07, 2016

Lush Henna Caca Rouge Results (3rd Application)

I did my third application of Lush's Henna Caca Rouge over the weekend! I used the same prep process and application as the previous two times. The only difference was that instead of co-washing before the application, I shampooed because my hair was still full of product from my last wash and go.

RELATED: How to use Lush Henna on Natural Hair 


Henna is a tedious process. It adds 4-5 hours to my usual wash day. It takes me about 20-30 minutes to apply the henna. I let it sit for 3 hours (one of which, I'm under my hooded dryer). Then it takes an additional 20-30 minutes to fully rinse the henna from my hair. Luckily for me, the results are are so worth it. Here's why:

VIBRANT HIGHLIGHTS

My hair is naturally dark brown with peeks of auburn highlights.  What I love about henna is that my natural sun-kissed highlights are now more vibrant coppery color. In the sun light, it's almost like I have a subtle bronze halo around my curls.


STRONGER SOFTER HAIR

I'm not sure if it's my new minimalist regimen, my latest obsession with wash and go's or a combination of both but my hair has been on it's very best behavior. My strands feel uber moisturized, despite the fact that I'm only washing my hair once a week. I haven't had to moisturize or seal between wash days and my curl definition is even better. (I didn't think that was a possibility!) I've also noticed less breakage.


CUMULATIVE

With each henna application, the color gets deeper and richer. So, I have many more applications before I'll get close to the firey copper glow that I really want. Fingers crossed that my time at the beach this summer will help expedite the process!


Any one else playing with henna? Do you have any tips or tricks to share?

Besitos!
KLP

Wednesday, June 01, 2016

Perfecting My Wash and Go | The #WashDayExperience

I'm still in a little shock that my wash and go from last week actually lasted for 5 days. I didn't have to add any additional product and using banding to maintain my hair was so simple. Because I'm just not customized to only washing my hair once a week. I was really expecting my hair to be dry and my scalp to be itchy. Surprisingly it wasn't.


RELATED: How I Maintained My Wash and Go for 5 Days

I probably could have stretched my wash day one more day---but I decided not to push it. The one thing that I knew for sure was that I'd have to shampoo to remove all of the gel/castor oil/dirt/sweat that was bound to be on my hair and scalp. 

Here's what I used:


Pre-shampoo/Strengthening Treatment- DIY Moisturizing Mist (tutorial here) + Aubrey Organics GPB Conditioner (review here)
Shampoo- Jessicurl Cleansing Cream (review here)
Deep Condition- Jessicurl Deep Treatment Conditioner (review here) + Extra Virgin Coconut Oil (shop it!)
Clay Rinse- Here's the dets on my recipe
Leave-Ins- Castor Oil (shop it!)+ Jessicurl Too Shea Conditioner (why I love this stuff here)
Styler- Eco Styler Krystal Gel (shop it!)


And here's how I did it:


I usually start my wash day with a pre-shampoo. My pre-shampoo sessions allow me to detangle/remove shed hair before I get into the shower and it gives my hair an extra boost of either moisture or protein. Because I already had a ton of build up on my hair, I wasn't sure that my pre-shampoo session would even be effective. But habits are hard to break. So I started by spraying my hair with my DIY moisturizing mist. This concoction is not just moisturizing---it's also fantastic at detangling my hair. After I sprayed each section, I slathered on a little warmed Aubrey Organics GPB Conditioner. After a week of wearing my hair out, I wanted to add a little protein to my hair for strength and to combat breakage. I covered with a plastic cap and sat under the dryer for about 20 minutes.

With my hair secured in about 7 sections (4 in the back and 3 in the front), I rinsed the conditioner then shampooed with Jessicurl Cleansing Cream (review here). I expected tangles and a week's worth of shed hair, but surprisingly the process was quick and tangle-free.

I t-shirt dried for a few minutes then applied my FAVEEEE deep conditioner Jessicurl Deep Treatment (review here). Next, I layered on a little Extra Virgin Coconut Oil (shop it!) to seal in the conditioner. I covered with a plastic cap and left it in overnight.


RELATED: Why I Deep Condition Overnight 

Wet hair after deep conditioning + castor oil


The next morning, I rinsed the conditioner then did my Clay Rinse treatment. Clay rinsing defines my curls giving them extra poppage. Made up word but whatevs... After applying the clay rinse in sections, I rinsed then applied some regular old castor oil (I used this one) to my soaking wet hair.
I rinsed my hair again to get my curls to clump up again. Out of the shower, I applied my moisturizing leave in, Jessicurl Too Shea Conditioner (why I love this stuff here) then sectioned off my hair to prep for applying the gel.


RELATED: How I Get My Curls To POP!


My Wash and Go Technique #2

I used the same exact technique from last week. Starting with the back, I spritzed it with water until it was soaking wet then finger detangled until my hair clumped into curls. Then I smoothed a little gel on the roots--but not on my scalp. Next, I raked a little more gel through all the way until the ends and gently shook out the curls. (aka the rake and shake technique)

The application process took me about 35-40 minutes to do. I let my hair air dry for a couple of hours. (about 3-4 hours) But that wasn't nearly enough time for it to dry, so I sat under my hooded dryer---set on cool--- for about 30 minutes.


My hair was a little damp at the roots, so I banded my hair using some extra wide hair ties. (these are my faves) Then let my hair dry overnight.

The next morning, all I had to do was remove the bands---which is super easy and doesn't cause breakage---shake my hair out a little then fluff.


Surprisingly, my hair actually felt more moisturized after this wash and go than it was after last week's wash and go. I attribute the extra moisture to applying regular old castor oil to my hair while it was soaking wet. I think that this technique helped seal my hair. Regular castor oil has a less pungent scent than JBCO so I'm glad that I switched plus it's soo much cheaper and the packaging makes it easier to use in the shower. Next week, I plan to switch to ribbon ties instead of the regular hair ties that I've been using. The regular hair ties leave dents in my hair--which I don't really mind, but I do worry if ribbon ties will work better. I also plan to apply just a little more gel to my roots. I noticed a little more frizz at the roots on day one than I had last time.

I wonder if I can get another 5 days out of this wash and go too!

Fingers crossed!

How was your #washdayexperience? Is your hair ready for the summer?


Tuesday, May 31, 2016

How I Maintained My Wash and Go for 5 Days

I never thought that I could actually get any style to last. Especially not for 5 days. Especially not a wash and go. And especially when I've never even had a presentable wash and go to begin with. But my wash and go from last week was pure magical. Not only was it beautiful on day 1---it was still gorgeous on day 5!


And I practially did NOTHING to maintain it. Legit y'all. No moisturizing or sealing. No reapplication of gel. No nada. Here's what I did:


BANDING

Every night, I banded my hair. Banding is a super simple concept and even easier to do. First, divided my hair into about 5-9 sections (the more sections you have the more stretch you'll be able to achieve), then used an extra wide hair tie to secure the section at the base. Next, I wrapped the the rest of the pony along the length my hair. I don't band the very ends of my hair to keep the curls in tact.

Banding elongates my curls without destroying the curl pattern. It also counteracts the ridiculous amount of shrinkage that I have. The best part about banding is that it's heat free, doesn't cause breakage, and it's incredibly gentle on my strands.

Related: How To Band Natural Hair 

Day 1
 

EXERCISING

I workout every morning---and night. During my morning workouts, I keep my hair banded and covered with a satin scarf. At night, I throw my hair up into a high puff.

Related: What I used for this wash and go!

Day 2 Wash and go

MORNING ROUTINE

On the mornings when I started the day with cardio---I noticed that my roots were a little damp. So I sat under my hooded dryer---on cool---for about 10 minutes until my roots were dry. Then I removed the bands, shook my hair, fluffed it a little with my fingers for some volume, then went about my business.

Day 3 Wash and go

NIGHTLY ROUTINE

After my night workout, I banded my hair into those same 5 sections. I didn't moisturize. I didn't seal. I didn't really do much of anything besides band my hair and cover with a scarf.

Day 4 Wash and Go


I'm not really used to one wash day a week anymore. I was afraid that my hair was going to be a dry frizz ball. But believe it or not, my hair felt amazing. I had a little frizz in the front---most likely from my time on the treadmill with covering my hair. *hangs head* So on day 5, I pulled it up into a high puff. I washed my hair the next day but I feel like I could have pushed it one more day in another high puff if I needed to.

Day 5 Wash and go


I'm feeling really optimistic about the future of my wash and gos!

Are you a wash and go girl? How do you maintain your curls?

Besitos!
KLP

Wednesday, May 25, 2016

Wash and Go Magic! | The #WashDayExperience

Every time that I wash my hair---I fall in love with my curl pattern a little more. Aren't my curls just the tiniest coiliest kinkiest curls that you ever did see? Okay, maybe I'm bias. But for as much as I love a good stretched curl former set, high puff, or updo---I love my curls 3 million times more. Which is why I'm more determined than ever to get this wash and go thing right.


Plus in honor of this week's #washdayexperience: "Next Day Hair." I used an old technique in a new way to give my wash and go a little stretch without heat.


Here's what I used:

Pre-shampoo/Strengthening Treatment- DIY Moisturizing Mist (tutorial here) + Aubrey Organics GPB Conditioner (review here)
Deep Condition- Jessicurl Deep Treatment Conditioner (review here)
Clay Rinse- Here's the dets on my recipe
Leave-Ins- Castor Oil + Jessicurl Too Shea Conditioner (why I love this stuff here) + EccoStyler Krystal Klear Gel (shop it!)


RELATED: My Minimalist Natural Hair Regimen

First, I spritzed the ends of my hair with my DIY Moisturizing Mist (tutorial here). Then I slathered my hair in warmed Aubrey Organics GPB Conditioner (review here) as I detangled. I love this conditioner because it helps makes breakage disappear, defines my curls and it has a TON of slip. I covered with a plastic cap and sat under the dryer for about 20 minutes.

RELATED: Tips for making your deep conditioner more effective 

Day 1 hair

After rinsing the conditioner in the shower, my hair felt amazing. Soft but strong and the curl definition/elongation was on point. Yay for protein treatments! I t-shirt dried for a few minutes then applied my FAVEEEE deep conditioner Jessicurl Deep Treatment (review here). Next, I layered on a little Extra Virgin Coconut Oil to seal in the conditioner. I covered with a plastic cap and left it in overnight.

RELATED: Why I Deep Condition Overnight

The next morning, I rinsed the conditioner, t-shirt dried for a couple of minutes then applied Jamaican Black Castor oil (shop it)+ Jessicurl Too Shea Conditioner (why I love this stuff here) as my leave ins.

Day 1 hair

My Wash and Go Technique #2


I put my hair into 5 sections then secured each with a hair clip. Starting with the back, I spritzed it with water until it was soaking wet then finger detangled until my hair clumped into curls. Then I smoothed a little gel on the roots. Next, I raked a little more gel through all the way until the ends and gently shook out the curls. (aka the rake and shake technique)

The application process took me about 35-40 minutes to do. Then I let my hair air dry for the rest of the day (approx 5 hours)

My hair was a bit damp at the roots, but I didn't want to use heat and potentially disturb my curl pattern. So I banded my hair using some extra wide hair ties. Then let my hair dry overnight.

Banding to stretch my curls


The banding actually helped break the gel cast and stretched my curls without destroying them (like I did the first time...smh) I noticed that the front of my hair is where I have the worse gel cast. Does this happen to anyone else?


So far this is the best wash and go that I've been able to produce! Here's an outline of what I did differently: Clay rinse after deep conditioning, applied castor oil instead of coconut oil to my freshly  washed hair, changed from EccoStyler EVOO to EccoStyler Krystal Klear, and I let my hair air dry then banded to elongate the curls. The next day---I banded again and got even BETTER results!


I finally got my curls to look the same when they are wet---as when they are dry! WASH AND GO MAGIC!!!! For my next wash and go, I plan to use regular ol castor oil instead of JBCO. I love the way that the JBCO kept my hair moisturized and really defined my curls, but the scent is just too woodsy for me. Plus, regular old castor oil is definitely more economical. I feel like I'm getting closer and closer to perfecting this wash and go thing!


How was your #washdayexperience? Feel free to share the details with the rest of our healthy hair tribe!

Besitos!
KLP